
If you read this blog, you know I am a massive fan of Everyday Carry items. And, of all the EDC items I like to keep on me, paracord is my favorite.
If you aren’t familiar with it, check out this post: what is paracord?
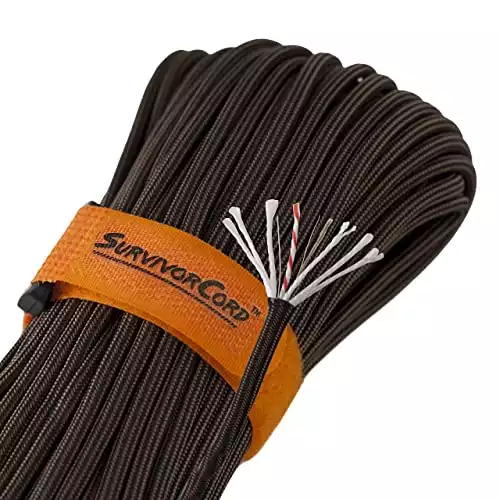
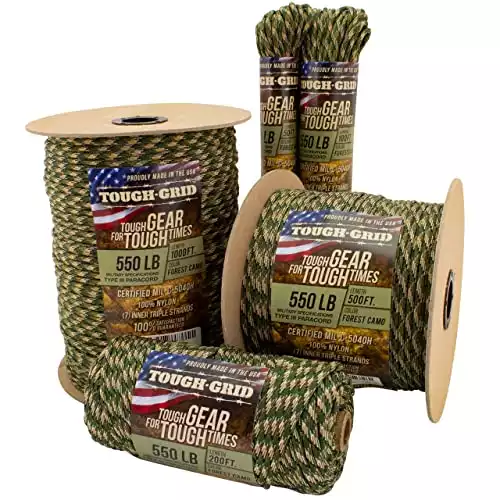
Not all cord is real paracord, and not all real paracord is the same. For most uses, 550 paracord is the best choice.
Stick with solid, well-reviewed brands like the one below, and you are all set.
Also, see how strong is paracord?
Recommended Paracord:
Recommended Time Saver
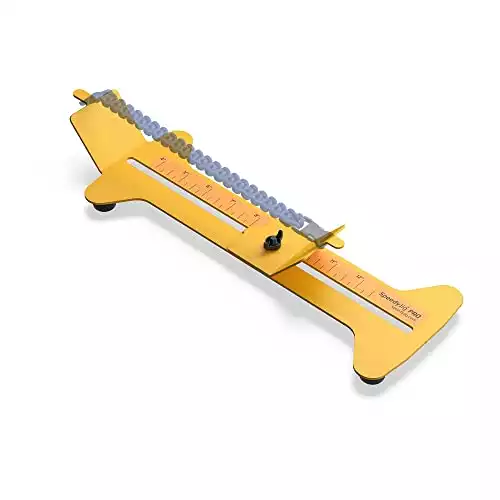
A paracord jig will help a lot when working on complex designs and hugely reduce frustration (and swearing) levels.
There are hundreds of uses for paracord; you are probably already familiar with the paracord bracelet as a way to always have cord on you at all times.
But bracelets are just one of many cool paracord projects you can make. Check out these projects, which are as helpful as they are cool.
Table Of Contents
1. Essential Paracord Braids and Knots
a) Paracord Snake Knot
The paracord snake knot is the basis of many paracord bracelets, lanyards, and keychains. It is a bit bulky but is one of the more flexible knots. Use two colors, and it will look fantastic.
b) Paracord Cobra Knot
This is one of the most popular knots. It is easy to make, contains a good amount of paracord, and is very strong. There are a lot of variations of the cobra knot (like the well-known King Cobra knot).
Learn the cobra knot first, and you’ll quickly be able to pick up on many other paracord braiding methods.
c) Paracord Monkey Fist
This knot is called the monkey fist or the monkey paw. It has been around a long time and has a few good uses (aside from the paracord it is made of).
The knot’s ball shape makes it easier to throw, so sailors would make a monkey fist on the ends of their ropes for easier docking.
A monkey fist can also be used as a weapon, such as if you were to put it on a long piece of rope and spin it over your head – though it will be a lot more effective as a weapon if you put a metal ball inside of it.
And this paracord project can be purely for fun if you ever need to use the monkey fist as a golf ball or baseball.
d) Two-Strand Diamond Knot (Tying Off Paracord)
You’ve just made an awesome paracord lanyard or another project… Now, how do you tie it off?
There are a lot of methods, but the diamond knot is one of the most reliable. Be warned: while the diamond knot might look simple, it takes a lot of practice and skill to perfect.
e) Mathew Walker Knot (Tying Off Paracord)
Like the diamond knot, the Mathew Walker knot is more complicated than it seems.
You’ll have to practice getting the knot in the proper position. Once you master it, you can use this knot as a divider between different types of paracord braids to make more versatile paracord projects.
2. Paracord Keychains
If you haven’t done so already, make a bunch of these DIY paracord keychains and put them on all the items you keep with you at all times (such as your keys, multi-tools, etc.).
There isn’t too much cordage in each of these key fobs, but every little bit counts when you are in a situation where you need it.
Below I’ve included instructions for some of my favorite paracord keychain patterns. They not only look great and hold your keys but mean that you’ll always have some paracord on hand, just in case.
a) Quick Deploy Paracord Keychain
One of the downsides of many paracord knots is that they take a long time to unravel. This can be a significant drawback if you need paracord quickly during an emergency. That’s why I love this quick-deploy paracord keychain.
It is a lot like the knot required for a noose. However, you wrap multiple times to get more paracord on the loop.
This one is made with 6 feet of paracord. You could make it thicker and longer to get more paracord on the keychain.
Steps:
- Tie an overhand knot about ½ inch from one end.
- Make a loop about 4 inches. Bring it down behind the “tail” of the knot you tied.
- Now take the cord up in front of the knot you tied.
- About 1 inch from the top of the loop, start wrapping the paracord around the loop.
- Keep the paracord taut as you wrap it down.
- When you get to the bottom of the loop, start wrapping upwards.
- Repeat until you are almost out of paracord.
- Make your last loop at the bottom of the key fob (where you made the overhand knot).
- Put the end of the paracord through the hole where the knot goes through the loop. Pull the top of the fob to secure the tail ends in place.
b) Two Color Monkey Fist Keychain (No Marble)
Most monkey fists require you to have a bolt or a marble in the middle. With this two-color monkey fist keychain, a diamond knot is used instead of the marble, which means you get more paracord to carry around.
If you want to carry lots more paracord, start with more than 2 and 2.5 feet of cordage. You’ll have a lot of excess at the end, which can be used to create almost any paracord knot you want for the keychain.
Steps:
- Need two colors of paracord: 2 feet of color A and 2.5 feet of color B
- Start by making a diamond knot. This will serve as the center of your monkey fist. Adjust so the diamond knot is at the end of the strands. Snip off any excess and singe the ends.
- Take color B and go almost to the end of it. Make 3 passes (loops) over your two fingers. Slip the diamond knot into the middle of the loops.
- Take color A and go behind the loops you just made with color A. Make 3 passes around the Color B loops.
- Remove your fingers.
- With color A, go through the middle of the top loop. Now make 3 vertical passes.
- You should now have 3 passes on each side.
- Look for where your diamond knot started. Pull on those strands to start cinching out the excess.
- You now have a two-color monkey fist with two strands coming out of it.
- Do whatever you want with the excess.
c) Fractal Sinnet Decorative Paracord Keychain
This is a gorgeous decorative paracord knot that works well as a keychain. Yes, it does take some skill to make!
You mainly have to be careful that your paracord doesn’t get kinked while making the knots. I love that this keychain has 12 feet of paracord, even though it is still small.
To make this paracord keychain, you use a combo of two knots: the zipper sinnet and the thorn branch elbow sinnet.
Steps:
- You’ll need 12 feet of cordage
- Start by making a slip knot in the middle of your paracord, leaving a loop at the bottom.
- Pull the left cord through the top loop. Tighten. Make a bight with the right cord and pull it through the top loop. (Zipper sinnet)
- Make another bight with the right cord and pull it through the top loop. (Thorn branch elbow)
- Now make 1 zipper sinnet followed by 3 thorn branch elbows
- Make 3 zipper sinnets
- Make 3 thorn branch elbow ties
- Repeat: 3 zipper sinnets followed by 3 thorn branch elbow ties
- Keep repeating until you reach your desired length.
- Use a loop and cinch to tie off the knots.
- Finish with a diamond knot.
If you are interested in learning more decorative paracord designs by fusing different knots, I suggest you get this book: Paracord Fusion Ties.
It comes in two volumes and can be bought on Amazon.
d) Boat Fender Keychain
I particularly love this paracord keychain design because it fits perfectly in your hand. It also contains 12 feet of paracord, which would be helpful to have in a pinch. The actual knots to make this keychain are reasonably straightforward. However, getting the knots tight takes some practice (and patience!).
Steps:
- You’ll need 3 strands of paracord, each 4 feet long, a strap piece of paracord, some masking tape, and a fib.
- Line up all 3 strands of paracord. Find the center. Measure 5 inches from the center and tie this point off with your scrap paracord.
- Below the point where you tied off the paracord (the longer side), start braiding the 3 strands of paracord.
- Keep braiding until the unbraided parts are equal in length to the strands at the top.
- Fold your braid in half. All 6 of the dangling strands of paracord should be of equal length.
- Using the tape, tape the end of the braid so it won’t unravel. Remove your scrap piece of paracord.
- Turn the fob so the braided loop is downwards. Spread out all 6 strands.
- Make a loop with one strand. Take the strand to the right of it and bring it over and under. It will end up back on the right-hand side.
- Take the next strand to the right and bring it over/under the previous strand.
- When you get back to the starting strand, you can pull down the loop you originally made and tighten it.
- Repeat from step 7. Keep repeating until you are almost the way down the braid. The remaining braid is the loop for your keychain.
- To finish, cut off the ends. Or, if you have a fib, use it to tuck the strands beneath their previous loop, then cut off and singe.
e) Cute Pink Paracord Keychain
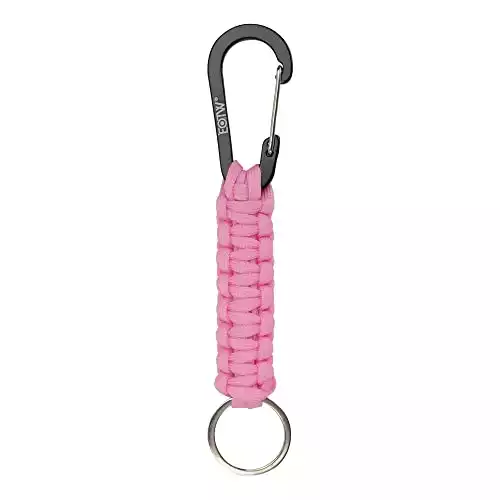
As a father of a small girl who loves everything pink and pretty, I understand the value of this paracord project.
She might not be so excited about wearing a paracord bracelet, but she loves having the paracord “dolls” on her bags.
3. Paracord Handles and Slings
a) Paracord-Wrapped Backpack Handle
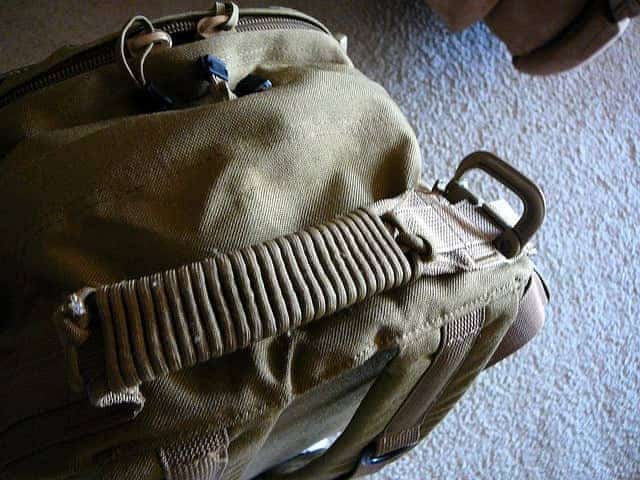
I hate to unravel an entire bracelet or keychain to get a little bit of cord for a small task. So, it is nice to wrap paracord around handles – such as your backpack handles or straps.
This paracord project is straightforward. Just go straight around and finish with half stitches on each end to the narrower web that runs through the middle.
b) Paracord Jeep Handles
This paracord project I love. The guy put paracord around the back of each headrest in the Jeep, so backseat passengers would have something to hold on to.
You can also wrap paracord around the grab bar of your Jeep or any other handle you have in your vehicle—what a great addition to your vehicle emergency kit.
c) Paracord Rifle Sling
I’ve got to admit that this doesn’t look like the most comfortable sling to use for your rifle. But, if you are ever lost in the woods while hunting or have an emergency – such as needing cord to make a splint for a broken leg – you will be happy that you did this project.
d) Paracord Flashlight Handle
You can find flashlights that come with handles built onto them. In my opinion, these flashlights are poorly designed.
The handle sticks out, which means they take up a lot more space than necessary and are difficult to pack. Because the handle sticks out, it is likely to break.
Instead of buying a flashlight with a weak, plastic handle, make your own paracord flashlight handle.
e) Paracord Water Bottle Sling
This is another of my favorite paracord projects because it is so helpful. With the right knot, you can carry any water bottle easily.
Again, it isn’t very comfortable to make a 1-cord sling. The cordage would start to dig into your shoulder as you carried it.
But you could get more creative with the design. For example, knot up a paracord strap and attach this to the water bottle sling.
4. Paracord Pouches and Bags
a) Paracord Drawstring Pouch
It is straightforward, and you can make the pouch in almost any size. The cool thing about the paracord pouch is that it even closes with a drawstring. In addition to collecting wild edibles, you can use them as a water bottle holder.
b) Paracord Multi-tool Pouch
You’ll definitely want a jig (Amazon Link) and needle for this paracord project. You’ll also have to be careful about your measurements if you want it to fit a specific phone or tool. However, this pouch is pretty easy to make. Add a carabiner, and you can carry tools out of your pocket.
c) Paracord Phone Pouch
This paracord pouch is similar to the one above. The difference is that it has a closure (so your phone or tools don’t fall out). It also adds extra weaving to the pouch, so it is sturdier.
Yes, the pouch might be a bit bulky – but it will help protect your phone from falls and ensure you have a lot of paracord with you at all times.
d) Paracord Bi FoldWallet
This paracord wallet requires a good deal of patience.
You’ll need to weave it into a wallet pouch carefully. Each side of the wallet holds credit cards/IDs, and the fold area is used as a money clip.
5. Other Paracord Projects
a) Paracord Belt
What’s better than a paracord bracelet for survival? How about a paracord belt!
You can get a lot more cordage on a belt, plus there are many survival uses for belts without even having to unravel the cordage.

The only downside of this project is that once you unravel the belt to use the cordage, you will have a hard time keeping your pants up!
If you prefer to let someone else do the hard work, check out this RattlerStrap belt (Amazon Link) which incorporates over 90ft of paracord.
b) Paracord Bull Whip
This full-length tutorial will teach you how to make a cool paracord bullwhip. Use your imagination to think up all the ways you could put it to use in a survival situation 😉
c) Paracord Webbing
If you have a pannier and want to keep things better organized, try this DIY project. It only requires about $4 worth of material. Once you are done, you can put the items you need most in the webbing for easy access.
Recommended Paracord

Consider… Paracord: belts, rifle slings, hat bands, wrist cuffs, on knife sheaths, back pack straps/belts, jeep grab-bars and hand holds… I have done that. You can color coordinate as you want and always have the cord for emergencies and such…
You are next level 🙂 I have yet to consider hat bands or wrist cuffs!