
I spend a lot of time backpacking and camping with my kids. If it weren’t for my dehydrator, this wouldn’t be possible. I simply wouldn’t be able to carry all the food.
Dehydrating means I can make my own just-add-water, lightweight, tasty, and nutritious meals.
My dehydrator also means I save a lot of money. I can buy foods like tomatoes and peppers when they are in season, dehydrate them, and have them all year round.
Many people get a dehydrator but never end up using it. Or, maybe they occasionally dry some fruit leathers and veggies.
In this guide, I will review some expert-level food dehydrating principles and tactics. Hopefully, they will give you the information you need to use your dehydrator to its full potential.
Recommended Reading:
Some Notes Before We Begin:
- Type of dehydrator: This guide is written for people using an electric dehydrator. You could also use sun drying, solar dehydrators, or even your oven. Most of the principles stay the same.
- Drying times: Most dehydrating guides will give you a chart of drying times. I’m not going to do that because it can vary drastically. Depending on your dehydrator’s strength, how well the dehydrator circulates air, and the juiciness of the food, it could take several hours, more or less. Consult with your dehydrator manual if you need a chart of drying times.
- Experiment! Most of what I’ve learned about dehydrating has come from experimenting. Don’t be afraid to try your own recipes.
Table Of Contents
- Fruits
- Veggies
- Starches
- Meat
- Other Proteins
- Making Dehydrated Meals
- Storing Dehydrated Foods
- Common Dehydrating Mistakes
- 1. Buying the wrong dehydrator:
- 2. Relying on drying guidelines to determine when a food is “done”:
- 3. Dehydrating different foods at the same time:
- 4. Stopping dehydrating in the middle:
- 5. Not testing dehydrated meals before packaging:
- 6. Not allowing enough time for rehydrating:
- 7. Drying oily or fatty foods:
- 8. Not killing pests before dehydrating:
- 9. Improper storage:
Fruits
Fruits are straightforward to dehydrate and get the best results. You can snack on them immediately after drying or use them to make cakes, pies, or energy balls (which is much cheaper than buying energy bars at the store).
1. Preparing Fruit for Dehydrating
If you plan to eat the dried fruit soon after drying, there isn’t much you need to do to prepare it. Just clean the fruit, remove any large seeds, cut into slices no more than ¼ inch thick, and put the slices into your dehydrator.
You can even dehydrate some fruits whole, such as strawberries, blueberries, and cherry tomatoes (yes, tomatoes are a fruit!). I still prefer to slice up most fruits as it speeds up drying and gives more uniform results.
Killing Eggs and Larvae
I used to have a plum tree in my yard. Since we didn’t spray it with pesticides, some insect larvae were always inside the plums.
As a general rule, you shouldn’t dehydrate any fruits with larvae, eggs, or broken skins (broken skin means insects could be inside). I didn’t want to let all those plums go to waste, though.
If you can get over the yuck factor, there’s nothing wrong with eating some larvae – it’s just extra protein. The issue is that dehydrating won’t kill eggs.
They will hatch and take over your pantry (I’m speaking from experience!). Treating the fruit with one of the methods below will prevent an annoying infestation.
You’ve got three options if you want to dry fruit that may be infested:
- Blanch fruit before dehydrating: This will change the texture and taste of the fruit, though, and cause some nutrients to be leached into the water.
- Pasteurize after dehydrating: When you are done drying the questionable fruit, you can pasteurize it by putting it in the oven at 175F for 15 minutes or 160F for 30 minutes.
- Freeze after dehydrating: Alternatively, you can put the dried fruit in the freeze for at least 48 hours.
Pretreating Fruit for Long-Term Storage
If you plan to store your dried fruit for a long time, it is best to pretreat it. The pretreatment will stop enzyme reactions, which cause the food to spoil and nutrients to break down.
Commercially-dried fruits use sulfur treatments. Since most of us don’t have access to sulfur (which is unhealthy anyway), use one of these natural pretreatment methods instead.
- Ascorbic Acid: Also known as vitamin C, you can buy packages of ascorbic acid powder from Amazon. Mix 1 tsp of ascorbic acid (3000mg) into 1 cup of water. Cut the fruits into slices for dehydrating, then put them in the ascorbic acid mixture for 5 minutes. Drain and then dehydrate.
- Fruit Juice: Some fruit juices – such as lemon, orange, and cranberry – contain a lot of vitamin C. So, you can use them just like you would an ascorbic acid treatment. The nice thing is that the juice treatment can flavor the dried fruits, and you can drink the juice afterward.
- Honey: If you use this treatment method, your dried fruits will become super-sweet and sticky. Mix ½ cup of honey with 1 ½ cups of warm water. Ensure the honey is dissolved in the water before soaking the fruit for 5 minutes.
- Blanching: This will change the texture and flavor of the fruit but is great for helping the fruit last longer. It varies by fruit, but you’ll generally need to blanch for 3-5 minutes.
Fruit Leathers
Want to make fruit leather? It is easy. Just blend up the fruits in a high-speed blender. You might need to add some water or juice to get a good puree.
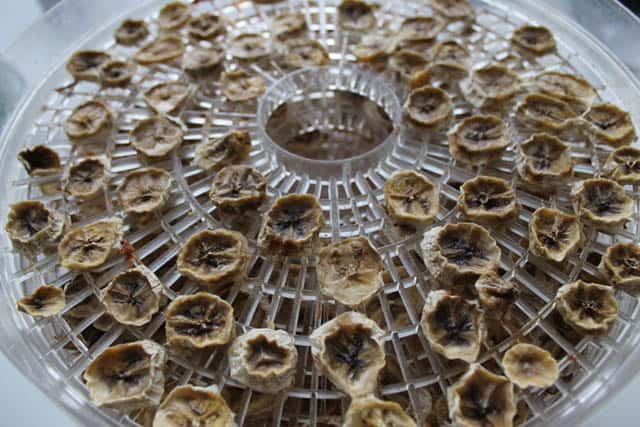
With thicker fruits, like bananas or apples, the puree can go straight on your dehydrator’s fruit leather sheet.
If you have juicy fruits, such as blueberries, you’ll need to strain the puree through a cheesecloth (a clean kitchen cloth also works).
Save the strained juice to drink! It is healthy and delicious.
2. Temperature for Drying Fruits
Generally, you’ll want to dry fruits at temperatures of 130-140F. Many nutrients in fruits are very sensitive to heat. This temperature range will keep most of them intact.
However, note that most fruits will sweat a lot when dehydrating.
The sweating causes the temperature inside the dehydrator to increase. So, even if your dehydrator is set to 140F, the actual temperature inside might be around 120F.
To counteract the sweating, you can set the temperature above 140F for the first two hours of drying. This will speed up the drying time drastically, too.
3. How Long to Dehydrate Fruits
You can find charts telling you exactly how long it takes to dehydrate fruits. These are great guidelines but don’t take them at face value. You should always manually check to see if the fruit is dry enough!
To check if a fruit is adequately dry:
 Cut it in half. No moisture should be released when you squeeze it.
- Fold the fruit in half. It should be bendable and not brittle.
- Stickiness – the fruit should not stick to itself when bent in half.
4. Conditioning Fruits after Dehydrating
Never package dried fruits immediately after dehydrating. They will release some moisture and this moisture will get into the packaging. As a general rule, wait 60 minutes. The fruit should also be cool when you package it.
You don’t want to wait too long before packaging because insects can start laying eggs on the dried fruit.
You must also condition fruit before packaging it (especially for long-term storage). Fruits never dry equally, so some will have more moisture than others.
To condition the fruit, seal the fruit in a large Tupperware container or plastic bag. The drier pieces of fruit will absorb moisture from the wetter pieces.
It takes about 10 days to fully condition fruit. It’s a pain, but don’t skip this step if you plan on storing the fruit for a long time.
Veggies
The sugar and acids in fruits inhibit the enzymes, which cause them to break down. That’s why fruits are so easy to dehydrate.
By contrast, vegetables have a lot less sugar and acids. They will start to go bad and lose their flavor much faster.
Some veggies are also very high in fiber. This can make them incredibly tough after dehydrating – it will be like eating tree bark. You’ll need to rehydrate them, which can take hours if you don’t prep them properly.
*Note: Anything which has a seed is technically a fruit. So that means cucumbers, zucchini, bell peppers, and lots of other produce are fruits. This is a big pet peeve of mine. However, I’m still going to put those items in the veggie section because they have low sugar content and get dehydrated like veggies.
1. Preparing Vegetables for Dehydrating
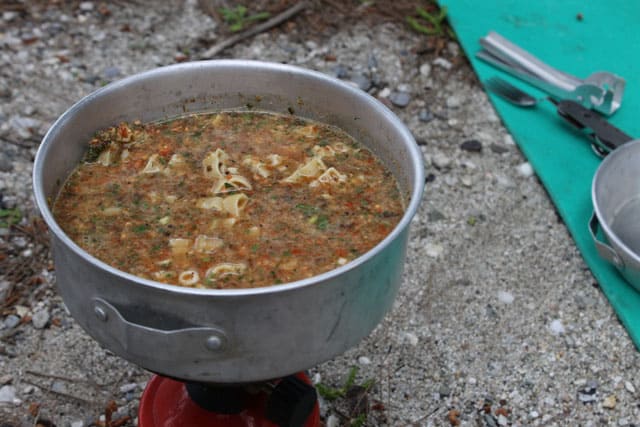
One of my first experiments with dehydrating veggies was for a trail soup. I dried slices of raw veggies and mixed them with seasonings. Then, I boiled it all to rehydrate it into soup.
Big mistake.
I boiled the dried veggies for 30+ minutes. Some of the veggies got soft. But the carrots and mushrooms were still rock hard.
What was my mistake? I didn’t blanch the veggies before dehydrating them.
Blanching or No Blanching?
There is a lot of debate about whether you have to blanch (or steam, boil, cook) veggies before dehydrating.
On the plus side, blanching:
- It helps the veggies last longer because it destroys the enzymes that cause them to spoil and lose flavor.
- Decreases rehydration time because they are already precooked. This is crucial with veggies that already take a long time to cook, such as carrots and onions.
- Shortens dehydration time because the tissues are softer, and moisture escapes more easily.
On the downside, blanching:
 Removes nutrients, especially heat-sensitive and water-soluble vitamins.
- Could cause veggies to get mushy, especially in dishes like casseroles which get cooked for a long time.
Ever since my soup fiasco, I have always blanched some veggies before dehydrating. This includes anything that is tough or takes a long time to cook (carrots, mushrooms, beets, corn, peas…).
I don’t blanch veggies that cook quickly (such as leafy greens like kale or spinach).
Bear in mind that I am using my dehydrated veggies for backpacking meals. I need them to rehydrate quickly. The rehydration time doesn’t matter as much if you use them at home in dishes that get cooked for hours (such as crock pot meals).
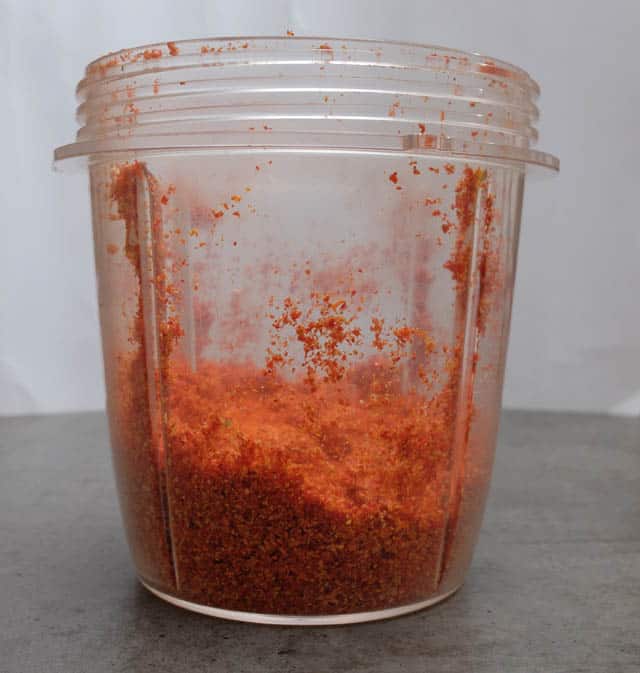
Expert Tip: Even some veggies that can be eaten raw (such as tomatoes) can take forever to rehydrate. A cool hack is to grind the dried veggies into a powder. The powdered form rehydrates quickly and is great for making cream soups.
Blanch before Dehydrating
- If you need the veggies to rehydrate quickly, such as for backpacking meals.
- If the veggie is very tough or fibrous.
- If you will be storing the dried veggies for the long term.
- If the veggie normally takes a long time to cook, such as carrots or onions.
- Corn, peas, and beans should always be blanched before dehydrating.
Dehydrate Raw
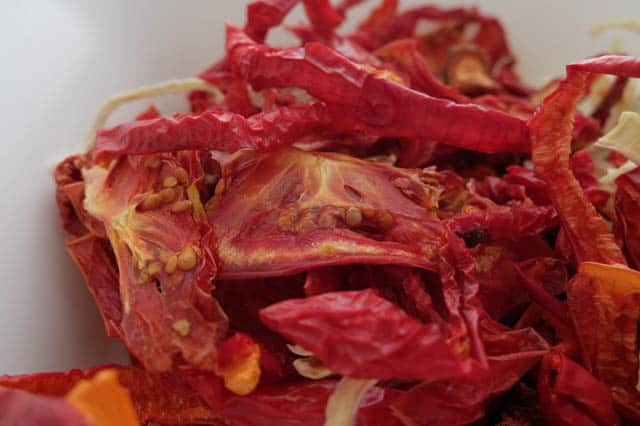
- If you would eat the veggie raw, such as sundried tomatoes on a salad.
- If you are concerned about losing nutrients during the blanching process.
- If you will grind the dried veggies into a powder.
- If the veggie cooks very quickly, such as kale or spinach.
How to Blanch Veggies
I prefer the steam-blanching method because it keeps the most nutrients. Cut up the veggies as you would for dehydrating. Then, layer them in the steamer basket no more than 2 inches deep.
The blanching time varies depending on the vegetable. As a general rule, the blanching is done when the veggie has turned a brighter color.
It should be softer but still have a bit of crispiness to it. You don’t want soggy veggies!
Dehydrating Canned and Frozen Vegetables
It is always best to dehydrate fresh veggies. The texture and taste will be a lot better. However, you can dehydrate canned and frozen veggies too.
Canned veggies usually turn out disgusting when dehydrated and rehydrated. They are already soggy from soaking in the can. The dehydrating-rehydrating process further causes their cell walls to break down, making them even soggier.
Frozen vegetables get better results. They will still be a bit soggy after rehydrating but retain much more of their texture and flavor.
2. Temperature and Drying Time for Vegetables
Like fruits, veggies should be dried at 130-140F to retain their nutrients.
Veggies don’t sweat as much as fruits, though, so you don’t have to increase the temperature for the first few hours of dehydrating.
Veggies need to be much drier than fruits (since they don’t have the sugars or acids to act as natural preservatives). You only want about 5-10% moisture to remain.
This means the veggie should be brittle. When you bend the veggie, it should break.
3. Using Dried Vegetables
Most vegetables don’t last very long when stored. They should really be consumed within 6 months of drying.
If you blanch the veggies and use an expert-level storage method (more on this later), then you can get them to last for years.
The dried veggies can be used in soups, stews, or casseroles. In theory, you can rehydrate the veggies and snack on them. However, the texture is usually disgusting.
You can also make yummy veggie chips from dried vegetables like kale and beets.
Using Different Dried Veggies in a Meal:
Note that vegetables rehydrate at vastly different rates.
If you want to make soup, for example, you can’t just throw all the dried veggies into the pot at the same time. Some veggies will end up tough and others soggy.
It is better to keep your veggies stored separately and add them to the dish one by one.
For example, when making a dried veggie soup, I would first add the dried mushrooms and carrots (which take the longest to rehydrate) and then add dried veggies like tomatoes and peppers.
With casseroles and creamed dishes, texture doesn’t matter as much, so you can get away with putting all the dried veggies into the dish together.
However, really think about how you want to use the dried veggies before mixing them.
More on this in the section about making dehydrated meals.
Starches
Starches last a long time, so most people don’t bother dehydrating them. But you can actually do some cool things by dehydrating starches – especially if you want to make backpacking meals.
Here are some ideas.
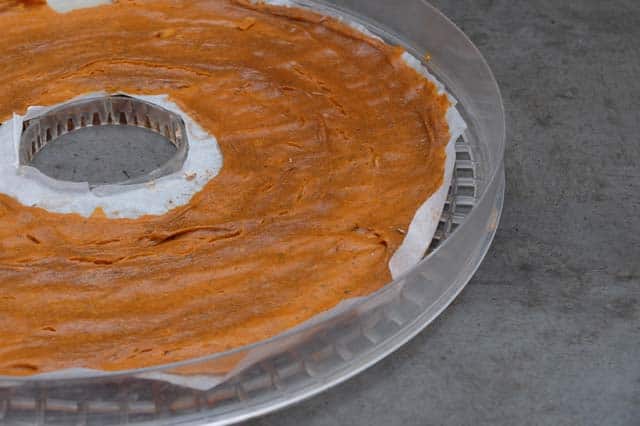
Potatoes and Other Root Veggies
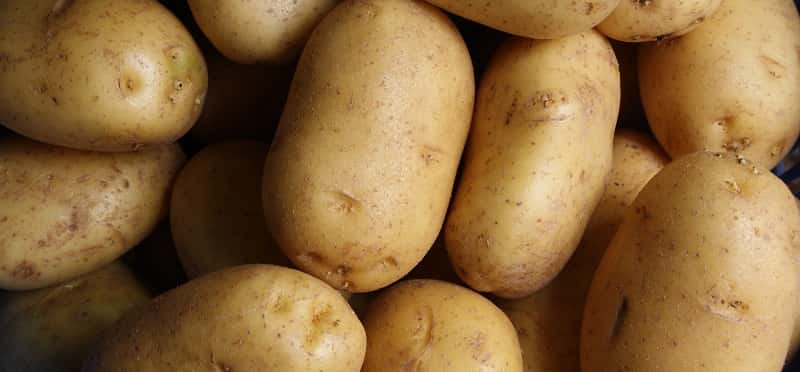
I never make dried potatoes because you can buy instant mashed potatoes (just dried potatoes that have been ground up into flakes) in the supermarket.
However, you could easily make your own instant dried potatoes in your dehydrator. Other root veggies, such as sweet potatoes, carrots, celery root, and turnips, work great.
To make dried root veggies:
- Boil the veggie.
- Blend into a mash.
- Spread the mash onto a fruit leather tray.
- As it dehydrates, it will start to crack apart.
- The veggie is done when it resembles cardboard and easily flakes apart.
Backpacking Chef, one of my favorite experts on dehydrating, calls these bark. You can use the bark to thicken soups or reconstitute into a mash.
Pasta and Rice
Pasta is already dry. So why the heck would you boil pasta and then rehydrate it? It turns out that cooked-then-dehydrated pasta cooks a lot faster.
This matters if you are making survival meals where you don’t want to waste a bunch of fuel by boiling pasta for 20 minutes.
The same goes for rice. Where brown rice might take 40+ minutes to cook, dehydrated rice takes only about 5 minutes of cooking to rehydrate.
Sometimes, you don’t even need to boil the pasta to rehydrate. For example, spaghetti and angel hair pasta will rehydrate almost instantly in boiling water.
You can even rehydrate them without boiling if you let them soak long enough – which is great for situations when you can’t boil water.
Instructions:
- Cook pasta in salted water.
- When done, submerge in cold water to stop the cooking process.
- Drain excess water.
- Dehydrate at 135F for 2-4 hours, or until hard.
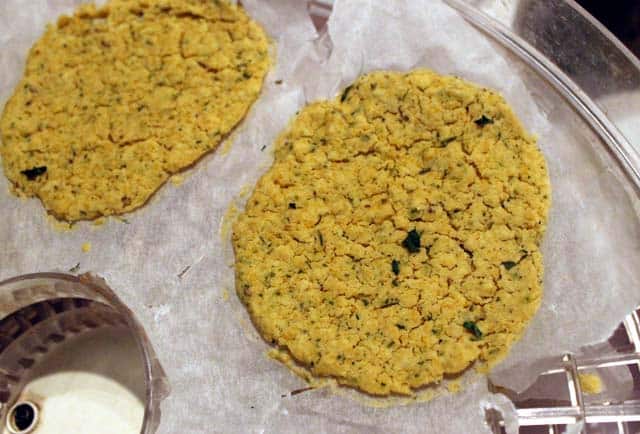
Bread and Crackers
Make your own croutons by dehydrating bread. This is really simple so I won’t delve into it too much.
If you want to take things to the next level, you can also make your own raw dehydrator breads using sprouted seeds. There are also many great recipes for crackers in the dehydrator.
Here are some ideas to get you started:
Meat
Dehydrating meat requires much more care than fruits and veggies because you must worry about pathogenic bacteria and parasites.
However, this doesn’t mean you should be put off the idea of making your own jerkies.
1. Safety Precautions for Making Jerky
You must clean and sterilize everything before making jerky. You’ve also got to be careful that the meat doesn’t have a chance to start growing bacteria.
You’ll need to:
- Sanitize all equipment such as cutting boards, knives, drying racks, and tongs. Use a solution of 2 Tbsp—bleach to one gallon of water.
- Thoroughly wash your hands before handling the meat.
- Keep meat refrigerated at 40F or below before using.
- Do not thaw frozen meat on the counter. Always thaw it in the fridge.
- Marinate meat in the fridge.
- Use meat from a safe source. If using hunted game, make sure that the game has been dressed properly. If the animal was wounded in the gut, the gut contents may come in contact with the meat and contaminate it. If there is any doubt, don’t make jerky from the game – use it in a way where it gets thoroughly cooked at high temperatures.
Temperature for Dehydrating Meat
To kill bacteria, a temperature of at least 160F is usually recommended. However, most dehydrators do not reach this temperature. If you know you want to make jerky, buying a dehydrator that can get to higher temperatures is worth it.
You should treat the meat if your dehydrator doesn’t reach this temperature.
There are two ways of doing this:
- Boil in the marinade: Soak the meat in the marinade. At the end of the marinating time, boil the meat + marinade for 5 minutes. Use a thermometer to make sure the meat reaches 160F. Drain and dry before dehydrating. Unfortunately, this does make the resulting jerky a bit crumbly.
- Bake after dehydrating: If you didn’t boil the meat in the marinade, then you should bake the jerky in the oven at 275F. Use a thermometer to ensure the meat reaches 160F.
*To ensure the meat or jerky reaches 160F, place a meat thermometer between two pieces. This ensures that the meat is actually getting to temperature, not just the air around it.
Use Acids
Jerky recipes always call for some acidic ingredient, such as vinegar or vitamin C. If the recipe doesn’t have an acid, don’t use it! The acid is essential for killing bacteria and maintaining freshness.
Trichinosis
Trichinella is a parasitic worm primarily found in pigs, wild boars, and carnivores. The parasite’s larvae live in the muscle tissue of the animals.
The larvae get into your intestines when you eat undercooked meat containing trichinosis. There the larvae mature into adults and begin producing more larvae. Those larvae then travel into your muscles.
Medicines can kill the parasites in the stomach. However, medicines cannot kill larvae in your muscles! The larvae can live for years in your muscles. When they die, they calcify and cause pain.
My mother-in-law got trichinosis from eating undercooked pork. She had to take medicines every day for the rest of her life. It is no joke!
Dehydrating does NOT kill trichinella. Nor does salting, microwaving, or smoking.
Freezing CAN kill trichinella in pork. However, freezing does not kill trichinella in wild game.
2. Preparing Meat for Dehydrating
Always remove all fat from meat before dehydrating. Fats don’t dehydrate and will cause the jerky to go rancid quickly.
Meat should always be cut into slices a maximum of 1/4 inch thick. It is tough to cut thawed meat this thin. A good trick is to freeze the meat slightly before cutting.
Cut the meat with the grain for the best texture.
Once you have cut the meat, it is time to marinate it. If you preheat the meat (as opposed to treating it in the oven after drying), do this at the end of the marinating process.
3. Temperature for Dehydrating Meat
You should always use the highest heat setting on your dehydrator to make jerky. Ideally, it should be at least 160F for safety reasons. However, most dehydrators won’t reach this temperature.
At the very least, your dehydrator must maintain a temperature of 145F to dry meat safely.
Even if your dehydrator claims to get to 160 degrees, this might not be true. The upper trays can be much cooler than the bottom ones with vertical-flow dehydrators. Horizontal-flow dehydrators are more consistent, but the area near the door might be a lower temperature.
Since temperature dials are unreliable (even on the best dehydrators), it is good practice to determine the actual temperature of your dehydrator:
- Test temperature while the dehydrator is empty. Do not check the temperature when food is in the dehydrator since sweating/condensation can lower temperatures.
- Put a thermometer inside the dehydrator. Put the thermometer on the second or third tray from the bottom for vertical-air flow dehydrators. For horizontal-air flow dehydrators, put the thermometer near the door.
- Set the dehydrator to the highest setting.
- Check the thermometer after about 20 minutes.
If the temperature doesn’t read at least 145F, then your dehydrator shouldn’t be used to dry meat. The warm air will cause bacteria to multiply, making it unsafe to eat – even if it looks dry and done.
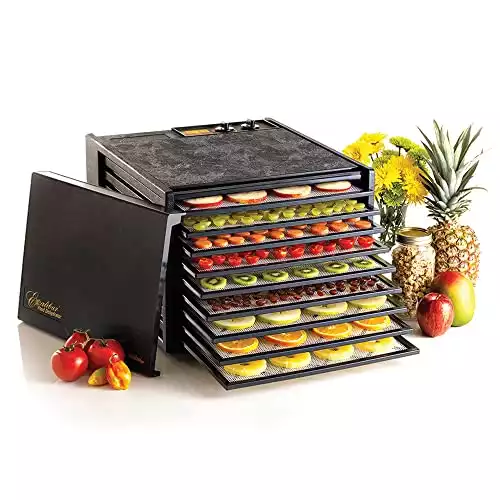
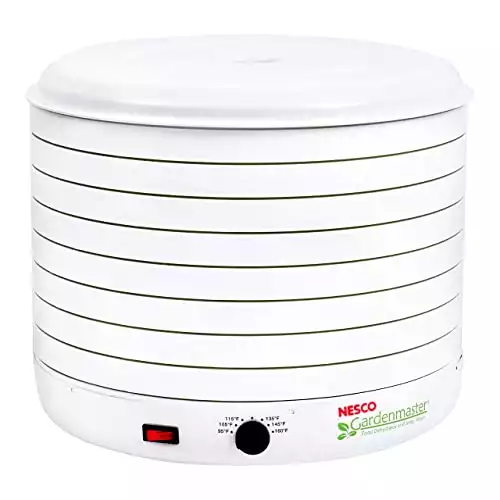
*Two dehydrators that can actually get to 160F are the Gardenmaster and the Excalibur. They are a bit pricier models, but worth it if you want to make jerky.
4. How Long to Dehydrate Jerky
Meat should be dehydrated for at least 4 hours. Some types of meat may need to be dried for 12+ hours. Never go by recommended drying times alone. You must check to ensure the jerky is thoroughly dry before removing it from the dehydrator.
Jerky should be leathery but not so dry that it is brittle. To check doneness, bend a piece of cooled jerky. It should crack apart but not break when bent.
Again, it is essential that the temperature reaches at least 145F during this time. Otherwise, the jerky will seem dry and done, but bacteria will still be present.
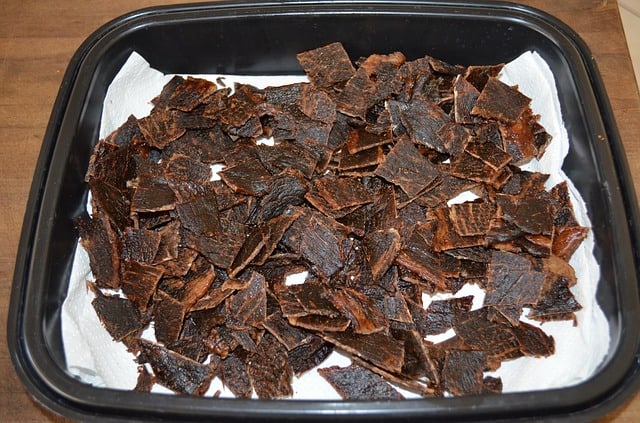
Removing Oil during Drying
As you dry the jerky, you’ll notice that some oil accumulates on the top. You must remove oil from the jerky while it is drying. To do this, pat it with clean paper towels. The jerky will go rancid much faster if you don’t remove the oil.
Unfortunately, since you have to remove oil during drying, you can’t just “set it and forget it.” You’ll need to check at least twice during drying and remove any accumulated oil.
Other Proteins
Fish
Because fish contains so much oil, it is harder to dehydrate into jerky. If you are just getting started with jerky, use leaner fish with less oil. You can dehydrate oily fish, but it will need more salt and won’t last as long outside of the fridge.
Before dehydrating fish, you’ll need to add at least 1 ½ tsp of salt per pound of fresh fish. Rub the salt into the fresh fish and let it marinate (in the fridge) for 4-8 hours before you start dehydrating.
You can also add other seasonings with the salt.
Because fish is so oily, the final product might seem moist. It will be very tough when it is done.
If you aren’t sure whether the fish jerky is completely done, keep it in the freezer until you are ready to eat it.
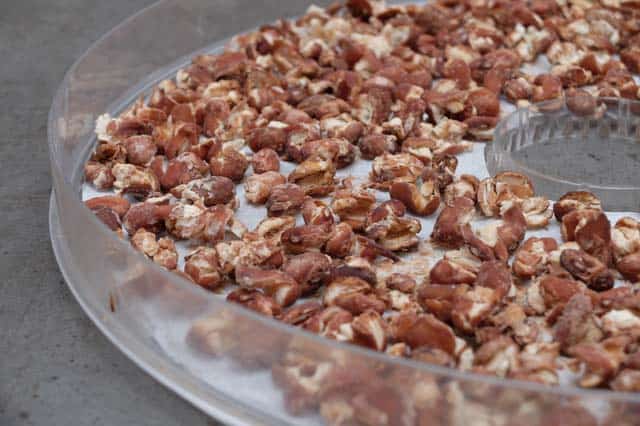
Nuts and Seeds
Nuts and seeds already last a long time, so most people don’t bother drying them. I use a lot of nuts in my backpacking dehydrator meals.
For example, I make a tasty sauce from soaked cashews, lemon juice, tomato sauce, and salt. It gets blended and then dehydrated. Just add water and put it on top of the pasta.
Nuts and seeds are high in oil, though. The oils can make them go bad faster. You’ll notice an off-taste when they start to go bad.
Eggs
You can buy dehydrated eggs from companies like Valley Food Storage Company (see our review of the Top 5 Emergency Food Brands).
Dried eggs tend to be expensive, though, so many people – especially those with backyard chickens – want to dehydrate eggs.
The bad news is that it is very hard to dehydrate eggs. You’ve got two options: drying raw eggs or drying cooked eggs. Neither will produce good results for scrambled eggs. However, dried raw eggs do work well in baking.
If you want to dehydrate eggs, here is what you need to know:
Safety Issues with Dehydrating Eggs
The dry eggs you buy from food companies are made with a process called “spray drying.” The eggs are liquefied, pasteurized, and shot through a spray nozzle. The spray is shot into a heated tank, which removes moisture from the liquid. By the time the eggs land, they are already in powder form.
Those commercially-dried eggs also have their sugars removed from them. This helps them last longer and prevents bacterial growth.
Since we can’t do this at home, salmonella poisoning from dried eggs is a real risk. The USDA recommends heating eggs to a temperature of at least 160F before eating. As discussed in the meat dehydrating section, most dehydrators don’t get to this temperature.
If your dehydrator doesn’t reach 160F, you should cook them before dehydrating… but cooked eggs don’t rehydrate well.
Dehydrating Cooked Eggs
To dehydrate cooked eggs, you first need to make scrambled eggs. Then, you dehydrate the scrambled eggs on fruit-leather trays.
Because of the high-fat content, they will take a LONG TIME to dry. I’m talking 10+ hours. If the eggs are still gummy, they aren’t dry enough. They need to be rock-hard clumps.
Here’s problem #2: You need to grind up those rock-hard egg clumps into a powder. Even a high-powered blender can have problems doing this. Do NOT use a coffee grinder. It will destroy it!
Now, how do you use these dehydrated scrambled eggs? The texture is disgusting if you try to rehydrate them back into scrambled eggs.
I suggest adding them to casseroles, rice, or pasta sauce. They will add protein to the dish, and you won’t notice the weird texture so much.
Dehydrating Raw Eggs
Some websites suggest dehydrating raw eggs at 140F for 10 hours. This is not hot enough to kill salmonella. Don’t risk it! If your dehydrator can’t reach 160F, use a different method of storing your eggs (pickling, for example).
To dehydrate raw eggs, you’ll need to blend them. Then, spread the egg mixture onto a fruit leather sheet.
Set the dehydrator to at least 160F, let it preheat, and then dry the eggs for 10-12 hours. The eggs are done when they are very brittle. Use a high-power blend to grind into a powder.
How do you use dehydrated raw eggs? You could try to make scrambled eggs – but I don’t recommend it. The texture is disgusting.
However, powdered, dry, raw eggs work well in baking.
- 1 Tbsp dried egg powder + 2 Tbsp water = 1 egg.
Milk, Yogurt, and Dairy
I never bother dehydrating milk because you can buy milk powder very cheaply. Plus, food dehydrators aren’t really made to remove liquid. Instead, they are meant to remove humidity from foods.
However, I do find it worthwhile to dehydrate yogurt and other dairy products (such as ricotta cheese and other soft cheeses). Hard cheeses like cheddar don’t dehydrate well since they have a high-fat content. They will go bad!
It will take a LONG TIME to dehydrate milk (around 10 hours). The issue is that mold or bacteria could start growing on the milk during dehydration.
Most websites recommend using a temperature of 135F to dehydrate milk. I’d set the temperature higher for the first hour to speed up the process and avoid the risk of bacteria growing. The same goes for yogurt.
You’ll know the milk or yogurt is done when it crumbles easily into a powder. It shouldn’t be cardboard-like.
Ricotta will get some rock-hard clumps in it when dehydrated. Don’t grind it into a powder, though – you want those clumps so it rehydrates into its normal clumpy consistency.
*Milk, yogurt, and ricotta turn a yellowish color when dehydrated. This is entirely normal!
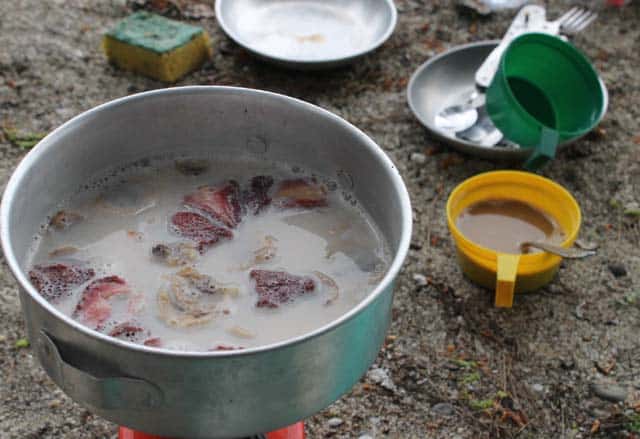
Beans
Beans are already dry. So, why the heck would you dehydrate them?
Just like with pasta, dehydrating cooked beans drastically reduces dehydrating time.
I do this a lot when making backpacking meals. I don’t have 2 hours to presoak and cook beans when on the trail.
For all of you preppers who want to make emergency meals, the same applies – do you want to spend over an hour cooking a meal during an emergency? Imagine how much fuel you’d waste!
Here’s how it works.
- I cook a huge batch of beans (you can skip this step and use canned beans).
- Then, I dehydrate the beans until they are dry again.
- To rehydrate, I boil them for a couple of minutes.
Making Dehydrated Meals
Here is where we really get into expert-level dehydrating. You can save yourself a lot of money by making your own just-add-water meals.
Not only are DIY dehydrator meals cheaper, but they are a lot healthier. A package of Mountain House beef stew, for example, has 870mg of sodium. That’s more than half of the RDA!
There are three ways that you can make dehydrated meals.
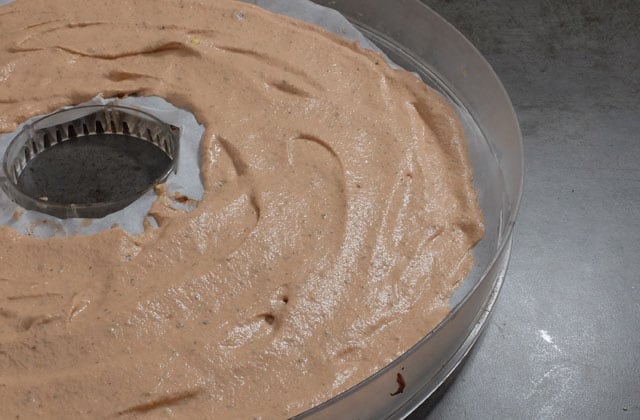
Method 1. Dehydrate the entire meal
This works well with meals that are saucy, such as:
- Cream soups
- Chili
- Pasta sauces (dehydrate pasta separately)
- Dips and spreads (hummus is a personal favorite)
This method does NOT work well with meals with chunks of ingredients with different rehydrating times. For example, you wouldn’t want to rehydrate minestrone soup. Some ingredients would get mushy when rehydrated, and others would still be hard.
Instructions:
- Cook the meal. For soups, stews, and sauces, use about half as much liquid as you’d typically use.
- Spread it on fruit leather sheets on your dehydrator.
- Dehydrate at 135F for around 8 hours or until dry throughout.
- To rehydrate, cook for a few minutes in boiling water.
Tips:
- Meat should be dehydrated separately!
- Don’t add too much water when rehydrating sauces; it will become too thin.
Method 2. Dehydrate and assemble
With this method, you dehydrate all of the ingredients separately. Then, you assemble the individual ingredients into one meal.
You’ll want to use this method when the ingredients have different rehydrating times. For example, if you try dehydrating chicken noodle soup, you’ll end up with soggy noodles, chewy chicken, and some veggies too soft and others too hard.
You are using this method for any meal where the ingredients could easily be picked apart from each other, such as:
- Non-creamed soups
- Chunky stews
- Pasta, rice, and grains with topping
- Beans
Important Notes:
- You need to store each ingredient separately (or at least the ones with very different rehydrating times). Otherwise, some ingredients will get soggy by the time the others rehydrate.
- You must cook the veggies before dehydrating them, or they will take hours to rehydrate. Seriously, I’ve tried making soups from dehydrated raw veggies. The raw tomatoes rehydrated okay, but the soup had hard little chunks of dried carrots and onions even after 40 minutes of boiling!
Here’s an example of how I’d make minestrone soup on the trail:
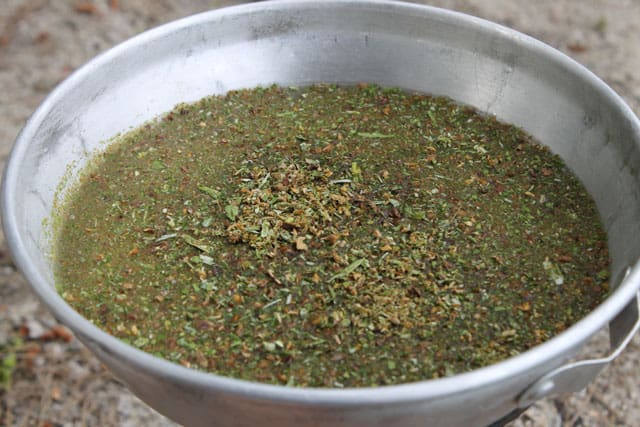
- Boil water. Add seasonings to water (salt, pepper, parsley, etc.)
- Add dehydrated blanched onions, garlic, and carrots. Let cook for about 5 minutes.
- Add dehydrated blanched tomatoes and scallions. Let cook for a few minutes.
- Check that the onions, garlic, and carrots are soft. If not, cook for a few more minutes.
- Add dehydrated cooked lentils and dehydrated cooked pasta. Let cook for a few minutes.
- Remove from heat and let sit a couple minutes before eating.
This method takes more active prep time than creamed soups. However, it is still only about 15 minutes on the trail (or in an emergency) to get a healthy, hot meal. I’d say it’s worth it!
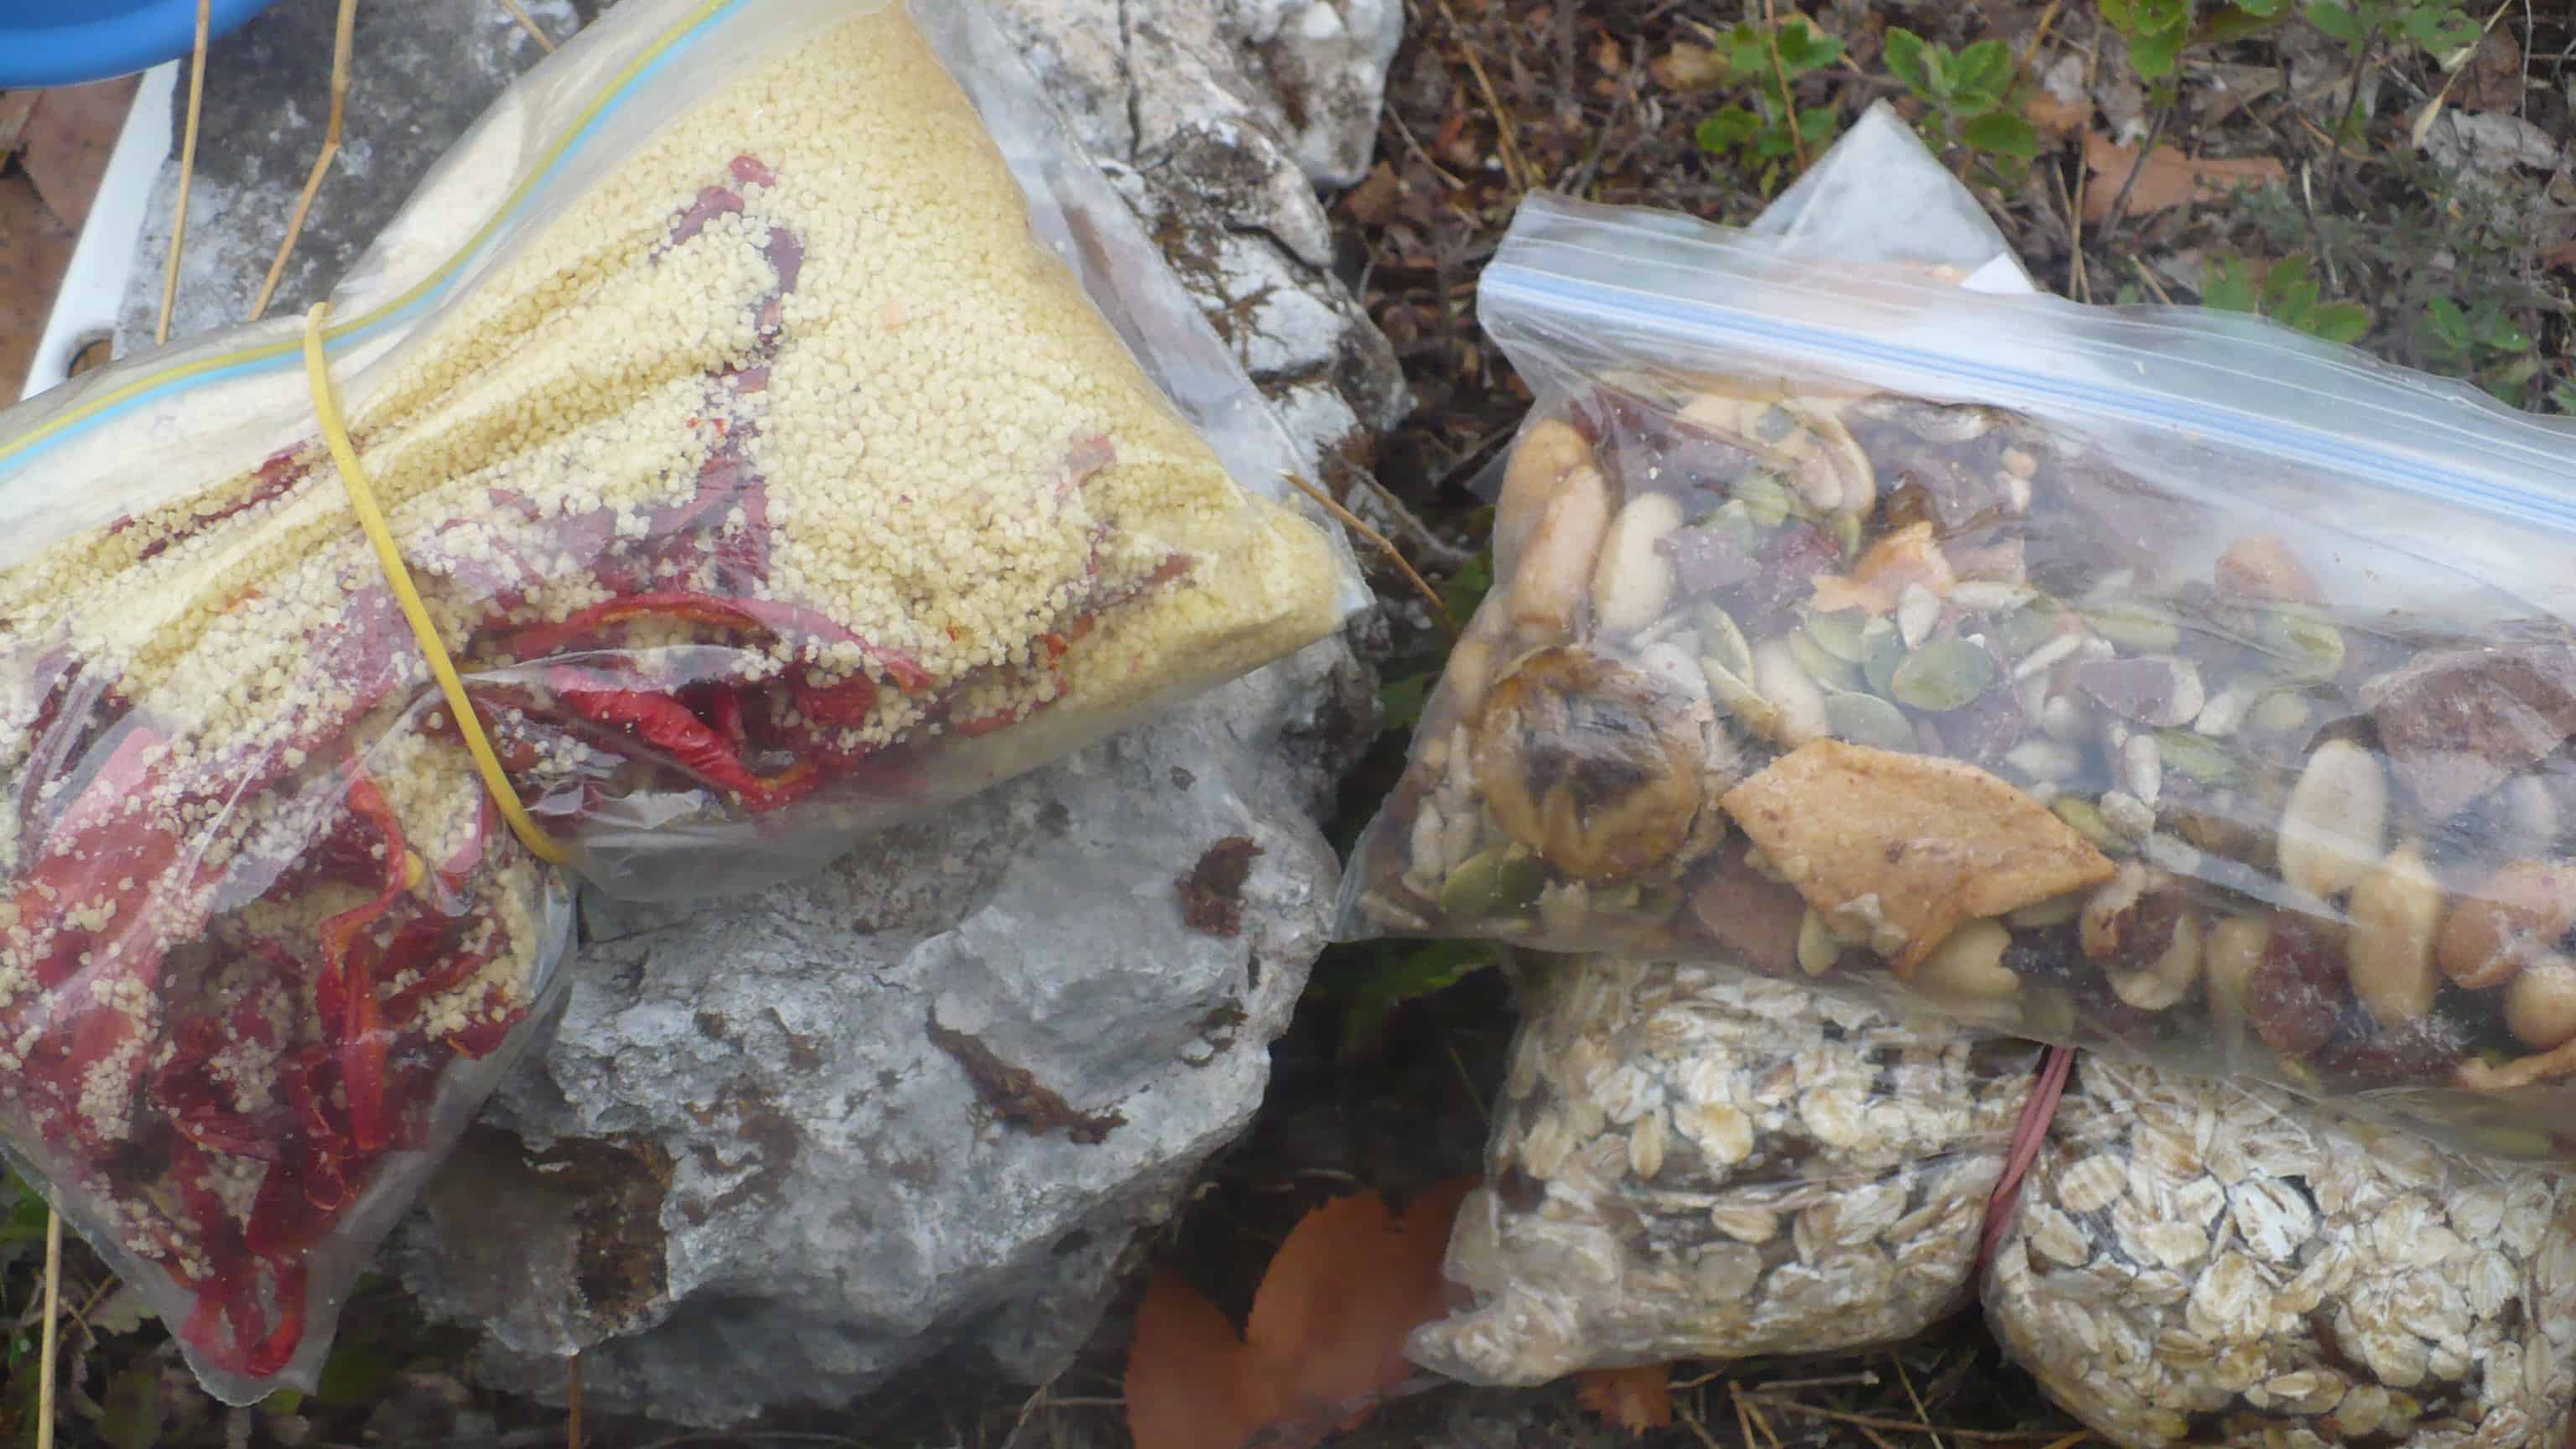
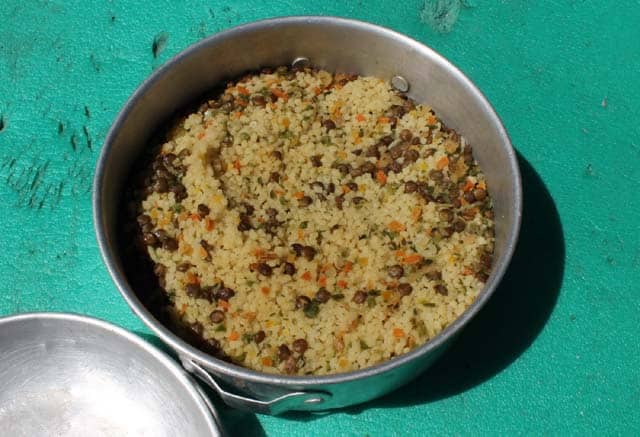
Method 3. Supermarket foods + dehydrated add-ins
There is no reason you have to dehydrate the entire meal. I like to find quick-cook foods at the supermarket and then spruce them up to make them more nutritious and filling.
For example:
- Couscous + dehydrated veggies and chickpeas
- Beans and rice in a box + dehydrated veggies
- Instant mashed potatoes + dehydrated gravy
Bear in mind that things have different cooking/rehydrating times.
For example, It takes only about 2 minutes to cook couscous (which is why I love it for backpacking). But it takes around 5 minutes to rehydrate most veggies and proteins. So, I would need to first rehydrate the veggies and then add the couscous to the pot. If I threw everything together, I’d end up with hard veggie chunks in the couscous.
It will take some experimenting, but it is worth it. You can make some fantastic meals with dehydrator foods. Once you’ve got a few good recipes, you can dehydrate large batches for backpacking, emergencies, or days you don’t like cooking.
Expert Tip: You can speed up the rehydration process by grinding the dehydrated food into a powder. For example, I make mushroom powder to add to mashed potatoes. The mushroom powder goes into the water first to boil for a few minutes. Then I add instant mashed potatoes. Voila! A tasty dish.
Storing Dehydrated Foods
If you plan on using your dehydrated foods soon, you can keep them in mason jars or plastic bags. However, I’d strongly suggest using vacuum-sealed Mylar bags with oxygen absorbers for anything that will be stored for more than a couple of weeks.
You’d be amazed how quickly insects can lay eggs on dried food. If you didn’t freeze/cook the foods beforehand, the food might have already had eggs on it before drying. Those eggs quickly turn into larvae and adults (you can also freeze foods for 48 hours after dehydrating to kill eggs).
Speaking from experience, it is hard to eliminate a moth infestation once you’ve got them. It is better to store your dehydrated foods properly than risk infestation!!!
Seriously, YOU WILL GET MOTHS if you don’t store the dried foods properly! I’m repeating myself because this is so important.
This is something we’ve talked about extensively in our Food Preservation Guide. I strongly suggest you read the section on Long-Term Food Preservation.
Here are some additional notes about storing dehydrated foods:
- Wait until the food has completely cooled down before storing. Otherwise, the heat will get into the storage container.
- But put foods for storage quickly. You’d be surprised how fast insects can lay eggs on dried foods.
- If not using vacuum-sealed Mylar bags, you should at least use glass jars with rubber gaskets. Insects can get into normal jars!
- Plastic zip-lock bags are not suitable for storing dried foods. They don’t keep moisture or air out, and foods will spoil eventually. Plus, insects can penetrate these bags (again, I’m speaking from experience!).
- Tupperware containers are also not suitable for long-term storage of dehydrated foods. They don’t keep out air, moisture, or insects.
- Don’t store fruits and veggies in the same container. The flavors will combine and cause a really weird taste.
Common Dehydrating Mistakes
1. Buying the wrong dehydrator:
If you know that you want to make jerky or dehydrate things like dairy or eggs, then you need a dehydrator that can get to 160F. You can still dehydrate these things at a lower temperature, but the risk of bacteria growing is high. It’s better to play it safe than sorry!
2. Relying on drying guidelines to determine when a food is “done”:
You’ll notice that I didn’t include a chart of foods with their drying time/temperatures. That is because these charts are highly unreliable.
For example, it’s taken me 4 hours to dehydrate apples. It’s also taken me 7 hours to dry apples in the same dehydrator and temperature setting. Why the big difference? It has to do with the moisture content of the apples.
Those charts are suitable for general guidelines but don’t follow them precisely. You should always check the food yourself to make sure it is dry enough.
Read the “Drying Time and Temperature” sections to learn how to tell if a food is dry enough.
3. Dehydrating different foods at the same time:
When you dehydrate different foods simultaneously, they pick up each other’s tastes and smells. This is okay if all the final ingredients are going into the same dish (such as if you are dehydrating a bunch of veggies for a casserole). However, some foods will taste nasty if dehydrated together.
Bananas and onions, for example. Or peaches and fish.
Gross! Keep these foods separate.
4. Stopping dehydrating in the middle:
Never start dehydrating foods if you won’t be able to finish the batch in one go. You cannot stop the dehydration process in the middle and pick it up later. The food will start to spoil, and you’ll get bad results that may even be unsafe.
5. Not testing dehydrated meals before packaging:
I learned this the hard way. I was backpacking and tried to rehydrate a soup I’d made on the dehydrator. The chunks of carrots stayed hard even after a long boil (it was because I hadn’t pre-cooked the carrots).
If you make emergency meals on your dehydrator, test them first. You don’t want to end up in a situation where you discover your dehydrated meals didn’t succeed, but you have nothing to eat.
To test a meal, remove a small portion. Then add water or boil it (depending on how you plan on rehydrating it later). Eat the results and see how they turned out.
6. Not allowing enough time for rehydrating:
You must test dehydrated meals before using them in the field. Rehydrating can take a lot longer than anticipated.
Even with individually-dried ingredients, rehydration time is essential to remember. You don’t want to add dried onions to a casserole only to end up with bits of chewy onion in every bite!
7. Drying oily or fatty foods:
Oil doesn’t dehydrate. When you dehydrate oily foods, it will start to go rancid. This is why it is so important to remove fat from meat before making jerky.
This is also important when making dehydrated meals. I will generally make the meal without oil, dehydrate it, and then add a squirt of oil after rehydrating.
8. Not killing pests before dehydrating:
This is something that I mentioned numerous times throughout the guide because it is so important. Even if you can’t see them, fruits and (to a lesser extent) veggies will have some insect eggs on them.
Dehydrating does NOT kill insect eggs. Those eggs will eventually hatch on your dried foods and multiply into an infestation. Always kill pests by cooking before dehydrating or freezing the dried foods afterward.
9. Improper storage:
Dehydrated foods usually last around 1-6 months in jars or Tupperware. However, you still risk getting insect infestations when you store them this way. I’m speaking from experience! Moths can somehow get inside closed jars and plastic containers!
Jars and Tupperware also won’t keep out moisture or light. Your dehydrated foods will go bad much faster.
If you want your dehydrated foods to last a long time, keep them in the freezer or invest in mylar bags + a vacuum sealer.
Remember, the secret to storing dehydrated foods is Dry, Dark, and Cool.
https://www.cdc.gov/parasites/trichinellosis/hunters.html
https://foodsafety.wisc.edu/assets/pdf_Files/Making_Safe%20Jerky_in_a%20Home_Dehydrator3.pdf
http://www.backwoodshome.com/dehydrating-eggs-at-home/
https://www.theprairiehomestead.com/2011/12/how-to-dehydrate-eggs-or-not.html

Thank you for the wonderful article and website
I have a question regarding #4 Conditioning Fruits after Dehydrating:
I understand the waiting for the fruit/veggie to cool down before storing.
However, I am confused by what you wrote later: “To condition the fruit, simply seal the fruit in a large Tupperware container or plastic bag. The drier pieces of fruit will absorb moisture from the wetter pieces. It takes about 10 days to fully condition fruit”
Why not just put all the fruit in its long-term storage container and let it equalize the moisture in there? I guess I am missing something.
They tend to be clumped together in the long-term storage container. So the moisture might not equalize nicely. Also, after conditioning, I like to check the moisture (squeeze them to see if any wet spots come out). I can’t do that once they are sealed in their long-term containers.
Hope that answers your question.
Why don’t the dehydrated meals you make and then seal in an oxygen deprived environment create a botulism breeding ground. This confuses and concerns me.
If you dehydrate the heck out of them (so dry that they snap when bent or shatter when crushed with a spoon), then there isn’t enough moisture for botulism to survive. botulism needs 35% moisture to grow. To play it safe, the general recommendation is to only use oxygen absorbers with foods that have max 10% moisture.
I seasoned my vegetables (cucumber, zuchini, carrots, long beans, egg plant) with salt and pepper and dehydrate them for 8h at 70 degree celcius. They turned out dry but rubbery. What am i doing wrong?
You have to cook most vegetables before dehydrating them. Otherwise the fibers are really hard and rubbery. This also makes them harder to digest and it will take FOREVER to rehydrat if you are using them in stews/cooked dishes.
I personally would never dehydrate cucumbber. Too much water and you end up with nothing — but maybe it would make a good snack. That one you wouldn’t have to cook beforehand.
I also don’t cook eggplant before dehydrating, but I usually soak it in some oil with tons of seasoning to make “jerky”. I add liquid smoke and it tastes awesome, but the entire house will smell like it for days. The oil content means it doesn’t last very long though.
Mason jars are absolutely safe to store food. People have been doing this for decades. For longer term storage, oxygen absorbers are essential. The glass will not allow oxygen in and definitely not bugs.
Thank you for this Amazing article. I bought a couple small books on Dehydrating and was very disappointed. Your article is more complete than those silly books! Thank you for taking the time to write all this out and add photos. I make dehydrated bread and crackers now and then, and was wondering if I could raise the temperatures a little to save time, since I am not fanatic about it qualifying as “raw food.” I surmised by reading your article that was OK and am drying my cracker/bread at 125 instead of 115 assuming it will take less time and I won’t have to get up at 1 AM and turn it over!! Thanks again! Morgine
Glad you found it useful. Keep on experimenting — there are hundreds of things which can be dehydrated if you think outside the box. 🙂
Just a suggestion … what about labeling the plastic bags you put your separate ingredients in, with the time it takes to rehydrate them in boiling water? That way you don’t even have to remember which takes longer! Just add the 10-min. one; then the 5-min. one; etc. Easy peasy!
Yes, that is a good tip 🙂 I don’t find a need to do this though because:
1) my meals meals are usually fairly simple (usually two bags of ingredients) and I can easily remember which goes first.
2) After rehydrating meals a few times, you will be able to tell when to add the second batch of foods by how soft they’ve gotten — no timers needed.
3) I often use the “cold-soak” method, which means I’ll leave dehydrated foods in cold clean water to soak for anywhere from 5 to 60 minutes before heating it up (and do camp chores while it’s soaking). This saves a lot of fuel.
Hello! question on dehydrating meals you cook at home for later backpacking use (specifically looking at a white chicken chili recipe). The recipe calls for sauteeing the onion and garlic in oil, then adding broth, etc. Will the oil cause the entire meal to go rancid? is ghee better than evoo?
I dehydrate all sorts of meals for backpacking (wrote a how-to book with recipes too- https://momgoescamping.com/gourmet-as-heck/). For backpacking, YES, you can use oil in the meals. YES, it will eventually make the meals go bad. I tested some meals in warm conditions and they were all fine after 6-8 weeks. The only one that went bad really quickly was a corn chowder made with lots of coconut milk. That one only survived 3-4 weeks before getting sour and rancid.
My advice? Just use as little oil as possible when making the meal. Then, on the trail, carry a small bottle of olive oil with you to add to the meal after rehydrating. You don’t have to add more oil, but it makes the meal more satisfying and filling plus gives you more calories.
Meat and/or mushrooms dried at a correct temperature in a dehydrator considered cooked?
Thank you for the great site.
Regards
Meat – yes it is safe if done correctly. We have a big section on dehydrating meat in the article above.
Hi all, I live in BC, Canada. In the summer we have beautiful, tasty, local cherries.
Last summer Aug 2018, I dehydrated some cherries. Fresh, pitted, cut in half; They took 24 hours to dehydrate. I use an Excalibur dehydrator @ 135F. Regards.
Is it normal that six trays of cherries and cranberries take more than 2 days on 57C? They came from the freezer directly to the trays. Due to what I read on internet that should not give problems.
No, that is NOT normal! I haven’t dried frozen cherries before but have done other frozen fruits. First off, I do them on parchment paper (or you could use dehydrator trays) because the juices run everywhere as they defrost. It takes about 6-8 hours at 40C (I think — I just let the dehydrator run while I sleep and am not too precise about dehydrating times 😮 ) for me to do 5 trays of blueberries. Strawberries I cut in half before dehydrating, which is tough when they are still frozen.
Is your dehydrator working? Maybe try sticking a meat thermometer in your dehydrator to see if it is actually heating up. Or maybe you just put too many cherries on at once and there is no air flow. But even then the bottom trays should still be dry as heck, just the top trays wouldn’t dry.
*random tip: when using parchment paper, make sure it doesn’t go to the edges of the trays. Otherwise too much air flow is blocked.
Hope this helps!
I have found that placing mint gum sticks in cupboards, anywhere where you store your dried items is a cheap and great detorant for mothes, wevil, ECT.
Thanks for the tip! Moths are driving me crazy. I still have them in my pantry…I’ve pretty much resigned myself to eating them :/
I had stored some rice & other foods in the containers purchased in the Kitchen Cabinets, they were all still in their date ranges, but when opening some they had different bugs, also found some crawling in the cabinet, I should have known when I saw a couple of spider webs, I removed everything got rid of the bags & containers that had the bugs, wiped them out & cleaned the cabinets, returned everything & in 2 days found more bugs, so I removed it all again, cleaned with Pinesol cleaner, swept it all out with a Wet-Dry vac, this time I did a more thorough cleaning & sweep of every nook & cranny, then I sprayed lightly with a good bug spray, & then sprinkled diatomaceous earth powder around all of the inside edges of the cabinet & around the outside all around them, I check the Cabinets regularly, & have not seen a bug of any kind since, this is now how I do all of my storage areas.