Before storing seeds long term, first and foremost, you need the right kind of seed. You also need proper air, light, and temperature.
We’ll explain everything you need to know from start to finish about storing and using seeds long term, so you’re sure to have a bountiful season for years to come.
Collecting Seeds for Long-term Storage
When it comes to long-term seed storage, knowing when to collect your seeds is paramount. Contrary to what one might think, when your garden food is perfect for eating, your seeds are not mature enough for collecting.
Harvest corn, bean, and pea pods after they have dried on their stalks. For fruits like bell peppers, tomatoes, cucumbers, and melons, the Illinois Extension recommends leaving a few fruits on the plant until they are overripe and sour.
As the food becomes inedible, the seeds mature enough for harvesting. Mature seeds are usually full and round, while unviable seeds are typically flat or green.
When collecting seeds from your annual garden, gather several from each crop throughout your gardening season. Seeds need to be thoroughly dried first, which takes time. This may be easier to do in smaller batches rather than all at once.
If you save seeds from pulpy crops, such as tomatoes or cantaloupe, wash the pulp off before drying them. You can do this by rinsing them in a container filled with water. You can also wash them by hand. I usually just place them in a strainer and rub them between my fingers until they’re clean.
Drying Seeds for Long-term Storage
Wet seeds can mold, sprout, rot, or suffer frost damage. So, you must dry them completely before packing and storing them. There are several methods for doing this, but here are the most common.
1. Air Drying
Spread your seeds on a dish, coffee filter, or parchment paper in a well-ventilated area to air dry. While smaller seeds may dry in as little as 24 hours, larger seeds sometimes take up to three weeks.
Stir seeds at least once a day and flip larger seeds so they dry evenly. Seeds can appear dry on the outside but still contain moisture on the inside. Once you think they’re dried, perform a snap test (explained below) to be sure.
Some seed savers use additional methods for drying, but air drying is by far the most efficient and safest method to avoid killing your seeds.
2. Dehydrating
If you use a dehydrator, it must have a low enough temperature setting to set between 80 and 90 degrees Fahrenheit.
You should only use dehydrators for larger seeds, such as beans, pumpkins, and squash. Because smaller seeds can be overheated and cooked, they shouldn’t be placed in a dehydrator.
Likewise, you shouldn’t run your dehydrator for more than 30 minutes at a time since this could accidentally cook your seeds.
Don’t use an oven to dehydrate seeds. Ovens cannot achieve the low temperatures necessary to avoid overheating the seeds.
3. Fans
You can also use electric fans to assist in air-drying seeds. To prevent seeds from blowing away, some people trap the seeds between air conditioning filters. Others place seeds between two coffee filters or pieces of cheesecloth and hold them in place with a cross-stitch hoop. You can also place the seeds between fine mesh wire screens.
Whatever method you choose, arrange your fan and seeds so air can blow through your filter, cheesecloth, or screens for maximum coverage. Small seeds dry rather quickly, but larger seeds may require a week or more.
Keep plenty of space between your seeds, or stir them frequently to prevent mold and rot.
Check and Package Your Seeds
Once you feel your seeds are dry, perform a snap test. To do this, attempt to break one of your seeds in half. If you succeed, it’s dry enough for storage. However, if it’s soggy or if it bends, continue drying.
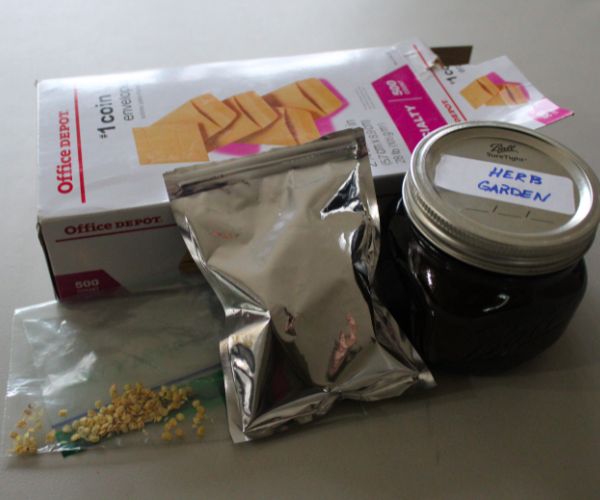
There are a variety of ways to package your seeds:
- #1 coin envelopes
- Ziplock bags
- Mylar bags
- Repurposed baby food jars, small food jars, or pill bottles
- Mason jars
Packing in smaller quantities works best, but that’s personal preference. Regardless of which packaging you choose, don’t forget to label your seeds with their name and the date you collected them (origination date).
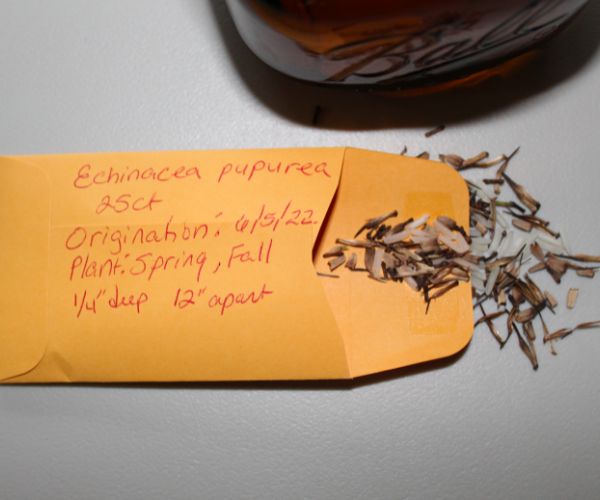
Feel free to add any additional information you deem pertinent, such as seed count or planting instructions. As with all things storage, rotate your stock on a first-in, first-out basis.
Organizing Your Seeds
If you’ve gardened for any length of time, you know staying organized makes life a lot easier. Managing your seed stock is no different. Two popular methods among avid gardeners include catalogs and mason jars.
Catalogs
To catalog your seeds, you can organize them by alphabetical order, month, origination date, plant date, or any other means that suits you. Once you’ve grouped all the seeds by your preferred method, place labeled dividers between them to differentiate one group from the next.
You can place them in one large container so they’re all together. Some gardeners use seed storage boxes or seed banks, while others use trading card boxes or even old shoe boxes.
Mason Jars
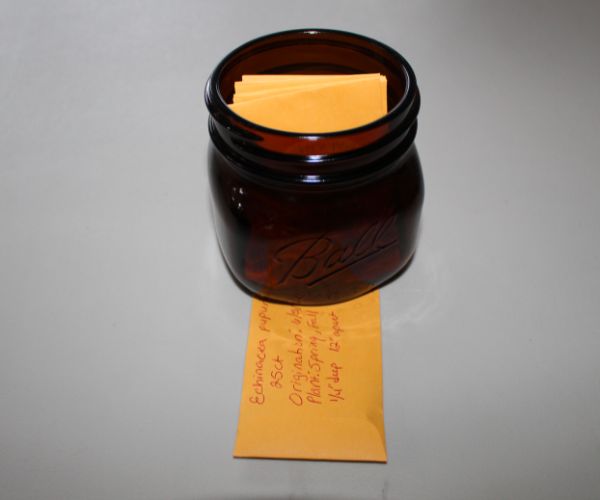
Mason jars are a nifty way to categorize your seeds by themes. For example, I like storing all my herb seeds in a single mason jar for easy access since I plant them several times yearly.
After placing the seeds in #1 coin packets and labeling them, I drop them into a dark mason jar for airtight storage.
Protecting Your Seeds for Long-Term Storage
Moisture, temperature, light, and pests can all ruin your seeds over time. Here’s what you need to know.
Moisture
Excessive moisture causes the outer seed wall to become soft. This can cause the seed to split open, mold, or rot. Moisture can also cause your seeds to sprout, rendering them useless.
Silica gels are an ideal way to prevent moisture from infiltrating your seeds. Likewise, dried rice grains also stave off moisture. Tossing either in with your seeds adds an extra layer of protection.
Temperature
To prevent the risk of premature germination, temperatures must be kept below 60 degrees. Anything higher, and you’re risking the dormancy of your seeds, which will cause them to degrade quickly.
You should keep them below 40 degrees Fahrenheit for successful long-term storage. Consider placing your seeds in one of the following:
- A basement
- A cold closet
- The north side of your home
- The freezer
- An electrical beverage cooler
Experts debate the benefits of freezing seeds long term because of the considerable risks:
- Subfreezing temperatures can kill the embryos of some plants.
- If the power goes out, temperature fluctuation could kill the seeds.
- Once you remove seeds from the freezer, you can’t put them back in.
- Some argue your freezer opens and closes too much to maintain a constant temperature for good preservation.
- Freezers are prone to condensation.
Only you can weigh the risks versus the rewards. However, should you opt for freezer storage, you’re better off storing smaller quantities for shorter periods.
I’m always a proponent of having more than one source for anything. For any prepper, three is two, two is one, and one is none. Consider storing a small amount of seed in your freezer and a larger amount elsewhere.
Some recommend using a small beverage cooler that can be tucked away somewhere and only accessed when you’re pulling seeds. However, the same risks apply to both moisture and power outages.
Light
Plants feed on sunlight, so prolonged exposure to light encourages them to germinate and sprout. Light also causes your seeds to decay.
A small amount of light is not overly harmful, but the longer you plan on storing your seeds, the more concerned you should be. For best results, store seeds in dark or opaque containers to significantly limit their exposure.
If you use ziplock bags or clear jars, you should house those in dark containers or locations.
Pests
Pests can destroy your precious seed supply as quickly as they can ruin your garden. If insects so much as nibble on your seeds, there’s little chance they will germinate. Watch out for these common culprits:
- Beetles
- Mice
- Moths
- Weevils
- Roaches
The best way to prevent bugs from attacking your seed supply is to place oxygen absorbers in your containers so they can’t survive. For larger critters, like roaches and mice, choose durable, airtight containers that rodents can’t chew through.
Sometimes, double-layering is the safest measure to ensure adequate protection.
How Long Do Stored Seeds Last
Over time, seeds decay regardless of how well you preserve them. The longevity of seeds varies from crop to crop.
Generally, annual flower seeds last 1–3 years, while perennials last 2–4 years. Vegetable seeds contain many natural oils, so the oilier the seeds, the shorter the shelf life.
Because alliums, corn, parsnips, and spinach contain a higher oil content, you should replace these seeds annually.
When purchasing garden seeds, in many cases, you’ll see an expiration date on the package. If you have expired seeds in your possession, you can still use them (if they are viable) without worrying about any negative impact on your food.
You can perform a germination test to determine their viability. When seeds “go bad,” they don’t produce bad food; they just won’t grow.
Here is a basic guideline for the longevity of common seeds.
Seeds That Last 1–2 Years
- Beets
- Beans
- Chives
- Corn
- Dandelion
- Garlic
- Lentils
- Onions
- Okra
- Parsley
- Peppers
- Spinach
Seeds That Last 3–4 Years
- Asparagus
- Broccoli
- Brussel sprouts
- Cabbage
- Carrots
- Cauliflower
- Celery
- Collards
- Cucumbers
- Fennel
- Lavender
- Lettuce
- Melons
- Peas
- Radishes
- Squash
- Tomatoes
- Turnips
- Watermelon
- Kale
Seeds That Last 5–6 Years
- Arugula
- Basil
- Mustard Greens
- Radishes
If you’re continually rotating your seeds after each gardening season, you don’t need to save seeds for more than five to six years. As time passes, like other foods, their quality degrades, and their viability declines.
There’s no point in saving seeds that won’t produce food.
Survival Seed Kits
Don’t fall for the 25-year, zombie apocalypse, regrow-the-world scenario. It’s simply not practical. Mother nature intended seeds to be in the ground, not stored indefinitely. Even most essential seed bank kits come with an average shelf life of five years or so unless they’re placed in the freezer.
Even still, while they promise you 20+ years, this is only under the most ideal situations and won’t apply to every seed type. No matter the type of seed and its variety, or how and where you store it, each year that seed is in storage deteriorates it. Expect a 5%–20% lower quality with each year of storage.
It’s still a good idea to keep a survival seed kit. It’s just better practice if you continually rotate your seeds. The younger the seed, the longer its viability.
Removing Seeds From Cold Storage
When using cold storage, allow your seeds to reach room temperature before opening them. Otherwise, they may absorb condensation while thawing, potentially ruining your entire stash.
A good rule of thumb is to let them rest on the counter for at least 12 hours before opening the container.
Why You Should Store Seeds Long Term
The benefits of storing seeds are numerous, but ultimately, it makes you more self-sufficient and saves you money in the long run. Buying seeds and starter plants every year can get quite expensive.
Have another look at the benefits of heirloom seed storage:
- Extending your harvest season
- Ensuring you aren’t eating GMO foods or foods heavily contaminated with herbicides, pesticides, and fungicides
- Ensuring your crop viability
- Decreasing seed-borne diseases
- Promoting natural resistance against pests
- Preventing waste of unused seeds
- Taking advantage of seed sales
- Facilitating a seed bank or survival garden
Storing and using your garden seeds properly is the best way to ensure you have food on the table year after year.
