I’m not going to lie or sugarcoat things. Preparing for a disaster does require money. However, it probably doesn’t cost as much as you think.
There are three main ways that you can go about stockpiling emergency food:
- Buy instant meals from the supermarket
- Buy non-perishable goods (dry staples and canned) from the supermarket
- Buy food buckets with Meals Ready to Eat (MREs)
Here I will break down the costs of each approach and their pros/cons so you can get started!
You might also find out interactive emergency food storage calculator helpful.
Option 1: Store-Bought Instant Meals
This is the easiest way to start building up your emergency food supplies. You can just buy a bit extra at the supermarket each time you go. It is also the most straightforward and relatively cheap way to get prepped.
But there are a lot of downsides to using instant meals as your emergency food. These foods are loaded with sodium and VERY unhealthy. You won’t get the nutrients you need to stay healthy through the disaster.
Also, note that YOU MUST REPACKAGE BOXED FOODS.
Some foods (like the packages in the pic above) might be okay, but boxes of food (such as mac n’ cheese) will get ruined. Think of all those food boxes soaked during a flood or smashed open during an earthquake!
I’ll talk more about this in the next section.
Example Foods
- Poptarts: 200 calories each, $0.25 each
- Oatmeal Packets: 160 calories per packet, $0.20 per packet
- Breakfast Bars: 130 calories each, $0.30 per bar
- Granola Bars: 100 calories each, 0.40 cents per bar
- Boxes of Cereal: 100 calories per serving, $0.20 per serving
- Canned Soups and Stews: 350-500 calories per can; $1.50-$2.50 per can
- Mac and Cheese Boxes: 500 calories per serving, $1.25 per serving
- Parmesan Couscous Mix: 200 calories per serving, $0.70 per serving
Serving sizes are pretty small on these products. You’d have to eat a bunch of servings to get anywhere near enough calories per day.
So, here are a few examples of what you might expect to eat during a day.
Emergency Meal Day 1:
- 2 PopTarts (400 calories): $0.50
- 20oz canned beef stew (500 calories): $2.00
- ½ box of Mac and Cheese (540 calories): $1.25
=$3.75 per day per person
Emergency Meal Day 2:
- 2 instant oatmeal packets (360 calories): $0.40
- 20 oz can of lentil soup (440 calories): $2.00
- ½ box of instant rice and beans (570 calories): $1.20
- 2 granola bars (200 calories): $0.80
=$4.40 per day per person
Emergency Meal Day 3:
- 2 breakfast bars (250 calories): $0.80
- 10 oz can tomato soup (225 calories): $0.90
- Prego Ready Meals Alfredo (370 calories): $2.00
- 5 peanut butter cookies (650 calories): $1.20
=$4.90 per day per person
Option 2: Shelf-Stable Staples (Canned and Dry)
This is what a lot of hardcore, industrious preppers do. They carefully calculate what their family needs to survive for 3 months (or longer) – including calories and nutritional requirements – and then gather everything up.
These foods need to be stored properly. When done right, the emergency foods can last a very long time – up to 20 years.
Note that I’ve included canned and dry staples here. Some people only buy canned foods. But, seriously, have you ever tried eating green beans straight from the can? Yuck! Eating just canned food tastes like crap. But put them on some instant mashed potatoes made with dry milk and seasonings, and you’re good to go.
Alternatively, you can get buckets of freeze-dried veggies and fruits. These taste a LOT better than the canned stuff. If you buy them in bulk, it is a lot cheaper. The bucket linked contains 165 servings of freeze-dried veggies.
You MUST Repackage Dry Staples!!!
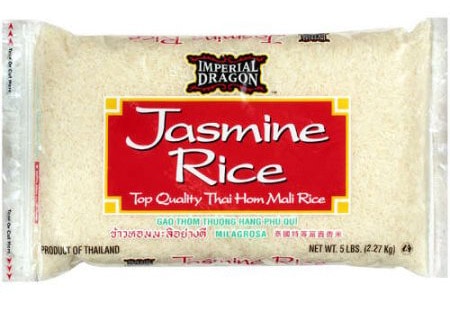
You can’t just buy a bunch of bags of rice and consider yourself set for grains!
Unless you are continuously rotating through your supplies (which is hard when you’ve got that much), your dry foods will start to spoil.
Yes, moisture can get through that plastic packaging.
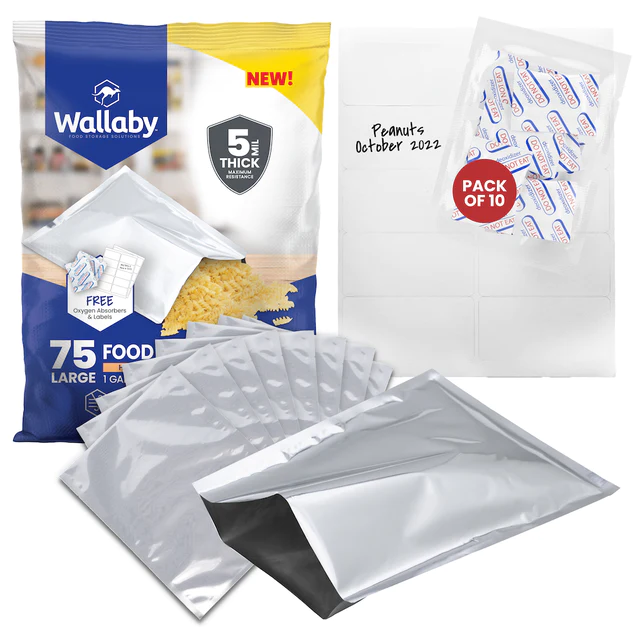
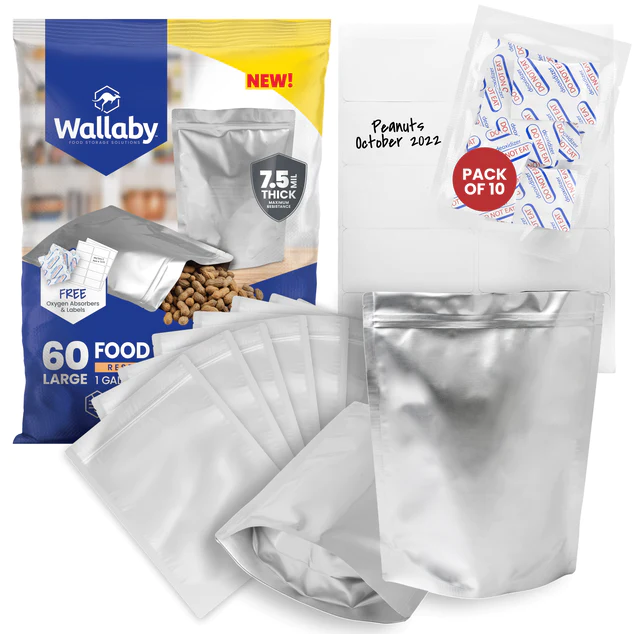
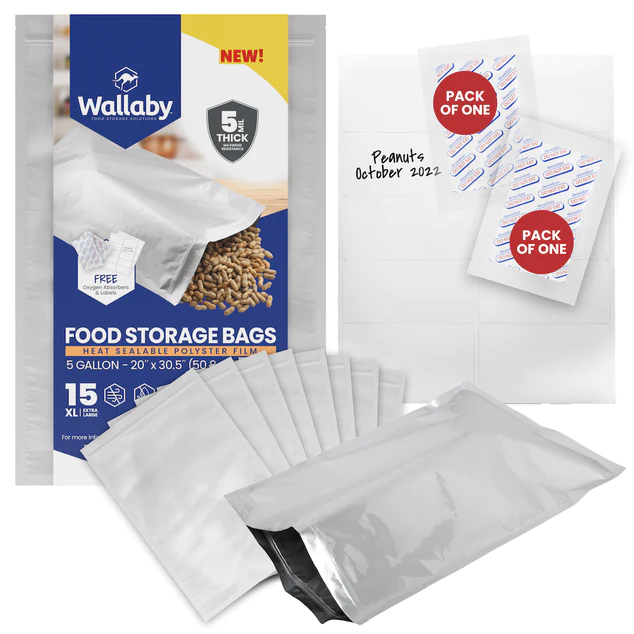
For long-term storage of dry goods (rice, dry beans, dry fruit, etc.), YOU MUST SEAL THE FOOD. The easiest and cheapest way to do this is to buy mylar bags and oxygen absorbers.
Each food goes into its own mylar bag; almost all the air is pushed out of it, then you put some oxygen absorbers in there before sealing the mylar bag. After that, you put the mylar bags into 5-gallon buckets.
Recommended Reading:
The mylar bags protect the food against moisture and air spoilage. The buckets protect against pests and damage, such as during flooding.
I prefer to use 1-gallon mylar bags instead of larger bags. This makes it easier to access your emergency food. If you need to get to it, you only have to open a small bag instead of opening up your entire supply and exposing it to spoilage.
What Staples to Buy?
It is necessary to stock up on a variety of foods. Below I’ve listed the foods by group and how many servings per day you need (as recommended by Health.gov for a 1600-calorie diet).
- Grains (6 servings per day): Oats, barely, rice, canned yams, flour
- Veggies (3 servings per day): Canned peas, canned and dried tomatoes, canned corn, dried peppers, canned olives, canned carrots, canned and dried mushrooms, canned green beans, canned water chestnuts, canned asparagus, canned okra
- Fruits (2 servings per day): Canned or dried fruits like cherries, peaches, pineapple, cranberries, raisins, prunes
- Dairy (2-3 servings per day): Dry milk, canned milk
- Proteins (2 servings): Dry and canned beans, chickpeas, lentils, canned tuna, canned beef, spam, dried eggs, nuts, seeds, jerky, peanut butter
- Oils and Fats (2 servings): Olive oil, coconut oil, canola oil
How Much Do You Need to Buy?
It is difficult to figure out how much emergency food to buy because serving sizes are confusing. I’ve made a chart below with typical serving sizes to simplify things.
I also looked at the typical costs of things. There is a big range. A can of tuna costs just $1, whereas 2/3 cup of almonds can cost twice that. I did my best to calculate the average costs of each type of food so you can get an accurate estimate of the costs.
| Food | Servings per day | Serving Size | Total (per day) | Total Calories | Cost (per day) |
|---|---|---|---|---|---|
| Grains | 6 | Half cup cooked | 3 cups | 600 | $0.10 - $0.50 |
| Veggies | 3 | Half cup canned | 1.75 cups | 60 | $0.50 |
| Fruits | 2 | Half cup canned | 1 cup | 150 - 300 | $1.00 |
| Dairy | 3 | 1 cup milk from powder | 2-3 cups | 240 - 360 | $0.90 |
| Proteins | 2 | 2-3oz meat. Half cup beans, 1 cup nuts\seeds | 1 can tuna and half cup beans OR 2oz beef jerky and half cup nuts | 170 - 600 | $2.00 - $5.00 |
| Oils\Fats | 2 | 1 tsp vegetable oil | 2 tsp oil | 80 | $0.06 |
| Totals | 1300 - 2000 | $4.56 - $7.96 per day, per person |
How Much Food Total for 90 Days?
- Grains: About 30-40 pounds of grains per person
- Veggies: About 90 cans per person
- Fruits: About 60 cans per person
- Dairy: About 34lbs of dry milk powder per person, to reconstitute into 225 cups per person
- Proteins: About 45 cans of tuna and 15 cans of beans and 45oz beef jerky, and 38 cups nuts/seeds (11.5lbs) per person
- Oils: 1-quart olive oil and 14oz coconut oil
- Other: Sugar, honey, salt, herbs, spices
If you need more help with this, check out our inventory planner tool. It calculates calorie needs and serving amounts for each food group based on the number of family members.
Emergency Meal Plan Examples
Here are some examples of what you might eat using these staples as your emergency food.
Day 1
- Breakfast: 1 cup of oats, ½ cup of dried fruit
- Snack: 1 cup of milk
- Lunch: 1 can of tuna, ½ cup of asparagus, 1 cup of milk
- Snack: 2 Tbsp peanut butter
- Dinner: 2 cups pasta with olive oil drizzle, ½ cup mushrooms, ½ cup tomato sauce
Day 2
- Breakfast: 1 cup oats, 2/3 cup mixed nuts, 1 cup milk
- Snack: 1 cup of canned fruit
- Lunch: 1 cup of instant mashed potatoes made with 1 serving of powdered milk and 1 cup of peas
- Dinner:1 cup rice make with oil, 1/2 cup salsa, ½ cup beans
TOTAL COST FOR 90 DAYS: $1,680-$2,865 (for a family of 4)*
*Includes the cost of mylar bags and buckets.
Option 3: Emergency Food Buckets (MREs in a Bucket)
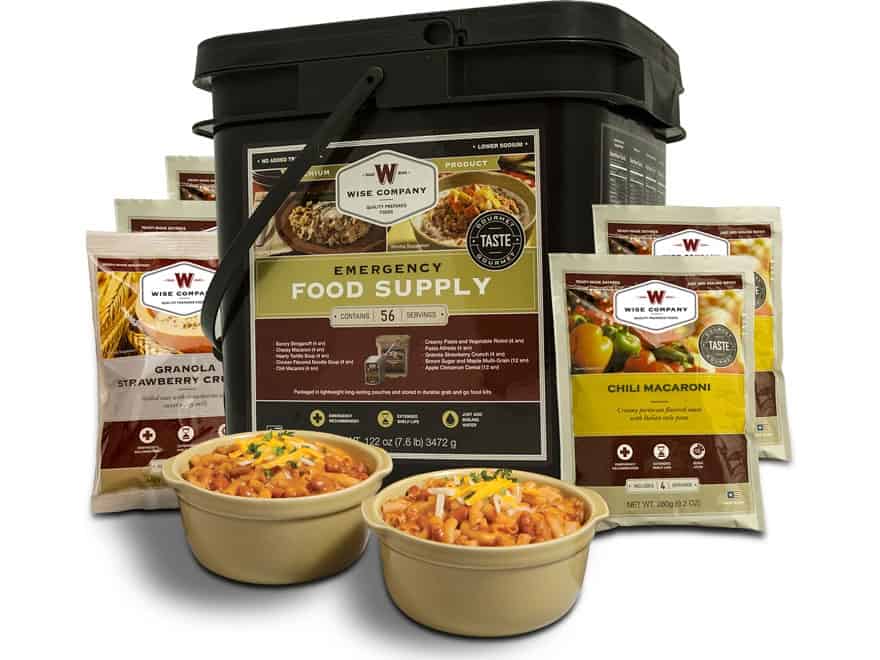
Meals Ready to Eat (MREs) are also known as “camping food.” This is the priciest route for emergency food, but it is also the easiest and safest.
The meals are already measured and packaged, so you don’t have to worry about spoiling or getting infested by pests.
This is the best option if you don’t want to worry about repackaging food for long-term storage!
Oh, and they taste good! I spent a trial week mainly eating canned food and was miserable. Most MREs come in tasty flavors.
Another benefit of buying MREs is that they cook quickly. Add some hot water to the pouch, let it sit for a few minutes, and you have a nutritious meal.
If you are interested in learning more about the best brands, check out our in-depth guide to the best emergency food.
Which Emergency Food Option is Best?
Option 1: Instant Meals
Total Cost (4 people for 90 days)= $1,350-$1,764
Foods readily available
Minimal cooking and prep required
Often have vestibules where you can keep your gear
Very unhealthy
Must repackage foods
Requires knowledge to repackage properly
Not a lot of variety
Option 2: Canned and Dry Staples
Total Cost (4 people for 90 days)= $1,680-$2,865
Can choose whatever foods you like best
Can be very healthy
You will have to do a lot of cooking
Some canned food tastes terrible
Requires a lot of planning
Must repackage foods
Option 3: Emergency Food Bucket
Total Cost (4 people for 90 days)= $2,600
Quickest and easiest method
Shelf life of up to 25 years
Buckets and pouches are safe against virtually all disasters
Priciest option
You might not like some of the flavors
What Do I Recommend?
Most preppers use a combination of all of these methods for their emergency food supply.
For example, they buy a smaller MRE food bucket and also stockpile some instant meals, canned goods, and granola bars. Just don’t forget to repackage those boxed instant meals, or they will get destroyed by pests, flooding, or spoilage!
The variety of food means that you are set for multiple types of disaster situations, such as when you need to grab a food bar and go or when you are hunkering down through a disaster and want a nutritious meal.

I think this is the best site on prepping and practical how to’s for the masses.
Just remember people, that in a SHTF scenario, you won’t be dining at the Ritz Carlton so pack basics that you’ll eat and stop nitpicking. You’ll find out how smart you planned once you need it. Hopefully, it will work out for ya.
I wish these blogs would stop assuming that every person NEEDS 2000 calories a day. Children don’t for starters. And the human body can get by with a LOT less than 2000 calories. Unless you are doing heavy manual labor during this time, you don’t need to eat that much. Which will make that box of pop tarts (gross by the way) last much longer.
Agree, but nutrition is a really complex topic and too much to get into in one blog post. A lot of people will end up sitting around doing not much of anything during a disaster and won’t need many calories (how much they eat out of boredom is another issue). Others will need drastically more calories for tasks like cutting firewood and hauling water, or because it’s winter and there bodies are using more calories. There’s also the issue of simple carbs (pop tarts) which will cause blood sugar to spike and crash quickly, making you feel hungry again quickly… Thus, the 2000 calories estimate is used. Each person should adjust based on their own needs and situation.
Pop tarts are not complex carbs, they are simple sugars. Whole grains like old fashioned oatmeal is a complex carb.
Good catch — that was an error from writing too fast. I’ve updated it. I know what complex vs. simple carbs are 🙂
If you prep for 2000 calories, but don’t eat that much, either your food will last longer, or, you will have some to share. ; ) At least it gives folks a starting point to work from.
I’m prepping food to share with my fur babies in the event we couldn’t get dog food.
A quick suggestion for 5 gal pails.
Call your local bakery shops. 5 gal pails are what a bulk of their lcing comes in. With quite a few having screw on lids.
One call and presto almost free pails. Still have to wash them out and frosting doesn’t like to let go of plastic.
It’s how I acquired most of mine. I’m all for cheep preps.
Cheap preps is always good, just be careful with the cleaning as even a tiny amount of residue can cause bacteria to be introduced into your food stockpile.
What is the best way to clean and sanitize free plastic food grade buckets and their lids to prevent this cross contamination? Could you please either describe how to do this or provide a link to the info? Thanks for your help in advance.
I strongly advise against storing dry foods (dry beans, grains, etc.) in plastic buckets alone. There are moth eggs already on the dry foods and they eventually hatch, which then contaminants your entire bucket of food (the moths are technically safe to eat if you cook the food, but it’s still pretty gross).
Instead, put the dry food in mylar bags with oxygen absorbers. Or, for shorter-term storage, you could just vacuum seal them. In this case, you only need to wash the buckets thoroughly with soap and water.
If you really want to just dump dry staples into buckets, you’ll want to disinfect them with a bleach solution: 1 tablespoon of unscented chlorine bleach + 1 gallon of cool water. Kill any moth/pest eggs in the foods by microwaving them on high for 5 minutes or keeping the foods in the freezer for 5 days (people argue about how long you really need to microwave/freeze foods to kill pests; I used conservative estimates). Then put them in the buckets and make sure you have a plan to rotate through the items. Here’s more detailed info on using bleach to sanitize food surfaces: https://ucfoodsafety.ucdavis.edu/sites/g/files/dgvnsk7366/files/inline-files/26437.pdf
I really like your site I just wish you would not recommend wise company for emergency food . Granted it might be the least expensive co. but it’s not right that they have misrepresented themselves on calories and ingredients. The servings and calorie intake could leave you malnourished in 90 days. I totally agree that a persons best options are to have some of all different kinds of food, being canned, self packaged and freeze dried emergency foods.
Wise are no different to any of the other companies in the way they report their “servings”. As we stress in the article the number of servings listed is almost meaningless, you need to be looking at the number of calories in these kits in order to get a true representation. Also take some time to look at the ingredients ie where are the calories coming from?
If you prep in a basement that is moisture-controlled (with dehumidifier) and temperature-controlled because it’s also living space, do you still have to repackage all dry goods (instant potatoes, ramen noodles, granola bars, crackers, nuts, seeds, etc.)? All items are rotated out before expiration dates also by the way. New to prepping, but off to a good start I think.
Under these conditions I would expect many of these items to be good beyond their expiry date but rotating is best practice of course. (edit: be careful with nuts and seeds their high fat content can cause them to go rancid)
The issue arises if you are in a flood or earthquake prone area as anything left in its original packaging will likely be destroyed by contact with water.
Most tractor supply stores now carry food grade buckets and lids
Good tip if you are on a tight budget.
Do you have a source for just the plastic buckets and lids or are the five gallon buckets that can be bought at most hardware stores okay to use?
Food grade buckets are recommended.
The problem I have with all of the “bucket” foods I’ve tried is they are about 50% salt and the other half starch, with, if you’re lucky, some “meatish” flavorings added. Plain oatmeal or rice and beans would be better for you. And as for canned goods tasting “terrible”? What’s that about? Perhaps a cookbook would be a good addition to that survival food supply:)
Yes the bucket foods can vary. Worth trying a few till you find one you like. Having said that you’ll be glad of anything in a full SHTF situation!
Mre’s are gross. Have never eaten one I liked or could even finish. I’ll stick with my freeze dried foods.
You weren’t In the military to have to eat them as we were. And you’re obviously not using the heating, warming device as directed. Yes some are not as good as others. But two a week in time of emergency, when nothing else is available, you would do it. You would eat’em. And you’ve obviously only tried one or two different ones. There’s most that taste the same as home made if you close your eyes. And fix them as directed. Semper Fi.
Yep! When your supply drop does not make it to the correct location, the inability to stomach an mre is gone. If you are truly hungry, you probably won’t even taste it because you are eating it so fast. Also, mre’s are made to be eaten physically while on the move if need be. Semper Fi!
MRE’s are good, especially in an emergency. Except the 4 fingers of death, no one should ever eat those.
MREs are great for a bug-opractical or cost efficientut bag for 3 to 5 days. Anything longer you need to look at long-term storage. I would eat MREs every day. I love the taste, but they’re not practical or cost-efficient. Yes, 20 years in the Army.
You would be surprised what you would eat, if the situation arose.
Or, you would just starve to death.
we ate actual military MREs back in the ’80’s. they tasted like real food and had a lot of meat entrees. I haven’t found anything these days to waste my money on, either. Most emergency rations today are a lot of filler; grains, sugars, pasta, cereal… expensive and overly salted or sugared. Best to buy real food in bulk and do the cooking.
I was in the military in 1966. we had C rations that were canned in 1945. believe me , MRE’s taste wonderful compared C rations.