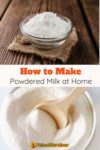
Powdered milk is one of the essential survival foods to have stockpiled in case of an emergency.
If you aren’t happy with the existing options for powdered milk or have a lot of excess milk on hand, you can make your own powdered milk with one of the three methods below.
Table Of Contents
Notes about DIY Powdered Milk
Before you get started, you must know a few things about making powdered milk. Otherwise, your powdered milk will probably go bad quickly, defeating the point of making it in the first place.
Only Use Pasteurized Milk
It’s not smart to use raw milk to make your powdered milk. There is too high a risk of bacteria growth during the drying process. Use pasteurized milk instead. The exception is if you have a freeze dryer; these are safer for raw milk.
Low Fat Is Better than Full-Fat
Fat doesn’t dry out as other liquids do. Even after the water content of the milk has been dried out, the fat will remain in the powdered milk. The fat will start to oxidize and eventually go rancid. The more fat in the initial milk, the faster the powdered milk will go bad.
If you only have full-fat milk, consider removing the fat first. This is pretty easy to do with raw milk. You can even use the skimmed fat to make yummy kajmak cheese (something my Serbian in-laws always do).
If you have store-bought homogenized milk, you can use your freezer to separate the fat from the rest of the milk.
Consider Maltodextrin
If you read the ingredients on powdered milk products, you’ll see that many of them include maltodextrin. Contrary to common belief, maltodextrin is not added as a filler. Rather, it binds with the fats in the milk and helps dry them out. The result is a better product that lasts longer.
Because DIY powdered milk can go bad so quickly – especially if you use fatty milk or are storing it in a warm environment – it might be smart to add some maltodextrin to your milk before drying.
Based on various industry papers I read, maltodextrin should account for 3-15% of the final dry milk product. (2, 4, 5) That means adding approximately 1-7 teaspoons of maltodextrin per gallon of milk. Add it to the milk before drying. (It can be found on Amazon here.)
*Fun fact: You can add maltodextrin to peanut butter to make peanut butter powder.
Don’t Dry Milk Which Is About to Go Bad
If you have milk that is about to go bad, you might want to dry it to preserve it. Unfortunately, this is generally a bad idea. The milk might already have higher levels of harmful bacteria, which could multiply during drying. If you want to save milk that is about to expire, it’s safer to freeze it instead.
The Powder Must Be Completely Dry
For powdered milk to be shelf-stable, it must be completely dry. It should crack easily when you touch it. Likewise, no moisture should come out when you squeeze the milk.
How to Make Powdered Milk At Home
There are three ways to make your own powdered milk. All of these take a long time and can get pretty messy. If you want to add maltodextrin to the milk, add it before drying it out.
Method 1: Powdered Milk with a Dehydrator
- Line your dehydrator trays with fruit-leather sheets
- Pour milk onto the trays. The less milk you put per tray, the faster the milk will dehydrate. Avoid putting more than ½ inch of milk per tray.
- Turn the dehydrator to the highest setting.
- Dehydrate on the highest setting for 1 hour.
- Reduce the heat and continue drying. The temperature should be no less than 135F.
- Continue dehydrating until the milk is completely dry and crumbles easily. It will probably take at least 10 hours.
- Put the dry milk into a blender or food processor to grind into a powder.
Read more about this in our Expert-Level Dehydrating Guide
Method 2: Powdered Milk with a Freeze Dryer
If you have a freezer dryer, you can make powdered milk that lasts much longer than dehydrated milk powder. Below are the instructions.
- Put the trays in the freeze dryer.
- With the trays partly pulled out, pour the milk into the trays.
- Push the trays in, insert the insulator pad, and shut the door.
- Choose the “Liquid” setting and hit start.
- It will probably take 24-30 hours for the cycle to complete.
Read more about:
Method 3: Powdered Milk in the Oven
You can also make powdered milk in your oven. I don’t recommend this method because it takes more work, but it is an option if you don’t have a dehydrator.
- Start by removing as much water from the milk as possible. To do this, put the milk in a double boiler (or a pot inside a pot). Heat the double boiler for several hours or until it looks thick and creamy.
- Pour the thickened milk into a deep pan. The milk should be no more than ½ inch deep. You may need to use several pans.
- Preheat the oven to 140F. Put the pan of thickened milk into the oven.
- Turn the oven’s fan on. If you don’t have a fan, leave the oven door open to allow moisture to escape.
- Leave the milk in the oven until it starts forming a thick paste.
- When the milk turns into a paste, remove it from the oven and pour it into a new tray lined with parchment paper. This will prevent the milk from sticking to the tray as it dries out.
- Put the milk back into the oven and continue drying.
- When the milk is completely dry, let it cool before using a food processor or blender to grind it into a powder.
Ready to use your milk? See our milk powder to water ratio charts.
Making Powdered Milk Probably Might Not Be Worth It!
While I’m a big DIY advocate, making your powdered milk probably isn’t worth the effort. Drying milk into a powder takes a very long time, and it can be pretty messy, too. You’ll only get about 1- 3 teaspoons of milk powder per cup, so that’s a lot of effort for a little bit of milk powder.
Because so many good emergency food brands are available, you are probably better off buying powdered milk instead of making your own.
The only time making your own powdered milk might make sense is if you have your own dairy cows or goats or if you bought milk in bulk because it was on sale. Even then, it usually makes more sense to use alternative methods of preserving milk.
Alternatives to DIY Powdered Milk
- DIY soy milk (soybeans are very easy to store long-term)
- Other DIY plant milks (such as oat, almond, etc.)
- Freezing milk
- Canning milk (read about canning)
- Making cheese or yogurt
Shelf Life of Homemade Powdered Milk
The shelf life of homemade milk powder will depend on how much fat is in the milk, how dry you got the milk, and whether you added maltodextrin. While some websites claim that DIY milk powder will last months, that hasn’t been my experience.
The fats in the milk (even if it is skim milk) will usually start to go rancid in about 4-6 weeks. If the milk powder is stored somewhere warm and humid, it will begin to go rancid long before then. Ideally, you should keep the milk powder in the refrigerator in an air-tight container. You’ll know the milk powder has started going bad if it gets a sour smell or taste.
Read about how to store powdered milk here.
Do you make your own powdered milk? Share your tips in the comments section below.


I cannot remove the dried milk from the jellyroll trays; it is stuck.
As I chip it off it flys across the counter.
Any suggestions?
Thank you!
Denise
Freeze the pan overnight. Should pop right off.