
Smoking is one of the most ancient forms of food preservation. It likely dates as far back as the Paleolithic period when our early ancestors realized that smoke from their fires made meat least longer.
Today, smoking has evolved into something which is part art and part science. Aficionados love using their smokers to impart flavor, such as by experimenting with different combinations of wood, brines, rubs, and temperatures.
Pitmasters are very passionate about smoking food, so it can feel a bit intimidating to get started.
However newbies – have nothing to fear. This guide will tell you everything you need to know to smoke food.
What Is Smoking?
Smoking was originally used as a way to preserve meat. While smoke is a natural antimicrobial agent, note that smoking alone won’t preserve meat. Smoking must be done in combination with another method, such as curing or dehydrating, if it is going to keep meat from going bad.
Today, smoking is mostly done as a way to add flavor to food, especially meat. The magic is in the fact that smoking uses indirect heat.
Unlike other cooking methods in which you put the meat right near the heat, smoking keeps the meat further away. The smoke is able to flow over the meat and impart flavor without drying it out.
Why Smoke Food?
There’s a good reason that people spend the time to smoke food. The process of smoking will give you these benefits.
1. Flavor
Connoisseurs know how great certain foods can taste when infused with smoke flavor. True masters of smoking even know how to pair woods and food together. For example, they might choose apple wood which has a light and fruity taste to compliment the taste of chicken.
2. More Tender
One of the big benefits of smoking meat is that it makes it much more tender. In fact, this is how smoking was originally used: It allowed farmers to eat meat which would have been otherwise too chewy.
The reason that smoking tenderizes meat has to do with collagen. Collagen is a type of protein mostly found in connective tissue. It is normally very tough and stringy (think gristle) . When put on a high heat, collagen starts to dry out and toughen quickly.
To soften collagen, you need to cook it at very low temperatures for a long time. This will make it dissolve into the meat so it becomes very juicy and soft.
3. Bark
True aficionados of smoking are all about bark. This is the darky, chewy crust that forms on meat when it is smoked. It takes a lot of practice to master bark, and is one of the things that judges look at in BBQ judging contests.
Downsides
While smoking meat (or other foods) can do wonders for their taste, it is a very long process. Depending on the smoker you choose, it might be a fairly hands-on process. You’ll have to occasionally check the wood or pellets and water pan with some types.
There are plenty of smokers which have hands-off features like computerized temperature control, but expect to pay a higher price for these features.
Smokers also can take up a lot of space. This isn’t something you can do in a very small backyard. Portable smokers can often be assembled so they don’t continually take up space in your yard, but it’s a pain to assemble before each use.
Difference between Smoking, Grilling, and BBQing
Smoking, grilling and BBQing are all common ways of cooking meat. They have some similarities – like that you can do them over wood, charcoal, or gas. However, the processes are actually very different.
- Smoking: Is a very long process done in a closed environment. The temperature range can either be cold (68-176F) or hot (126-220F). Even hot smoking is done at a much lower than with grilling or BBQ.
- Grilling: Foods are cooked over a very high temperature (400-550F) for a very short period, sometimes just minutes.
- BBQ: Foods are cooked “low and slow.” The temperature is usually kept at 190-300F and takes several hours. Smoked foods can also be barbecued.
Best Foods to Smoke
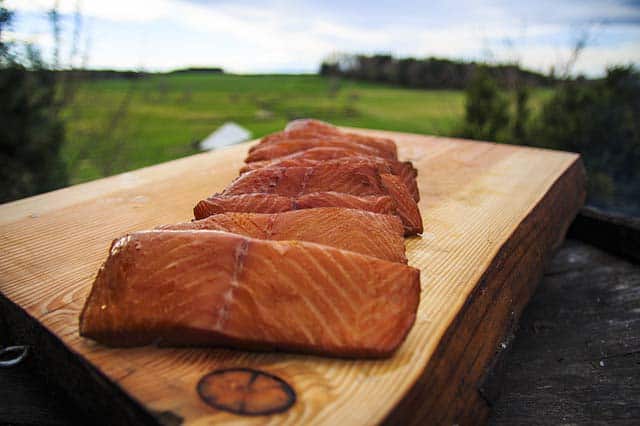
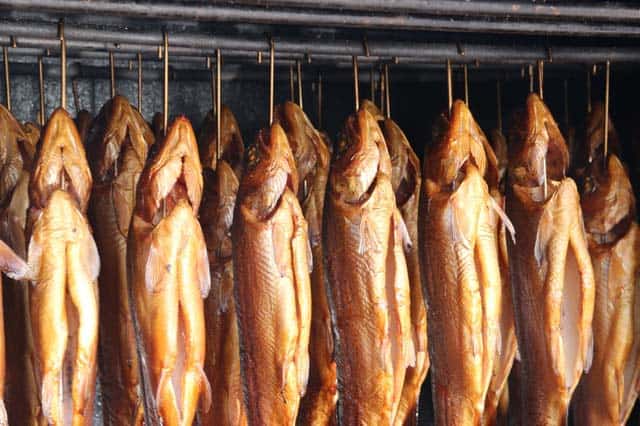
Smoking is synonymous with meat. Beef brisket, pork shoulder, ribs, and salmon are all popular choices. However, virtually any other meats can also be smoked.
You can even smoke foods like vegetables, fruit, and tofu (though I’m sure the hardcore smoking aficionados would be upset with me for even mentioning tofu!).
These fruits and veggies are particularly good on a smoker:
- Avocados
- Pineapple
- Peaches
- Asparagus
- Eggplant
Remember that you can put entire casserole dishes onto a smoker. When you consider this, it really opens up the number of foods you’ll want to try smoking. Think outside of the box!
Some interesting smoker recipes I’ve seen include:
- Mac n Cheese on the smoker
- Smoked corn on the cob
- Jacked up smoked meatloaf
- Smoked cheese
- Apple crumble (sooo good!)
- Chili
Smoking Methods
There are two methods for smoking food: Hot smoking and cold smoking. For most beginners, hot smoking is the way to go because it is safer, faster, and easier.
Cold Smoking
With cold smoking, the temperature stays below 100F (usually between 68 and 86F) for a long period of time. The low temperature means the meat doesn’t get cooked during the smoking process. Essentially, you are drying out the meat as you impart the smoke flavor.
To cold smoke, you need to maintain a steady supply of smoke for 1 to 5 days. Further, you need the temperature to remain consistent. That means the meat will need to be a good distance from the heat source so it doesn’t get too hot. This simply cannot be done with a standard portable smoker. You’ll need to build a smokehouse or get a large oven smoker.
Even with a smokehouse, cold smoking is risky. The low temperature creates the perfect conditions for bacteria to grow. Parasites also aren’t killed at this low of a temperature. Thus, you have to be very careful when cold smoking meat to preserve it.
Important
Certain at-risk people (like pregnant women, those with compromised immune systems, and the elderly) should never eat cold smoked meat.
To cold smoke meat safely:
- Only use fresh, high-quality meat.
- Before cold smoking, the meat must be cured, pickled, or cooked. Alternatively, cook the meat to an internal temperature of 165F before eating it.
- Make sure the temperature of the smoker remains consistent.
- Only cold smoke on cool days.
- You can start/stop the smoking process. However, the meat must be immediately refrigerated.
- Store the cured smoked meat away from moisture, heat, and light.
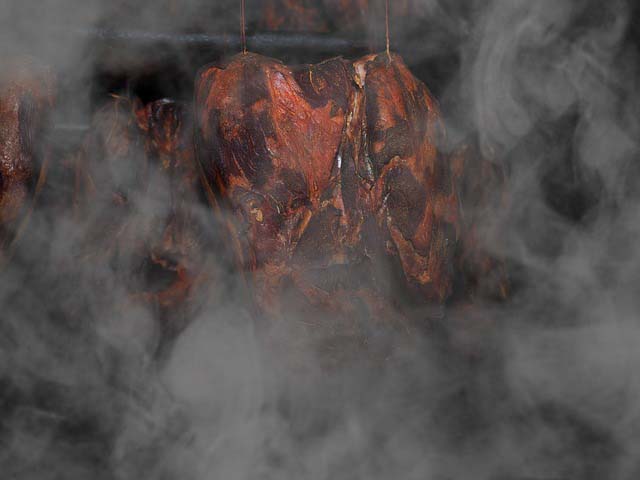
Hot Smoking
With hot smoking, the temperature is high enough to cook the meat – generally around 220F (though some recommend temperatures of 126F to 185F to prevent the meat from buckling).
Because the meat is cooked with hot smoking, it can be eaten safely right after smoking. There is no need to cure or cook it before smoking. However, beginners should still make sure they are checking the internal temperature of the meat.
According to USDA safety standards, meat should reach at least 165F to be safe to eat. More on this later .
Note that hot smoking does not preserve meat. You’ll need to keep hot smoked meat in the refrigerator and use it within a few days.
If you want to preserve meat that has been hot smoked, you can dehydrate it after smoking. Remember that the dehydrator will need to reach temperatures of at least 160F or bacteria could start to grow.
Types of Smokers (Vertical vs. Horizontal Smokers)
All smokers can be broken down into two basic types: vertical and horizontal. Both of these can be fueled by pellets, charcoal, or wood. Vertical smokers can also be powered by electricity or propane.
Summary
Most beginners should choose a vertical smoker. Once you’ve mastered it, you can always sell it and upgrade to a larger horizontal smoker.
Vertical Smokers
 Low learning curve
- Affordable
- Efficient
- More fuel options
 Annoying access
- Lose heat and smoke each time opened
- Can’t be used as a grill
Horizontal Smokers
- Can be used as a grill
- Hold a lot of food
- Easier access and use
- Uneven heating surface
- Higher learning curve
- Take up a lot of space
Vertical Smokers
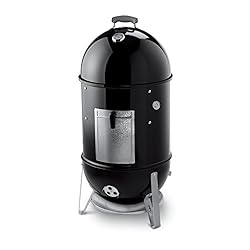
Vertical smokers are the easiest to use and generally are portable. If you are just getting started this is the type you want to get.
Vertical smokers are made up of three parts:
- Heat source at the bottom (charcoal, pellets, wood, gas, or electric hotplate)
- Water pan (for moisturizing the air and helping to regulate the heat)
- Smoking chamber (includes racks and hooks)
Using a vertical smoker is very easy. All you have to do is place your meat inside and fill the water pan. Then you put in the fuel and light the smoker. With electric and propane smokers, you don’t even have to do that. If the meat has a thermostat, then you set the desired temperature and are set.
There are several sub-types of vertical smokers that you can choose from. The following are all types of vertical smokers:
- Vertical water smoker
- Box smoker
- Smoker ovens
- Kamado grill
- Drum smoker
Pros
The best thing about vertical smokers is that they are easy to use and dependable. The heat source is right below the food, so you can regulate the temperature easily. There aren’t issues like one area being hotter than another, as is the case with horizontal smokers.
The design of vertical smokers also means that they are very efficient. A horizontal smoker will usually use 3-4 times as much fuel to do the same thing.
You’ll find plenty of affordable vertical smokers, including many heat source options. That makes vertical smokers great for newbies. Buy a quality smoker and you can always sell it when you want to upgrade to a horizontal smoker.
Cons
While vertical smokers are simple to use, they are sometimes annoying to use. Most (including drum smokers and vertical water smokers) can only be accessed from the top.
Let’s say you want to remove the bottom tray of food from the smoker. You’d have to lift out racks above it to access it.
There are some “oven smokers” and “box smokers” which have doors instead of lids. This solves the rack problem. However, they tend to be quite large and pricey.
Another thing to remember is that newbies tend to check their food, water pan, and wood too often. Each time you open a vertical smoker you let out heat. The heat then have to build up again, creating an inconsistent and inefficient environment.
Finally, vertical smokers are only smokers: you can’t grill on them. That means you’ll need a separate grill taking up space in your yard.
Recommended Vertical Smokers available on Amazon:
Horizontal (Offset Smokers)

Horizontal smokers have two parts. The first is a box where the heat source is located and burned. Typically pellets are used, though some models still use charcoal.
The box is attached to a longer barrel or box chamber with a small smokestack. You put food in this chamber, close the door, and heat the fuel.
When the fuel is heated, heat from the box enters the chamber through a vent. The heat and smoke then exit through the smokestack. The best offset smokers are designed so heat is distributed over the chamber equally. Otherwise, the area closest to the fuel box is the hottest.
Pros
There are three main benefits of a horizontal offset smoker versus a vertical smoker. First, offset smokers can also be used as grills. If you don’t already have a grill, this will save you the expense of buying one.
The other benefit is that offset smokers are a bit larger. If you are serious about smoking a lot of meat, then this is the way to go. There are some large vertical smokers but they tend to be much pricier than a large offset smoker.
Compared to a vertical drum-type smoker, offset smokers are a lot easier to use. They can be loaded in standing position. There’s no need to remove racks to access bottom racks. This is crucial if you plan on putting your meat in foil for part of the smoking time, or want to barbecue it while smoking.
Even tending the fuel box is easier with an offset smoker. You just open up the box to add fuel. This is also done in standing position; no need to crouch down to the bottom of the smoker!
Cons
While offset smokers are easier to load/unload, the uneven temperature can create problems for beginners.
The temperature difference from one side to the other of the smoker can be as much as 50 degrees. It takes a while to master the uneven smoking temperature to your advantage! You won’t have this uneven temperature with vertical smokers.
Expert smokers can actually utilize the uneven heating of offset smokers (such as by putting larger pieces of meat closer to the fuel box). However, there is still a high learning curve.
Bear in mind that offset smokers tend to be very large. They will take up a lot of space in your yard. Consider where you will put it in winter to keep it from rusting.
Recommended Offset Smoker on Amazon
Smoking Instructions and Process
Smoking food is part science and part art. There are a lot of aspects that you can adjust, such as using a different type of wood, temperature, and brines.
Wood for Smoking Meat
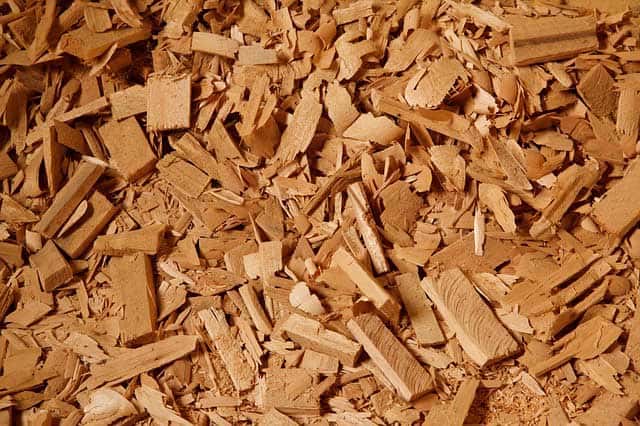
Many users swear by wood smoking because of the taste the wood imparts on the food. When smoking with wood, only use hardwoods such as maple, oat, apple or hickory. Never use soft woods or wood from needle-bearing trees. These woods have a lot of resin and will produce bad flavors.
Type of Wood
If you have a refined palate, then you’ll be able to pick up the different flavors that woods impart on the food.
As a general rule, “strong” flavors should go with strong foods. You wouldn’t want to use an intense-flavored wood with a delicate food like lobster. It would completely take over the lobster flavor. (The same goes with beer-food pairing. You wouldn’t drink a heavy or bitter beer with a light dish like soup or salad).
Also avoid strong-flavored woods with long-smoking meats. The taste can get too strong. You’ll want a mild wood like oak for long smoking times.
Here’s a cheat sheet with wood types, their flavors, and pairings.
*What works with chicken will usually work for other poultry
**What works for fish will usually work with veggies
***Don’t take this as gospel! Experiment with various combinations. You might find something you love.
****You can combine multiple types of wood. Go crazy!
| Type | Flavor | Use With |
|---|---|---|
| Alder | Light, sweet | Chicken, Seafood, Pork |
| Apple | Fruity and sweet | Chicken, Seafood, Pork |
| Cherry | Mildly sweet and fruity | Chicken, Seafood, Pork, Beef |
| Hickory | Strong and intense | Pork, Beef |
| Maple | Sweet and delicate | Chicken |
| Mesquite | Very pungent and strong | Pork, Beef |
| Oak | Subtle flavor | Chicken, Seafood, Pork |
| Peach | Light and sweet | Chicken, Pork |
| Pear | Light and sweet | Chicken, Pork |
| Pecan | A bit fruity and burns cool | Chicken, Pork, Beef |
| Walnut | Strong and slightly bitter | Pork, Beef |
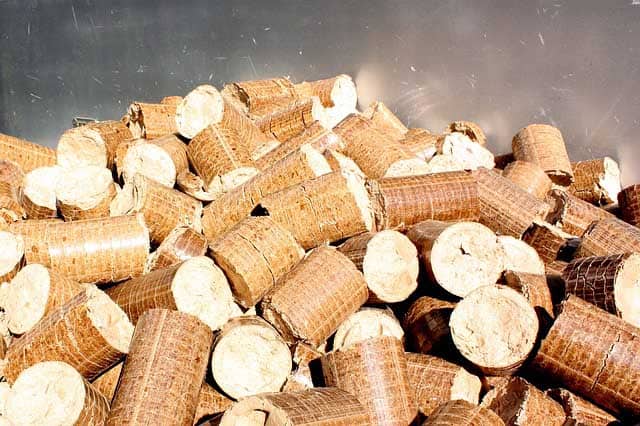
Chunks, Chips, or Pellets?
Unless you have a giant smokehouse, you aren’t going to be tossing entire logs into your smoker. It takes a very high temperature to burn logs and get good, consistent smoke.
Instead, you will be using smaller pieces of wood or pellets.
- Wood Chunks: These are easy to use and have a fairly quick burning time. This makes it easy to control the temperature.
- Wood Chips: These burn very quickly, so you’ll blow through a lot of them during a long smoke. However, they are the easiest to load and can be found at local hardware stores.
- Pellets: Pellet offset smokers are very popular because of how easy they are to use. Many pellet smokers even have automated systems so pellets are fed into the box when the thermostat signals.
Soaking the wood?
There is a lot of conflicting advice online about whether you should soak wood before putting it in a smoker.
Soaking wood is supposed to help it burn slower and create more smoke. However, some say that the benefit only lasts a few minutes. Unless you soaking large chunks of wood a full day before smoking, the water will only get into the outer surface of the wood. Once the water burns off, the wood burns quickly.
Further, wet wood is colder. So, it will reduce the fuel box temperature each time you add more wood.
I’d say to try it for yourself and see whether you think soaking the wood really makes a difference or not.
How much wood?
Remember that you aren’t trying to make huge clouds of smoke! Too much smoke will make the food taste bitter after about 1 hour of smoking. You only want a thin wisp of smoke, nearly invisible, going through the smoker.
The Meat
Ideally, you should choose meat which is of high quality to smoke. If you are already going to spend 10 hours smoking, you don’t want to waste the effort on discount chicken! Look for beef which is free range and grass-fed. It really does taste better.
However, you don’t have to choose the most expensive cuts of meat. Because smoking tenderizes meat, you can use fattier, tough cuts of meat and get great results. This is why smoking was invented!
The most popular meats to smoke are:
- Beef brisket
- Pork Shoulder
- Ribs
Trimming Fat
A common misconception is that you should leave fat on meat when smoking. The idea is that the fat will start to melt during smoking and absorb into the meat.
However, fat doesn’t absorb into meat easily. Instead, it will just melt off and make a bit of a mess. Beginners should ideally trim the fat off of the meat before smoking.
Brining
Brining involves soaking the meat in salty water. You can also add herbs, spices, molasses, honey, or other flavors to the brine to impart flavor.
The salt is important for tenderizing the meat. It also makes the meat juicer because the salt causes a chemical reaction which makes the meat proteins more able to retain water.
It takes a while for brine to penetrate into meat. So, you’ll want to soak your meat approximately 10 to 24 hours before smoking.
You’ll need about ½ tsp kosher salt per pound of meat (or ¼ tsp table salt). The amount of water varies depending on how the meat is cut.
Dry Rubs
Dry rubs are another way to impart flavor when smoking meat. Unlike with brines, you aren’t trying to get the rub into the center of the meat. It only needs to be on the surface. So, you can do a dry rub immediately before putting it in the smoker.
BBQ Sauces
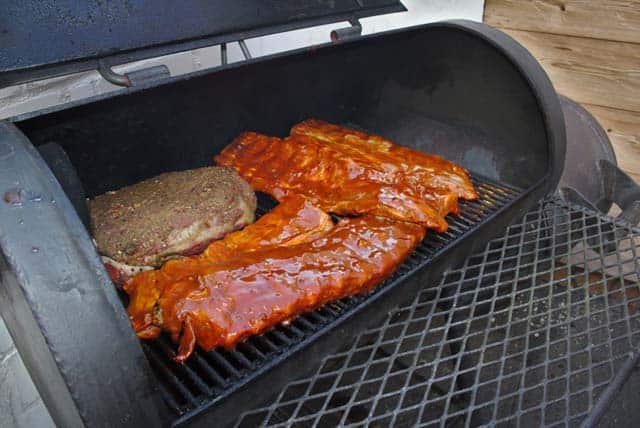
Meat can be simultaneously smoked and barbecued. You’ll need to apply any BBQ sauce near the end of smoking though – usually the last 15 or 20 minutes.
Smoking Temperature and Time
When smoking meat, you want a low temperature for a very long time. High temperatures will cause the collagen in the meat will get hard and stingy. Likewise, high temperatures will cause the cell walls of the meat to burst. They won’t be able to retain moisture anymore and will be dry.
By contrast, when meat is smoked “low and slow” the collagen will dissolve into the meat. You’ll get a succulent smoky meat which practically melts in your mouth.
Safety Issues
Meat can contain all sorts of parasites or bacteria. The most notorious ones are Salmonella and E. Coli, but others may be present too.
To make meat safe to eat, the USDA recommends cooking meat to the following internal temperatures (measured with a meat thermometer):
- Chicken and poultry: 165F
- Beef, pork, lamb, and veal: 145F
- Ground meat: 160F
- Combination dishes: 165F
To get meat to this internal temperature, you’ll need to make the smoker temperature higher. Recommendations vary, but the ideal temperature of a smoker is around 180F to 220F.
Bear in mind that the USDA recommendations are for instantly killing bacteria. It is also possible to smoke meat at lower temperatures safely so long as you smoke it for a long time (which is usually the case with smoking anyway).
For example, you can pasteurize beef at 135F. It will just take at least 37 minutes at this internal temperature.
If you have a good smoker, the “low and slow” method is safe. However, I’d still recommend that beginners follow the USDA recommendations and use a thermometer. It’s better to be safe than sorry!
Smoking Temperature and Time Cheat Sheet
How long it will take to smoke meat depends on three main factors:
- Type of meat
- Thickness of cut
- Temperature
Some meats can be done in just a few hours. Others – such as whole hogs or ducks – can take all day. Fruits and vegetables are generally done in an hour or two.
Below is a cheat sheet with smoking temperatures and times for meat.
| Meat Type | Temperature | Smoking Time |
|---|---|---|
| Brisket | 250F | 1.5 hours per pound |
| Beef Ribs | 225F | 3-4 hours |
| Prime Rib | 250F | 15 minutes per pound |
| Pork Butt | 225F | 1.5 hours per pound |
| Pork Sausage | 250F | 1-3 hours |
| Salmon | 200F | 3-4 hours |
| Ham | 250F | 1.5 hours per pound |
| Chicken Breast | 350F | 1-2 hours |
| Baby Back Ribs | 240F | 5-6 hours |
| Chuck Roast | 250F | 1 hour per pound |
| Jerky | 140F | 3-4 hours |
| Rabbit | 200F | 3.5-4 hours |
| Veal Chops | 200F | 1.5 hours per pound |
| Lamb Leg | 225F | 4-8 hours |
| Turkey Leg | 350F | 2-3 hours |
| Sirloin Tips | 250F | 30 minutes per pound |
Smoking Tips
Here are some random tips that will help you master the art of smoking food.
Checking the Meat
When you first start smoking meat, you will be tempted to constantly check the meat to see whether it is done. You’ll need to resist this temptation. Each time you open the smoker, the temperature will decrease and fluctuate.
Trust me: Your meat won’t get overdone or burnt. It takes a long time to smoke meat!
Only open the smoker if you must, such as for checking water, filling wood chips, or checking the internal temperature.
Don’t Flip the Meat
This is a common rookie mistake. There is absolutely no need to flip the meat. You’ll only be allowing heat to escape from the smoker while it’s open.
Use Two Thermometers
To make sure meat is being properly cooked, you’ll need to have two thermometers. The first one measures the temperature inside the actual smoker. The second smoker is used for measuring the internal temperature of the meat.
Is It Safe to Eat?
A lot of newbies to smoking are paranoid about whether the meat is done. If you’ve smoked the meat for three hours, it should be safe to eat. To play it safe, check the internal temperature with a meat thermometer.
If you are still paranoid, you can smoke pre-cooked meat. Then you won’t have to worry about internal temperature at all.
Wrap Meat in Foil
When meat gets to a higher temperature, it starts to dry out. To prevent the meat from drying out, some pitmasters like to wrap it in foil for part of the time.
Use the 3-2-1 rule for wrapping in foil:
- Let the meat smoke for half the cooking time
- Wrap the meat in foil and let it cook for 1/3 of the total cooking time
- Unwrap the meat and put it back on the smoker for the remainder of the smoking time.
So, with a 6-hour smoke, you’d do:
- 3 hours of smoking
- 2 hours wrapped in foil
- 1 hour without foil
DON’T Bring Meat to Room Temperature before Smoking
A common myth is that you should let meat come to room temperature before smoking it. The idea is that doing this will allow the meat to cook more evenly and brown better.
Realistically, bringing meat to room temperature before smoking doesn’t accomplish anything. Meat isn’t going to sear until a lot of its moisture has evaporated, so the starting temperature doesn’t matter.
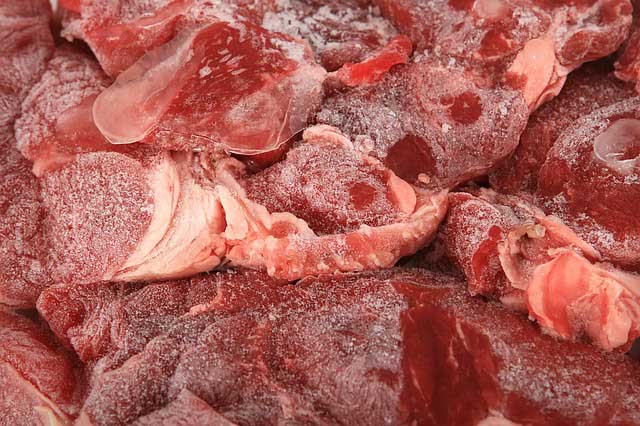
However, you do NOT want to use frozen meat in a smoker. Frozen meat should be completely thawed beforehand.
Barbecuing and Smoking Meat at the Same Time
Yes, you can have smoked BBQ. There’s no point in putting the sauce on too early though.
First let the meat smoke for the recommended cooking time. Then take out the meat, slather on sauce, and put it back in the smoker for 15-20 minutes.

I’ve started using CBD gummies , and they’ve made a clear-cut difference in my routine. They’re submissive to turn to account, style distinguished, and require a comprehensible modus operandi to incorporate CBD into my day. I’ve found they support me relax and improve my drop after a crave period, which has been a huge benefit. The in keeping CBD dosage in each gummy is a noteworthy plus in return managing intake. If you’re making allowance for CBD, gummies are an prime election to start with—legitimate draw up sure you choose a trustworthy brand looking for the greatest results!