As a way of preserving food, water bath canning has been around for centuries. It was originally used to preserve food for the military. Soldiers then got used to canned food and started eating it when they returned home.
At various points in history (such as during WWII), the government even encouraged people to can food at home. You can bet that all of our grandparents canned their own food.
Yet, because of how readily available canned foods are today, we’ve mostly lost the knowledge of how to do water bath canning (along with many other skills our grandparents knew).
It’s not all lost, though. Many people are learning how to do canning and increase their self-sufficiency. Water bath canning is a great place to start because it’s easy, and no special equipment is necessary.
Is Water Bath Canning Safe?
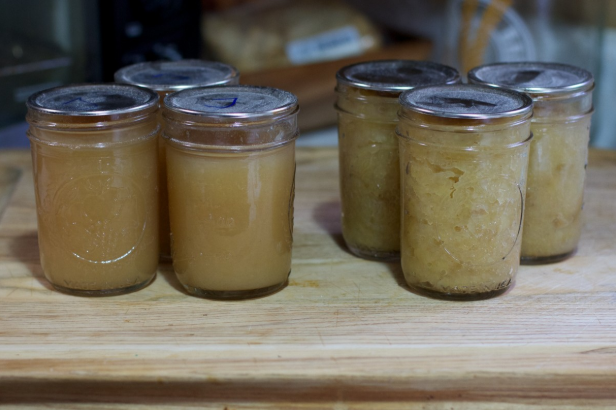
Water bath canning is a process of putting food into a clean, sealed jar. The jar is then placed in a pot filled with water. The water is brought to a boil.
The heat from the boiling water kills microorganisms and enzymes, which would cause the food to spoil. The heat also forces air out of the jar. As the jar contents cool, the lid gets sucked down to make a vacuum seal. The vacuum seal prevents air from getting back into the jar.
Here’s where things can get dangerous:
At sea level, water will boil at 212F (100C). This is not hot enough to kill deadly spores from botulism bacteria. This bacteria is found on low-acid foods. So, if you are canning low-acid foods (such as meat or veggies), water bath canning simply isn’t safe.
Likewise, at high elevations, water boils at a lower temperature. This could mean the food isn’t heated to a high enough temperature to kill bacteria.
What’s the solution?
For certain foods or at high elevations, you will need to use pressure canning instead. Pressure canning is similar to water bath canning but uses a sealed lid. The lid traps steam in the pot, causing pressure to build up.
Under pressure, the water will get to a higher temperature. Most pressure canners will reach at least 240F, which will kill any microorganisms in the food, including botulism spores.
Read our guide to pressure canning here.
What Foods Can Be Canned with the Water Bath Method?
High-acid foods can be safely preserved with water bath canning. These include most fruits.
Safe List
- Citrus fruits
- Berries
- Apples
- Peaches
- Pears
- Plums
- Apricots
- Pickles
- Jams
- Jellies
- Fruit butter
- Tomatoes packed with an acid
- Figs packed with an acid
- Sauces (follow recipes for water bath canning)
- Foods packed in acids (such as pickles, relishes, chutneys, and many other condiments)
Not Safe for Water Bath Canning (Use Pressure Canning)
- Meats
- Poultry
- Seafood
- All dairy products
- Greens
- Pumpkin
- Carrots
- Asparagus
- Beans
- Peas
- Corn
- Beets
- Peppers
- Tomatoes
- Figs
- All other vegetables
- Any fatty food or recipe which contains oil
What about canning salsa and marinara?
Salsas and marinara often use a combination of low-acid and high-acid foods. Depending on the recipe, it may or may not be safe for water bath canning.
If you want to use the water bath canning method for these products, you will need to find recipes specifically for water bath canning. Follow the recipe exactly! Changing the amount of sugar or acid could change the acidity and make it unsafe.
Can I add vinegar or other acids to make veggies safe?
In general, NO. Simply adding vinegar to your veggies doesn’t guarantee that they will be acidic enough to prevent botulism.
However, if you use proper pickling methods, then low-acid foods can be made acidic enough to be water-bath canned. Make sure you follow a recipe that was designed for water bath canning.
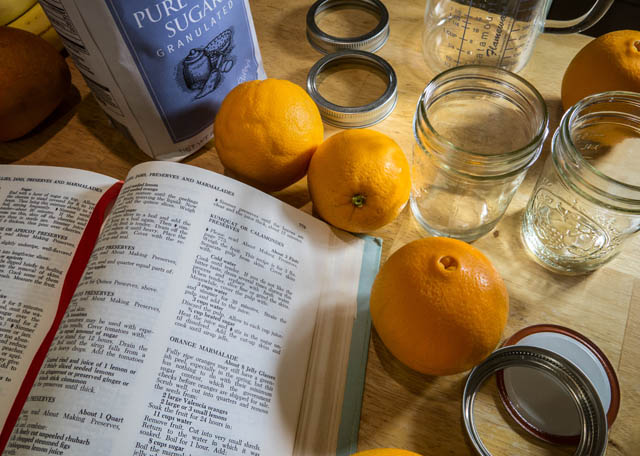
This book on Amazon has good instructions about how to pickle foods for canning.
You also need to ensure the vinegar you use has at least 5% acidity. The vinegar you get in the store has only 4% or lower acidity.
What about canning oily foods like pesto?
Oil can go rancid very quickly – even when properly canned. So, it is generally not safe to water bath anything that contains oil. Even when pressure canning, you will still want to limit oil and fat. For example, only can lean meats.
Play It Safe!
If you aren’t sure whether it is safe to water bath can a food, then don’t. Use pressure canning instead. Yes, this does require you to get a special pressure canner. However, some models aren’t expensive and are easy to use. You’ll have peace of mind plus be able to preserve many more types of food.
Read more about what foods can be canned in a water bath.
Equipment for Water Bath Canning
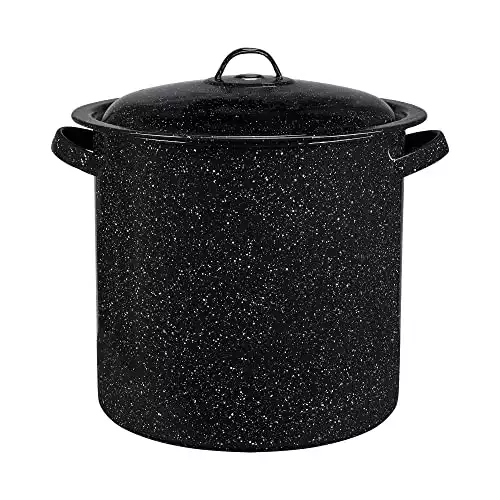
1. Giant, Deep Pot
For water bath canning, you need to cover the jars of food in water completely. There should be at least 2 inches of water above the top of the jars. So, you’ll need a larger pot than the jars you intend to use.

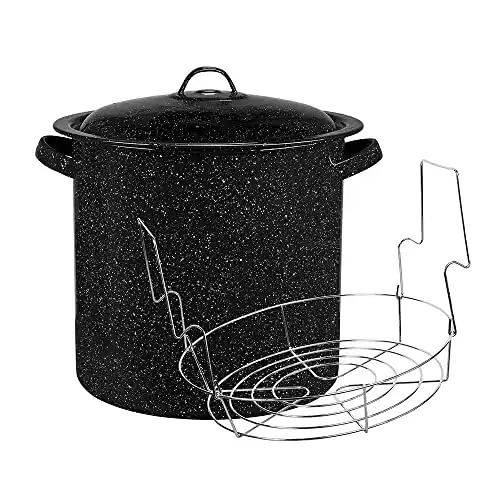
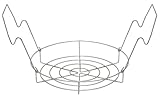
2. Canning Rack
Racks have three primary purposes:
- They elevate the jars off the bottom of the canner. You don’t want your canning jars to be in direct contact with the bottom of the pot, or they could break.
- They hold the jars in place so the water can get around them.
- They make it easier to lower/lift the jars into the water without burning yourself.
It’s straightforward to make your own canning rack. It can be as simple as putting a rolled-up towel at the bottom of the pot. You can also tie together canning screw lids and put them in the bottom of the pot.
However, these DIY methods usually only elevate the jars. They won’t keep jars in place nor help you lower/lift jars.
Recommended: Victorio Stainless Steel Canning Rack and Lifter

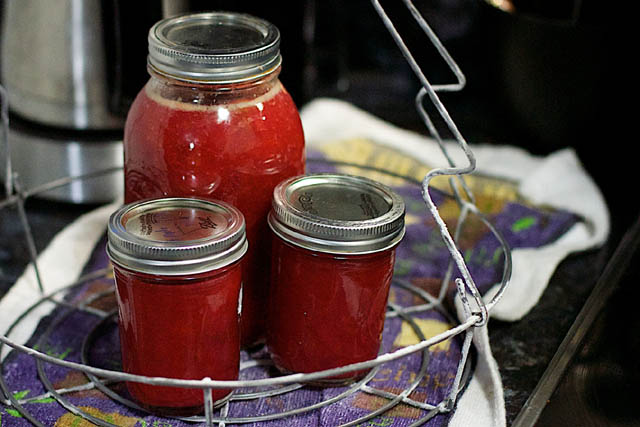
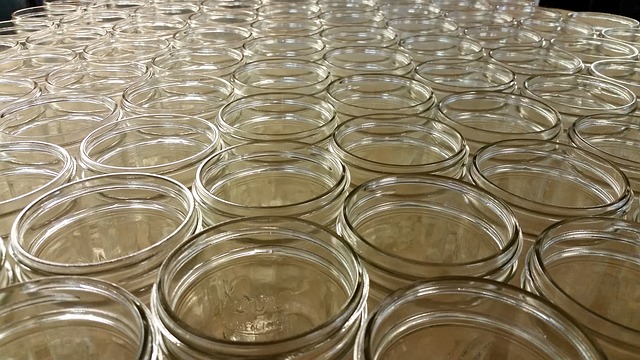
3. Mason Jars
It is NOT safe to use everyday jars (such as old jars from spaghetti sauce) for canning. These jars don’t have enough surface to get a good seal. They also aren’t very strong and can break during the canning process.
Instead, you will need to get some Mason jars. These are easy to find online. They are typically available in quart, pint, and half-pint sizes.
Tip: I prefer Mason jars that go straight up (as opposed to ball-shaped jars). These are easier to clean. Also, choose ones with wide mouths so you can get your hand inside to scrape out any remaining bits of food.
Recommended: Ball Glass Jars with Lids and Screw Tops
4. Canning Lids and Screw Tops
Canning lids have two parts: a flat lid with a sealing compound around the rim and a screw band. The flat lid goes on the jar first. The screw band holds it in place.
The screw band can be reused. It is generally advised not to reuse the flat lid. It often gets indented and may not be able to create a strong seal. The sealing compound also gets indented and squished, so it won’t make a seal the second time around. Read more about reusing canning lids.
When putting on a canning lid, the screw band doesn’t need to be tightened very forcefully. The seal needs to be tight but also have enough give so air can escape.
*When removing jars from the canner, never tighten the screw band further. This can break the seal.
Recommended: Ball Wide Mouth Canning Lids Pack
5. Jar Lifters
If your canning rack doesn’t have a lifter, you’ll want to get a jar lifter. This allows you to lift out the hot jars without touching them.
Recommended: Ball Secure-Grip Jar Lifter
Water Bath Canning Instructions
There are two ways to do water bath canning: hot pack or cold pack. The instructions for water bath canning are slightly different depending on your chosen method.
Hot Pack Canning Instructions
With this method, you preheat the food, such as by cooking it in syrup or water. The food is simmered for 2-5 minutes and kept near boiling temperature as it is poured into the jars. It will be loosely packed in the jar.
The hot packing method is preferred, especially with water bath canning, as it is better at removing air from the jar. Hot packing also helps pre-shrink foods so more food can fit in a jar.
Step 1: Preheat the jars
You need to preheat the jars to prevent them from breaking when they come in contact with hot water or food.
The easiest way to preheat the jars is to submerge them in hot water. Or you can put them through the dishwasher and take them out while still warm.
Step 2: Prepare the Food
Heat/cook the food according to the recipe. While it is still hot, pour it into the preheated jars. Leave ¼ to ½ inch of headspace in the jar.
Step 3: Put Lids and Screw Tops on Jars
Be sure that the lids are centered. Then put on the screw tops. It doesn’t have to be very tight.
Step 4: Add Filled Jars to Boiling Water
This is where it is helpful to have a lifting rack or jar lifter. Make sure there is at least 2 inches of water above the jars. There also needs to be enough room around the jars so the water can circulate around them.
Step 5: Process
Only start counting the processing time from when the water is at a rolling boil. Put a lid on the pot. Process for at least 10 minutes. Add an extra minute of processing time for each 1000 feet above sea level.
Step 6: Removing Jars
When the processing time is up, remove the lid from the canner. Carefully remove the jars from the canner. Let them cool uncovered on a rack. Once they reach room temperature, label them with the contents and date.
Raw Pack Canning Instructions
To raw pack foods for canning, the food is packed very tightly into the jars without heating/cooking it first. Unfortunately, raw packing often means that foods will float to the top and air will get trapped around them. This will eventually lead to discoloration. Thus, raw packing is better suited for pressure canning.
Step 1: Put Food in Preheated Jars
You’ll need to pack the food in tightly.
Step 2: Pour Liquid into Jars
Boil the packing liquid you will be using (such as water, juice or brine). Then pour this over the food.
Step 3: Put Lids and Screw Tops on Jars
Be sure that the lids are centered. Then put on the screw tops. It doesn’t have to be very tight.
Step 4: Put Jars in Canner and Cover with Water
Don’t forget that you need to use a rack so the jars aren’t in contact with the bottom of the pot. Cover them with at least 2 inches of water. There also needs to be enough room around the jars so the water can circulate around them. Bring the water to a boil. Put lid on the pot.
Step 5: Process
Only start counting the processing time once the water is boiling. Process for at least 10 minutes. Add an extra minute of processing time for each 1000 feet above sea level.
Step 6: Removing Jars
When the processing time is up, remove the lid from the canner. Carefully remove the jars from the canner. Let them cool uncovered on a rack. Once they reach room temperature, label them with the contents and date.
Checking Jar Seals
When you remove the jars from the canner, the screw band might be a bit loose. This is entirely normal. Do NOT attempt to retighten the screw lid. It can cause the lid seal to break.
Allow the jars to cool for 12-24 hours. Once they are cooled, remove the screw bands and test the lid seal. This can be done by pressing the middle of the lid with your finger. If the top pops up, then it isn’t sealed correctly.
Alternatively, you can hold the jar at eye level and look at the lid. It should be slightly concave, so it curves down towards the jar.
https://www.naturalblaze.com/2019/05/prepping-water-bath-canning-with-vinegar.html
https://extension.colostate.edu/topic-areas/nutrition-food-safety-health/making-pickled-peppers-at-home-9-314/
https://nchfp.uga.edu/questions/FAQ_canning.html#31
https://www.healthycanning.com/fat-and-oil-in-home-canning/
https://extension.umn.edu/preserving-and-preparing/canning-quick-reference-chart
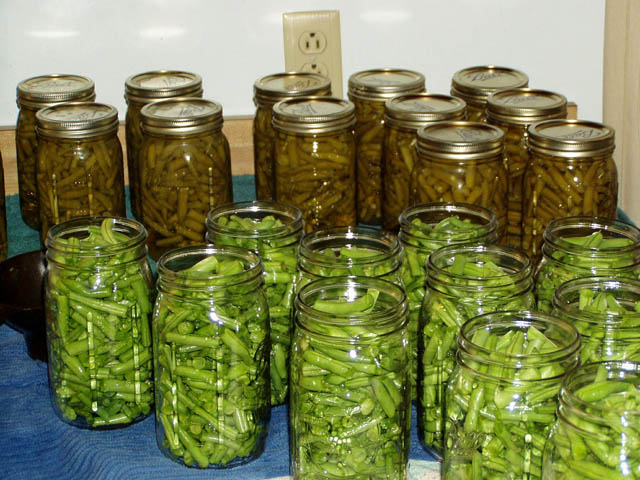
It alarms me to see the photo of all those still open jars of green beans right under the heading for WATER BATH canning! Green beans are low acid vegetables and should NEVER be done in a waterbath UNLESS they are being PICKLED with a proper recipe. Plain green beans should be canned in a pressure canner. Botulism can result if green beans are waterbath canned.!!
Good catch. I’ve added a caption to the image saying that vinegar should be used.
Can you can milk ? How would you do that ? What about butter ?
Thanks .
Sandra DeWys
Home canner
There’s a lot of controversy about whether canning milk is safe or not. Obviously people did it in the past though (not that everything people did in the past was safe!). If you do want to do it, pressure canning will certainly be safer than water bath canning.
how can I save vegetables if I don’t have a pressure cooker and only have a small freezer
Patty, water bath canning for acidic or appropriate foods, or you can dehydrate many vegetables with an inexpensive dehydrator.
It’s not too difficult to make your own dehydrator. You can also read about root cellars here https://www.primalsurvivor.net/root-cellars/
How do you water bath fresh potatoes ?
Because they are low-acid, potatoes should be pressure canned and NOT water bath canned.
Doesn’t water go into the jars since there has to be two inches of water above jars? I see bubbles coming up around the seals when I put water over the jars..
Water shouldn’t be going into the jars. You don’t (and shouldn’t) even need to screw the lids down that tightly. Just screw enough until you feel some resistance. It’s normal for air bubbles to get trapped in the jar while you fill them. It’s actually something you WANT to see. These air bubbles start to escape out of the lid when the jars go into the canner. Remember that the heat will make the food and air inside the jars expand – hence why it’s a common newbie mistake to overfill the jars and have food escape into the canning water.
Why can’t you water bath canned sweet potatoes? How did they do it back in the old days ?
Botulism is more likely to be found on low-acid foods like sweet potatoes. So, while they can be water-bath canned (and I’m sure people in the old days did), it’s a higher risk. Botulism is no joke, so it’s best to play it safe and only use pressure canning for things like sweet potatoes.
If you don’t have a pressure canner, you could try lacto-fermenting the sweet potatoes. They come out really yummy pickled. 😀 Once they’ve been pickled with lacto-fermentation, you could water-bath can them (the pickling makes them high-acid and thus safer against botulism). But it will save you a step to just get a pressure canner.