
A good shelter in the woods will protect you from the elements and trap heat inside to keep you warm.
But, even if you made the best shelter in the world, you will still get cold if you lie directly on the hard ground. This is why you need a bed for your survival shelter too.
If the conditions aren’t too cold or wet, your “survival bed” can be a pile of leaves and other debris. But, if it is freezing, you will need to lift your body off the ground with a raised survival bed.
Below are instructions for making a raised bushcraft bed with absolutely no supplies.
1. Hang Your Shelter Ridgepole
You will need to make a shelter around your bed to keep you warm. I like to hang the shelter’s ridgepole (main support beam) before making the bed.
This way, I have a reference point for how to size the bed in relation to the shelter.
2. Find Two Long Branches

These branches are the rails for your bed frame. You’ll need to place them shoulder-width apart on the ground.
The ground wasn’t completely flat where I was making my shelter. So, I used a thicker branch on the lower side to even out the height difference.
*Can’t find branches long enough? Arrange several shorter branches along each other.
3. Fill the Rails with Debris
")
Using a “broom” made of twiggy sticks, sweep leaves and other debris between the bed rails. This will give you an extra layer of insulation below your body, preventing radiative heat loss (body heat lost to air below).
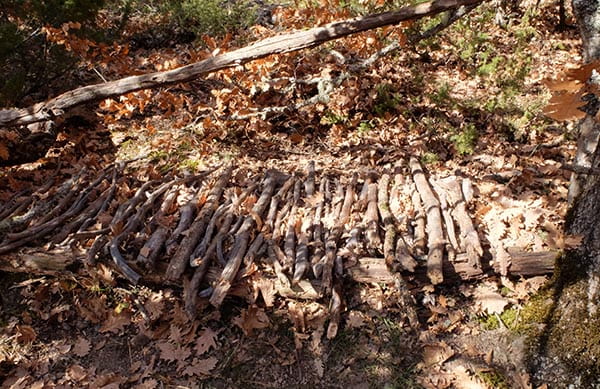
4. Lay Branches Sideways Across the Rails

These are the “slats” for your bedframe. The branches should be at least as thick as your thumb. These are what you will lay on.
They will lift your body off the ground. You’ll need a lot of branches to hold your body weight!
5. Test Your Bed
If it breaks, add more branches across the rails. Also, adjust the position of any branches in case they are poking you or are uncomfortable.
6. Add More Debris On Top

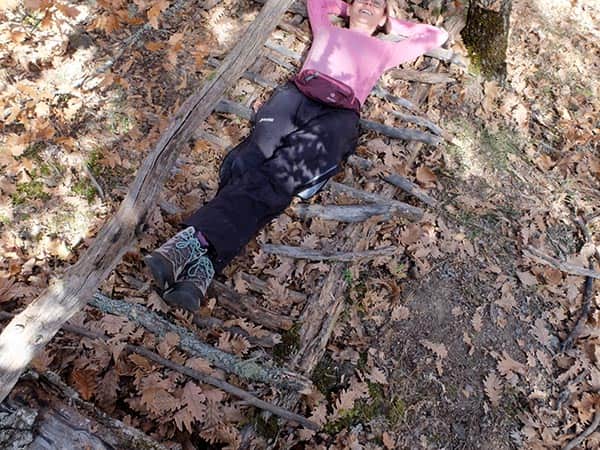
Sweep up more debris and put it on top of the bed. This layer makes the bed more comfortable. It also helps keep you warm by adding an extra layer of insulation. When it’s time to sleep, you’ll pile even more leaves on top of yourself to make a natural “sleeping bag” or blanket.
In the picture above, it looks like I’m lying on a pile of leaves, but I’m nicely lifted off the ground because of the bed rails.
7. Finish Your Shelter

Now that bed is finished, you can build a shelter around it. I made an A-frame debris shelter, which also requires absolutely no supplies.
If you have a rope or a tarp, you’ll have many more options for survival shelters.

Personally, I’m just trying to make these Bushcraft creations for fun, a good place to hide out for hide ‘n seek, and to sleep in. Since I’m only 10, this is a great starting point! However, if you’re more advanced, this isn’t a great long-term place. Still love it, though!
Well, you did an excellent job. You should be proud of yourself for doing something most adults don’t know how to do.
When I was your age, my sisters and I would make forts in the woods behind our house. Our parents didn’t know – we didn’t tell them. It was so fun.
Keep it up. Maybe one day you’ll build yourself a log cabin.
So neat to see one of my builds on here!