Whole grains are generally easier to store long-term than flour. However, if you want to use whole grains during an emergency for things like making bread, you will need to have a way to grind them into flour. That’s why your preps also need to include a grain mill.
Here’s what you need to know to choose a suitable grain mill for prepping, including burr types and motorization options.
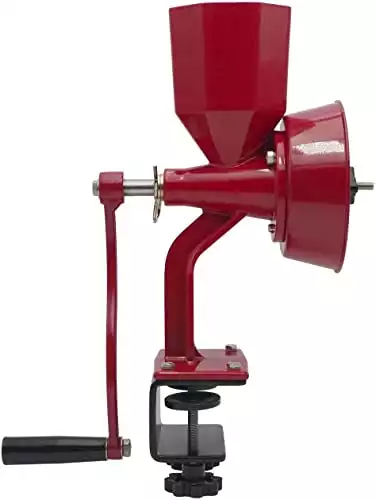 Wondermill Junior Deluxe
It is built to last, versatile, easy to motorize, and not nearly as expensive as the competitors.
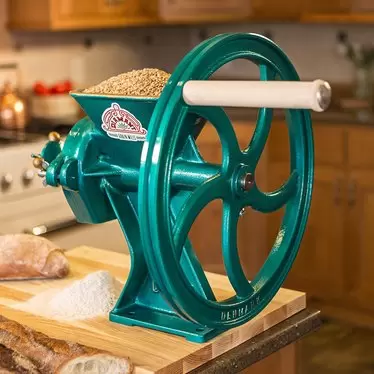
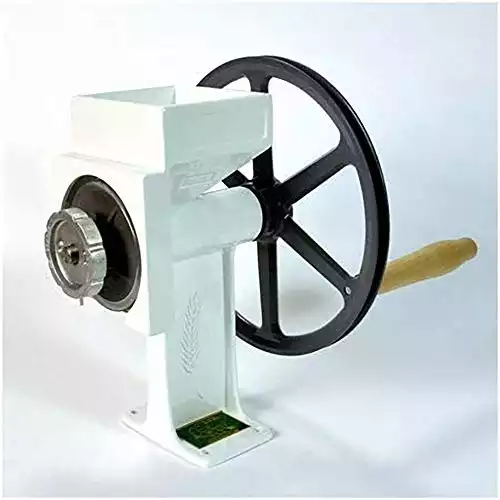 Country Living Hand Grain Mill
This grain mill is famous for its solid build, engineering, and ability to grind ultra-fine flour. It’s expensive, but the price matches the quality.
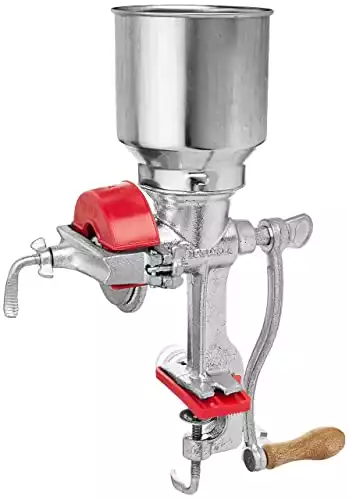 Victoria Manual High Hopper Grain Grinder
It’s the cheapest grain mill you can find, which still reliably does what it is supposed to, albeit with a lot of effort.
Best Manual Grain Mills for Prepping
Country Living Mill
Verdict: Fantastic mill, which is durable and easy to use. The quality makes it worth the price but be warned that the optional accessories, including the motorization kit, quickly add to the total cost.
Key Features:
- Burr type: Steel
- Materials: Cast aluminum alloy body; carbon steel burrs
- Motorization options: Electricity conversion kit
- Wet/oily grains: Yes
- Flywheel: Yes
- Cost: Check on Amazon
Materials and Build
The Country Living Mill has a very durable cast aluminum body. You can tell that it is made to last. Even things you can’t see are made from high-quality materials, like the dual-sealed ball bearings. It is made in the USA and has a lifetime warranty on all parts but the grinding plates.
The mill weighs about 18lbs, so it’s too heavy to move.
The hopper will hold about 4.5 cups of grain. Cleaning the Country Living Mill is straightforward: remove the fineness adjustment knob and outer plate to get to the grinding chamber. Otherwise, there’s not much maintenance involved in this grain mill.
What Can It Mill?
The Country Living Mill will grind almost all hard and soft grains, beans, and legumes. It also can mill some oily grains. However, it does tend to get clogged if you put oily grains in it. This is not a mill for peanut butter.
The brand does make an accessory for making nut butters, but it is very pricey. You could buy a dedicated peanut butter machine for the same price as the attachment.
Ease of Use
Compared to most other hand mills, the County Living Mill is very easy to use. You can adjust the texture setting from very fine to coarse.
There is a large flywheel which makes milling easier. It takes longer to grind grains into flour with the Country Living Mill than with competitors. However, it takes less effort. So, it’s a tradeoff between speed and physical energy required. You can buy a “Power Bar” accessory that extends the handle’s length and makes it even easier to mill grains.
One downside of the Country Living Mill is that it is a bit messy. It tends to spray flour around if you don’t use the special flour bin. The flour bin is sold separately, though, and adds to the (already-expensive) cost of the mill.
Motorization Options
There is a motorization kit for the Country Living Mill you can buy, which converts it to electricity. This is incredibly convenient, but the kit is costly.
It is possible to DIY for much cheaper, though. Many people have converted it to electricity with cheap motors they bought online. Connecting it to a stationary bicycle or even a treadle sewing machine base is also relatively easy.
Cost
As one user said,
“Country Living mills are super pricy but nice. The difference between these and lower-end mills is obvious when you use them.”
However, if you want to motorize your mill, the Country Living Mill might not be worth it. The motorization kit is costly. For the same price, you could buy an electric grain mill and a manual grain mill.
Pros
- Good price for the quality
- Motorization kit available
- Lots of accessories
- Built to withstand regular use
- Super-fine to coarse flour
- Lifetime warranty
Cons
- Expensive
- Doesn’t mill oily foods like nuts and seeds
- Need separate accessory for peanut butter
- Accessories are expensive
- Sprays some flour
Wondermill Jr. Deluxe Mill
Verdict: It’s not as good as the Country Living Mill, but it costs significantly less, mills more things, and has many motorization options.
Key Features:
- Burr type: Stone and steel
- Materials: Cast aluminum body; stainless steel and ceramic-corundum burrs
- Motorization options: Electricity conversion kit, drill bit attachment, sprocket attachment, or pulley attachment
- Wet/oily grains: Yes
- Flywheel: No
- Cost: Check on Amazon
Materials and Build
The Wondermill Jr. Deluxe is made from cast aluminum, and its hopper holds a bit more than 4 cups of grains.
It comes with two sets of burr plates: stone and stainless steel. The “stone” is ceramic-corundum, which is less porous, less prone to breaking, and easier to clean.
This is a quality-made grain mill, but not as good as the Country Living Mill. For example, the bearings on the CLM are much better than the bushing bearings on the Wondermill Jr. Likewise, the CLM carbon burrs will hold up better than stainless steel. There is a Limited Lifetime Warranty, which means the mill is covered for 6 years.
Note that some people complained about the powder finish flaking off the mill. The finish is FDA-approved for food contact, but it’s still not pleasant to have flakes in your flour.
What Can It Mill?
One significant benefit of the Wondermill Jr. Deluxe mill is that it can grind many things.
When it comes to flour, the Wondermill theoretically can produce a very-fine flour, but it does best with mid-level fineness. You might be disappointed with the mill if you are very picky about your flour fineness.
As for oily foods, the Wondermill Jr. does well enough with oily grains and most seeds. It comes with a separate auger for nut butters. However, don’t expect to get a creamy peanut butter with it! The nut butters end up pretty chunky.
Ease of Use
When it comes to speed, the Wondermill Jr. Deluxe produces more flour per minute than virtually any other hand mill. However, the tradeoff is that it is more difficult to turn. There is no flywheel, so your arms will get tired fairly quickly.
A cool thing about the hand mill is that it has a “flour guide,” which helps reduce spray. This makes it less messy to use than other hand-grain mills.
Motorization Options
For motorization options, the Wondermill Jr. Deluxe excels. You can buy a complete motorization kit from the company to convert it to electricity, but it is costly. There are cheaper options available, though, including
- Drill bit attachment: Almost any drill will work with soft grains, though you’ll need a more robust drill for hard grains
- Motorizing pulley: Lets you hook up the mill to a bike or motor
- Sprocket attachment: For hooking up the mill to a bike
Cost
The Wondermill Jr. Deluxe is also not a cheap grain mill and is probably slightly overpriced for the quality you get. However, motorization accessories are reasonably cheap, so the overall cost of a manual-motorized grain mill ends up being fair.
Pros
- Lots of motorization options
- Comes with stone and steel burrs
- Mills oily foods
- Faster than most other manual mills
Cons
- Pricey
- Finish may flake off
- Not great at milling very-fine flour
- Nut butters end up chunky
Diamant Grain Mill
Verdict: One of the best manual grain mills available. It’s just really expensive!
Key Features:
- Burr type: Steel
- Materials: Cast iron with iron/steel burr plates
- Motorization options: V-belt
- Wet/oily grains: Yes
- Flywheel: Yes
- Cost: Check on Lehmans (note this link goes to the home page from where you will need to search for “Diamant”)
Materials and Build
The Diamant Grain Mill is a massive piece of craftsmanship. It weighs 56lbs and must be bolted to a table; it cannot be clamped like most other grain mills. The weight is a sign of the quality materials, though. It is made out of solid cast iron. The flywheel is also cast iron and has a long wooden handle. The burr plates are a mixture of iron and steel.
Even the inner parts of the Diamant mill are high-quality. The bearings are sealed, so you don’t have to worry about oiling the mill ever. There is a “pre-grinding” system that other grain mills don’t have. There are some “teeth” that mash the grain before it gets to the auger. The auger itself is an impressive piece of iron and much larger than you’d see in other grain mills.
What Will It Mill?
You can mill any grain with the Diamant mill. It doesn’t grind peanuts, nuts, or seeds into butter, though, and might clog with some oily spices. However, it does a fantastic job of grinding beans and legumes. Unlike other mills, which only grind these into coarse flour, you can get a very fine bean powder.
Ease of Use
The flywheel on the Diamant mill is massive and has a long handle. This makes it very fast and easy to mill flour without exerting yourself. Expect about 15lbs of bread flour per hour. Adjusting the coarseness is very fast and easy, and there’s no need to swap out the burr plates.
The interior engineering of the Diamant mill also makes it easier to use: the pre-grinding teeth and massive auger do a lot of the work for you. The hopper has a force-feeding mechanism. This makes it easier to mill oily grains, nuts, and seeds without clogging the plates.
Motorization Options
The flywheel of the Diamant Grain Mill has a groove for a V-belt. They recommend using a motor with a horsepower of at least 1400 rpm and a motor pulley of 3 ½ inches. You’ll need to use approximately 300 rpm on the mill, giving you approximately 40lbs of flour per hour.
Cost
The Diamant grain mill is very expensive. It’s not a prepping mill that you get “just in case.” Instead, it’s a mill that you can regularly use for the rest of your life and will be functional during emergencies.
Pros
- Incredible quality
- Lasts lifetimes
- Little physical effort required
- Motorization option
- Can produce very fine flour
Cons
- Very expensive
- Must be bolted to table
- Not for nuts
Victoria Manual Hopper
Verdict: The cheapest grain mill which is still functional
Key Features:
- Burr type: Steel
- Materials: Tin-coated cast iron body; white iron burr plates
- Motorization options: DIY
- Wet/oily grains: Yes
- Flywheel: No
- Cost: Check on Amazon
Materials and Build
The Victoria Manual Hopper is made from cast iron with a tin coating, and the burr plates are white iron. It withstands wear and tear well enough. There are two options: a high hopper and a low hopper. The high hopper holds more grains and is better if you plan on milling large batches. It will hold about 3-4 cups of grains.
What Can It Mill?
As expected from a cheap grain mill, the Victoria doesn’t mill everything very well. Even on the tightest setting, you will still only get a coarse grind. You have to run the flour back through the mill to get a finer grain.
It does a decent job of grinding lentils and corn into meal. However, most beans are too hard for the mill. You can do it – but it’s a serious workout!
You theoretically can make peanut butter with this mill, but it’s a messy process that only produces a chunky substance. You’d have to run the peanut butter through the mill numerous times to get anywhere close to a creamy texture.
Ease of Use
Because the burr plate is so small and there is no flywheel, it takes some effort to mill flour with the Victoria hopper.
There are no premade motorization kits or attachments available for this mill. If you want to motorize it, you’ll have to DIY it. One option involves removing the handle and attaching a bolt where the handle should go, then attaching it to a drill.
Cost
There are grain mills that are even cheaper than the Victoria Hopper, but these ones perform even worse. If you only want a grain mill that is “good enough” for a SHTF situation, pay a few dollars extra to get the Victoria one.
Pros
- Very cheap
- Durable
- Good for corn
Cons
- Produces coarse flour
- Need to re-mill flour to get a fine grind
- Not easy to motorize
- Doesn’t mill oily foods well
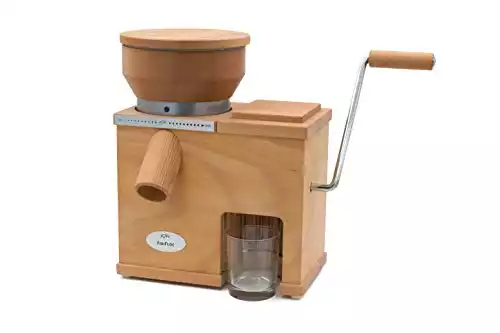
Komo FidiFloc Mill and Flaker
Verdict: Choose this if you want an electric mill for everyday use but also a way to process whole grains you’ve stockpiled for emergencies. Just know you won’t be able to make bread flour with the flaker.
Key Features:
- Burr type: Stone
- Materials: Beechwood with ceramic-corundum burr plates
- Motorization options: N/A
- Wet/oily grains: No
- Flywheel: No
- Cost: Check on Amazon
Materials and Build
The Komo FidiFloc consists of two machines: an electric grain mill and a manual grain hopper. It sits nicely on a counter without needing to be bolted down.
Komo makes some of the most beautiful grain mills available, and this one is no exception. It’s got a beechwood body and hopper. The stone burrs are actually corundum ceramic, so they are not as porous and withstand heavy use well.
What Can It Mill?
The electric grain mill side of the Komo FidiFloc can grind all dry grains. It can also handle dry beans and legumes – though you might need to run them through the mill twice to get a fine texture.
Just don’t try to grind oily products like nuts, seeds, or spices; the mill will get clogged. It won’t even process flax by itself, though you can get away with mixing some flax in with other grains while grinding.
The flaker side is best for oat groats, but it will flake just about any grain. You might have to soften them first by soaking them and letting them dry. It isn’t ideal, but it is an okay solution for disaster prepping: you could stockpile whole grains (which last longer than flour) and then flake them for use in soups, stews, risotto, etc. Just don’t expect to get flour from the flaker!
Ease of Use
The electric mill can grind 3.5 ounces of flour per minute. It’s straightforward to use and adjust the texture. Komo says the flaker side can grind up to 4.6 ounces of oats per minute. However, it will take some physical strength to get that much. Because it isn’t bolted to the counter, the FidiFloc might wobble if you try to turn the handle forcefully.
Motorization Options
There is no way to convert the electric part of the FidiFloc to manual, and no way to motorize the manual part. That means you are stuck with manual flaking during power outages.
Cost
The Komo FidiFloc is expensive. It’s best for serious foodies who love fresh flour and oats and want a gorgeous machine.
Pros
- Attractive
- Good for everyday use
- Fast mill rate
Cons
- Not for oily grains, nuts, or seeds
- Expensive
- Only flaker is manual
Note about Using Freshly-Milled Flour
Freshly-milled flour is a bit different than the flour you buy in the store. There’s a slight learning curve, so I recommend practicing with it before you need to use the flour in an emergency. Here are the key differences.
- Measurements: Flour you buy in the store has had time to settle. By contrast, freshly-milled flour will take up more space. So, a cup of store-bought flour contains more than a cup of freshly-milled flour. For this reason, I recommend using recipes that go by weight when working with home-milled flour.
- More bran: Even compared to “whole-grain” flour, home-milled flour has more bran. This can make it act differently in recipes. It usually won’t bind as well.
Do You Need to Hull Grains Too?
When buying bulk grains, they will usually be hulled. However, some homegrown grains need to be hulled before grinding into flour. You can use a grain mill to hull grains, but there is a learning curve. Make sure you practice before you find yourself in an emergency!
How to Choose a Grain Mill
While all grain mills work on similar principles, there can be huge differences between products. You need to consider the following factors:
- What the mill can grind
- Power options
- Burr types
- Milling rate
- Materials
What Grains Do You Want to Mill?
A good grain mill should be able to handle common grains, including:
- Wheat
- Buckwheat
- Spelt
- Rye
- Quinoa – Read how to store Quinoa long-term
- Millet
However, a lot of grain mills (even the good ones) have trouble with certain types of grains or ingredients.
Soft Grains
Soft grains sometimes clog the grinding plates. For example, oats can be problematic. Even soft varieties of wheat can cause the plates to clog. You’ll get better results if you mix soft grains with harder grains.
Seeds and Oily Grains
The oils will clog the grinding plates. You might be able to get away with grinding them in your mill if you mix them with non-oily grains. For example, you could put a bit of flax in with your wheat berries – but you couldn’t grind the flax by itself.
Some examples include:
- Almonds, walnuts, peanuts, and other nuts
- Flax seeds
- Mesquite beans
- Olive pits
Corn, Dry Beans, and Lentils
Cheap grain mills usually aren’t strong enough to handle tough grains like corn or dry beans, and lentils. The grinder will get damaged if you try to grind them.
Instead, you may need a corn grinder for these. Corn grinders can technically grind other grains but only produce a coarse grind which isn’t suitable for baking.
If you want to mill corn, your options are to get:
- One very good mill which can handle both grains and corn OR
- Two cheaper mills: one for grains and the other for corn
Important: Even if you usually only eat wheat flour, it’s good to get a mill that can handle many types of grains. You don’t know what grains will be available if SHTF!
Coffee Beans
Just like with oily grains, you need a good burr mill to grind coffee beans. Never use a stone burr grain mill for coffee. The stone will absorb the coffee smell, making all grains you grind smell like coffee.
You can use a steel burr grain mill for coffee. However, removing all of the coffee from the plate is difficult. You may end up with coffee in your flour. For this reason, it’s best to use a dedicated grinder just for coffee. Luckily, good coffee grinders are much more affordable than grain mills.
Read: How to store coffee long-term
Spices
Bulk spices can be ground in mills that can handle oily grains. However, it’s generally not a good idea to grind spices in a grain mill:
- The mill can end up with spice residue on it: any grains you mill afterward might taste like the spices.
- You need a lot of spices to make it worthwhile
- Spices quickly lose their flavor after being ground. If fresh flavor is what you want, it’s best to mill spices in small batches.
A lot of coffee grinders have attachments for spices. You can also use a coffee grinder without any attachment for spices: clean it out afterward by grinding white rice and removing the residue.
Read: How to store spices long-term
Electric or Manual Grain Mill?
For disaster prepping, you want a grain mill that can be used manually. However, manual grain mills are a lot of work to use. In a SHTF situation, this might not matter much.
But, if you want to use your grain mill in your everyday life, milling by hand can be tedious. Plus, it’s a lot of hard work and might not be possible if you have arthritis, arm injuries, etc.
As one homesteader said,
“Everyone who’s ever bought a manual one has regretted it real quick. Including me.”
My recommendation? Get a manual mill that can be motorized.
A lot of manual grain mills can easily be rigged to a drill. There are also DIY ways to rig them to a bike, which is much easier than turning the mill by hand.
Some grain mills, like the Country Living Mill, have motor drive kits you can buy for converting it to electricity.
Types of Grain Mills
All grain mills can be broken down into two main types: Impact and burr. For disaster prepping, you want a burr mill.
Impact Grain Mills
These have a pair of steel discs with raised sharp teeth on them. One of the discs is kept in a fixed position while the other disc spins above it. The sharp teeth break the grains into small pieces, similar to how food processors work.
The only real benefit of impact mills is that they are cheaper. But there are many downsides, including
- Always electric – no manual option
- Very loud
- Can’t produce a very fine flour
- Won’t grind oily grains or seeds
- Cause the flour to get hot
Note: Many yeasts start dying at around 115F. If your flour gets too hot during the grinding process, it won’t be suitable if you want to make your own bread yeast.
Burr Grain Mills
Burr grain mills are also made of two plates. The bottom plate is fixed, and the second plate rotates above it.
Unlike impact mills, though, they don’t have teeth. Instead, they have grooves or channels in the plates. The channels allow grains to enter the space between the plate, where they are crushed (as opposed to being chopped like in an impact mill).
While they are often more expensive, the benefits of burr grain mills are many:
- Can be manual or electric
- Quieter operation
- Produce a larger variety of grinds, from very coarse to very fine
- Don’t heat the grains as much
- Some are suitable for oily grains and seeds
- Tend to be more durable
Burr Type
Burr grain mills are further divided up by their burr type: stone or steel. Steel burr mills are better for disaster prepping because they are more versatile and affordable. Stone burr mills are better for people who regularly grind large amounts of flour and are willing to invest in a good mill.
Stone Burr Mills
Also called gristmills, they consist of two millstones. The bottom millstone is called the bedstone, and the upper is called the runner stone. Grain gets trapped between the two stones and ground into a fine powder. It’s hard to beat the quality of stone-ground flour.
Historically, sandstone and volcanic rock were used for millstones. Today, some mills – such as the Komo electric grain mills, use ceramic plates instead of natural stone. These are durable, less porous, and even can be self-sharpening.
Pros/Cons
- Can produce very fine flour
- Good one lasts a lifetime
- Because stone is porous, they aren’t suitable for oily grains, coffee, spices, or cacao
- Tend to be very expensive
- Natural stone requires maintenance
Steel Burr Mills
Steel burr mills are much more common today. If you only want to get one mill for disaster prepping, this is your best choice because it can grind more things than a stone mill. Good steel burr mills are just as durable as a stone mill.
Pros/Cons
- More affordable than stone mills
- Easier to clean and maintain
- Can be used to mill oily grains, coffee, and spice
- Many more options
Milling Rate
With electric grain mills, the milling rate is typically given in ounces per minute. With manual grain mills, though, the milling rate is directly tied to how much effort you put in.
Some manual grain mills are easier to use than others. Depending on the mill, expect it to take 15 to 60 minutes to produce 6 cups of bread flour.
To make milling faster, look for mills that have:
- Very long handles: This reduces the amount of force you need to put into each turn. For example, the Country Living Mill even has a Power Bar handle extension to make it easier to use.
- Flywheel: This feature is when the handle is mounted to a wheel. It ensures steady shaft rotation. It also stores some kinetic energy, so it’s easier to turn.
- Top-mounted handles: When the handle is on the top (so the wheel lays flat instead of vertical), you can use more of your body when turning it. Side-mounted handles use mostly arm strength and tire you out faster.
- Quality burr plates: The way the burr plates fit together can reduce how much effort you need to turn them. This is the difference between a cheap and quality manual grain mill.
- Good ball bearings: These make it easier to turn the wheel. This is a reason why good grain mills cost more.
- Sturdy counter clamp: If the mill doesn’t clamp down well, it will wobble. You’ll lose energy into the counter instead of putting it into grinding grains.
Mill Materials
Avoid grain mills made out of plastic. These are likely to crack or break. Also, avoid mills made out of cheap metal. You are better off with a grain mill made from cast aluminum, cast iron, or hardwood body. These mills will be very heavy but will last a lifetime if well cared for.
