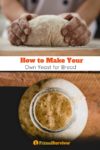
Are you out of yeast and want to make bread? It’s possible to grow your own yeast at home. Also known as sourdough starter or wild yeast, the process is simple, and all you need is some flour (or other starch like potatoes), water, and a bit of time.
What is Wild Yeast?
Wild yeast/sourdough starter is made from the healthy yeasts naturally found on grains or starches.
When you add water to the flour, it “activates” the natural yeast on the surface. The yeast starts to grow and replicate. You “feed” the yeast regularly, and it can be used to make bread. Before commercial yeast was available, this was how bread was made.
*See these recipes for bread without yeast
Isn’t Homemade Yeast Dangerous?
If you were to leave most foods out for several days, they would grow mold and become infested with bacteria. Why doesn’t this happen with wild yeast starters?
The difference with wild yeast is that most bacteria don’t like to eat the starch in flour. The flour also contains healthy bacteria called lactobacilli. As the natural yeast and lactobacilli start replicating, they release lactic acid, inhibiting harmful bacteria growth.
*These same bacteria also make yogurt and DIY fermented pickles.
How Does Wild Yeast Compare to Commercial Yeast?
Commercial yeast is typically only made from a single yeast strain (Saccharomyces cerevisiae). They don’t contain any healthy bacteria. The strain of yeast was chosen because it works quickly and is cheap to isolate.
By contrast, wild yeast starters contain numerous strains of yeast as well as lactobacilli bacteria. The yeast and bacteria break down proteins in grains (including gluten), making them easier to digest. This is why many people argue that bread made from wild yeast is healthier. The wild yeast also gives the bread a fuller flavor. Note that wild yeast doesn’t always make a sour taste. It depends on the strains of yeast and how much develops.
While the traditional method of using wild yeast arguably creates a better-tasting and healthier bread, many people still prefer buying yeast.
Why?
Because store-bought yeast can be used immediately and gives consistent results.
With homemade wild yeast, there can be some trial and error before you become familiar with your yeast and figure out how much to add to make a perfect loaf of bread.
Read more about how to store dry yeast.
Wild Yeast Instructions
Here is a wild yeast recipe using flour. It’s also possible to make wild yeast starters out of potatoes.
Other starchy vegetables, such as sweet potatoes, parsnips, chickpeas, beans, and peas, can work too. However, these can be a bit trickier, so I’d recommend using flour when starting with DIY sourdough starter.
- Clean a glass jar that is at least 1 quart in size.
- Mix equal parts by weight flour and water. If you don’t have a kitchen scale, you can use 2 Tbsp. water to 3 Tbsp. flour. Ideally, use distilled or highly-filtered water since chlorine can kill the natural yeasts and bacteria.
- Stir the flour and water until completely mixed.
- Cover the jar loosely with a lid or cloth. You want to keep insects and dust out but still allow the yeast to breathe.
- Set aside at room temperature in a dark place like a cupboard. If your home is very cold, try putting the yeast starter next to a radiator or oven.
- Every 24 hours, add another 2 Tbsp. of water and 3 Tbsp. of flour and stir.
- After about 5 days, the mixture should be bubbly. The bubbles are carbon dioxide emitted by the yeast. It should have a pleasant, sour, acidic smell. It should not be a rancid smell.
Using the Wild Yeast Starter
The bubbly mixture is your yeast starter. You’ll need about ¾ to 1 cup of the mixture to make bread (it depends on the starter; you’ll have to experiment a bit).
To use wild yeast starter in regular bread recipes, remember that starter is made out of equal parts by weight flour and water. So, you’ll want to subtract equal parts flour and weight from the recipe and replace it with the starter.
For example:
If you want to use 200 grams of starter in a recipe, you’ll need to subtract about 100g of flour and 100g of water from the recipe.
Note that:
- 1 cup of starter usually weighs around 200 grams. The weight varies depending on how bubbly the starter is.
- 1 cup of flour = 128g
- 1 cup of water = 237g
I stopped using recipes and measurements for bread a long time ago. But if you want to be precise and are just starting out, I’d recommend getting a kitchen scale that has grams as an option. It’s also good to use European bread recipes since the ingredients are listed by weight instead of in cups.
Storing Your Yeast Starter for Later Use
After using your yeast starter to make bread, you’ll discard all but about ¾ cup* of the starter. The remaining starter will either go in your fridge or stay on the counter.
- Store in the fridge if you bake weekly.
- Store on the counter if you bake frequently
*Some people discard all but 1 Tbsp. of the starter. Others discard half of what is in the jar before feeding. It’s a personal choice that will vary depending on how much starter you typically use to make bread.
Why do you need to discard some of the starter before feeding?
If you kept feeding the starter, it would be a mess of broken-down proteins. You need to discard some of the starter so it remains fresh. I leave about ¾ cup of starter. Some people leave more or less.
You don’t have to throw away the discarded starter. It can be used to make your next batch of bread. You can also use starter in other recipes, like pancakes, crepes, or even crackers.
Maintaining the Starter (Feeding)
Wild yeast is a living thing and needs to be fed regularly to stay alive. Feeding it is easy: you add equal parts flour and water (by weight) to the starter on a regular basis.
Here’s how to feed your wild yeast starter:
- If you put the starter in the fridge, it will only need to be fed once weekly. First, discard all but ¾ cup of starter. Then feed it by adding 1 cup of flour and 1/2 cup of water. Mix well, cover loosely, and let it sit on the counter for 5-8 hours until bubbly. Then return to the fridge.
- If you store your starter at room temperature, it must be fed daily. Discard all but ¾ cup of starter before each feed and add 2 Tbsp. of water and 3 Tbsp. of flour. Mix well and cover loosely.
Using Refrigerated Starter
You shouldn’t use starter straight out of the fridge; the yeasts need time to wake up to be effective. To use it:
- Remove the starter from the fridge at least 5 hours before you want to bake. You can take it out the day before.
- Feed it with water and flour.
- Leave at room temperature for at least 5 hours or until it gets bubbly. It will take longer in colder temperatures.
- Take as much starter as you need for your bread.
- Discard all but ¾ cups of unused starter and return it to the fridge.
Starter kept on the counter doesn’t need to be “woken up.” You can use it straight off the counter, so long as you don’t just feed it.
Troubleshooting/FAQs
How will I know if my yeast starter has gone bad?
You’ll know if the starter has gone bad or gotten contaminated! The smell will be nasty, or there will be visible mold growing.
There is liquid floating on the top of my starter. What is it?
This liquid is called “hooch.” It is a sign that your yeast starter is hungry. Just drain off the hooch and discard it. Then, feed your starter and stir it.
My yeast won’t start.
If you are having trouble getting your yeast going, try these solutions:
- Use distilled water. Tap water often contains high amounts of chlorine, which can inhibit growth of the natural yeasts and bacteria.
- Make sure your flour doesn’t contain any preservatives. This will also inhibit yeast and bacteria.
- Keep it somewhere warmer. Like next to a radiator or your stove.
- Add a raisin or pineapple juice. Use pineapple juice instead of water on the first feed (day 1 only!). Or add a raisin to the water. This will give the yeast some extra sugar to help them get growing.
Related
Use your yeast in one of these survival bread recipes.


Hello,
I just read through this article and found it very understandable. I could just print this out, but was wondering if you had or could recommend a book that has the same information plus recipes. I am simply trying to keep all my information more organized and not have papers everywhere and I’d like to be less dependent on the internet incase we don’t have it some day. Thank you, MH
We are working on a set of survival printables!
That would be Fantastic!
Hi Donna – they are available here – https://www.primalsurvivor.net/product-page-v2/
Look for the cheatsheets!
How do you make starter with potatos?
Just use potatoes instead of flour as food for your wild yeast. You can use other starchy things too. But it’s easier to just use flour.
How much starter do you use with say 3 cups flour for making bread.
You’ll have to test it yourself because it can vary depending on how “active” your starter is and how fluffy you like your bread to be. I’d recommend starting with 3/4 cup and seeing how it goes and adjusting as you see fit.
Confusing here about how much flour to add when feeding. Text says: Here’s how to feed your wild yeast starter: If you put the starter in the fridge, it will only need to be fed once per week. First discard all but ¾ cup of starter. Then feed it by adding 1 cup of flour and 1 cup of flour and 1/2 cup of water.
So do you add 2 cups flour or only 1 ??????
Ahh, that’s a typo (thanks for catching it!) It should read “1 cup of flour and 1/2 cup of water”.
To elaborate, each person does it a little differently. Some people feed more or less. I used the amounts which seem to work best for most people (including myself) who bake weekly. What matters is you feed it equal amounts *by weight* of flour and water. It depends on your type of flour (how course it is), but that usually means 1 cup of flour and 1/2 cup of water. If you have a kitchen scale, use it. Some flour weighs a lot more or less!
If you notice liquid (hooch) forming on the top of your starter, it means it is hungry. You’ll need to add more flour and/or feed it more frequently.