A diet of fruit and nuts won’t get you very far, whereas a loaf of bread can sustain you for days, lifting your spirits and boosting your energy reserves.
We tend to think of baking bread as a long-winded and arduous process that requires endless kneading, rising, and resting.
Not all bread recipes are quite so demanding, however, and some can be made quickly and easily with little more than a campfire and a few basic ingredients.
13 Survival Bread Recipes
1 Hardtack
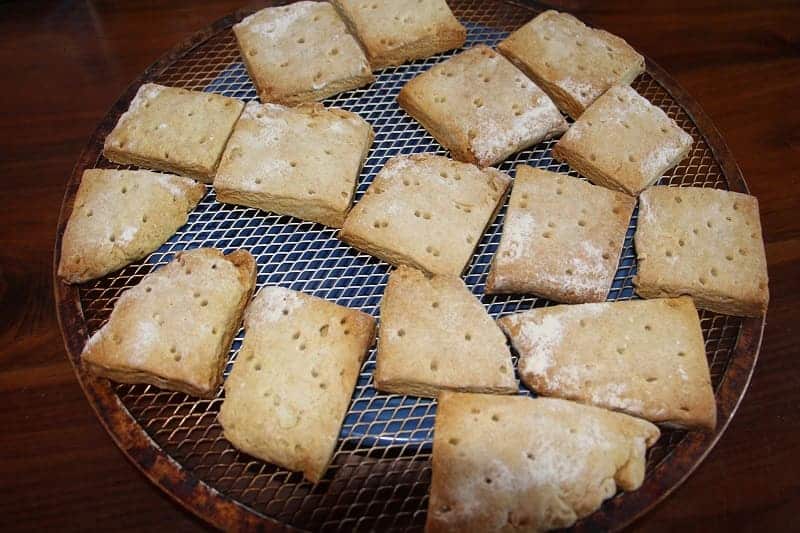
Long-lasting and cheap, hardtack is the original survival food.
The Egyptians, Romans, and British all relied on different types of hardtack because it was one of the few foods that wouldn’t spoil. The oldest piece of hardtack in existence was baked in 1851 but is still edible 170 years later.
Hardtack is simple to make and requires just three ingredients – flour, salt, and water. We cooked up a batch recently and it turned out well, check out our simple hardtack recipe.
It may be hard to swallow and certainly won’t be the most mouth-watering bread you’ve ever eaten, but it will keep you going for up to three months, even if you have nothing else to eat.
2 Pita Bread
The original pita bread recipe is approximately 4,000 years old and, for 10,000 years or so before that, people were substituting on various types of flatbread, which rose in the sun and were baked over a fire.
Ingredients:
- Water
- Yeast
- A pinch of sugar
- All-purpose flour
- A pinch of salt
- Cooking oil
Instructions:
- After preparing your yeast in 1 cup of luke-warm water with a little sugar, add in half a cup of flour and stir until the mixture starts to bubble
- Now add the rest of the ingredients until the contents of your mixing bowl resemble a shaggy dog
- Dust with flour and knead until the mixture becomes smooth
- Coat with oil and leave covered for an hour to rise
- Deflate the dough gently and divide it into 8 equal balls
- Using a floured rolling pin or bottle, roll out each ball until you have 8 circles that measure approximately 8 to 9 inches in diameter
- Warm a frying pan or skillet over the fire, testing it by adding a couple of drops of water. If the water immediately starts to sizzle, the pan is hot enough to cook on
- Drizzle a drop of oil into the pan before adding your first pita. Cook for 1-2 minutes on each side until the dough starts to puff up and form a pocket.
3 Scottish Bannocks
Scottish Bannocks is a type of fry bread that’s quick to make and easy to store.
Its name comes from the Gaelic word bannach, meaning morsel, and it was originally cooked on a girdle or griddle known as a Bannock Stone.
The perfect Scottish Bannocks have a biscuit-like texture, with a soft, fluffy center that resembles a scone.
Ingredients:
- 330g oatmeal or ground oats
- 265g plain flour
- 2 tsp baking soda
- 1½ tsp salt
- 1½ cups buttermilk
If you forgot to pack your emergency buttermilk supplies, you can make your own using homemade powdered milk and substitute the Bannock Stone with a skillet.
Instructions:
- Mix the flour and oatmeal with the salt
- Add the buttermilk and stir into a rough dough
- Remove the dough and split it into two equal parts
- Using your hands, flatten the dough until you have a one-inch-thick circle that’s about the same size as your skillet
- Indent the circle to form four equal quarters
- Carefully place the dough in a skillet heated over hot coals
- Cook the first side until the bottom turns golden brown and the top starts to dry out. This process takes around 10 to 15 minutes.
- Flip the dough over and cook for a further 10 to 15 minutes.
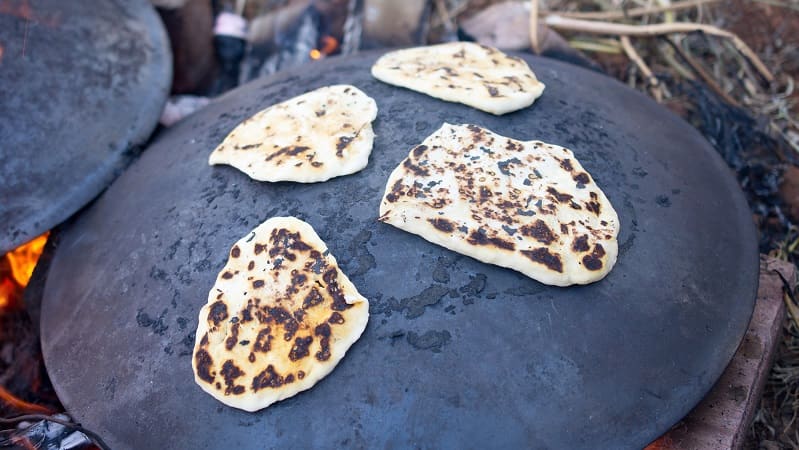
4 Roosterkoek
South Africans love to braai which, to the rest of the world, is almost the same as a barbecue. The main difference is that everything is cooked over an open fire – from the starter to the dessert.
Roosterkoek means grill cake and, like most traditional South African cuisine, is best eaten fresh from the fire. It’s even tastier if you’ve got ¼ cup of sugar to add.
Ingredients:
- 2 cups self-raising flour
- 1 level teaspoon salt
- 2 tablespoons olive oil
- 2 beaten eggs
- 1 cup luke-warm water
Instructions
- In a large bowl, combine the flour, yeast, salt (and sugar)
- Make a well in the center of the mixture and add the eggs, oil and a little luke-warm water
- Continue adding water until you have a smooth dough
- Cover the dough with a cloth and leave it to rise for about an hour
- Once it’s doubled in size, roll it out on a floured surface
- Divide the dough into equal-sized squares
- Arrange the squares on a braai grid or campfire grill
- Place the grid on the warm coals, making sure they’re not close enough to burn
- Once the bottom starts to brown, flip the bread
- Repeat until the dough starts to rise
- If your Roosterkoek makes a hollow sound when you tap it, it’s ready to eat
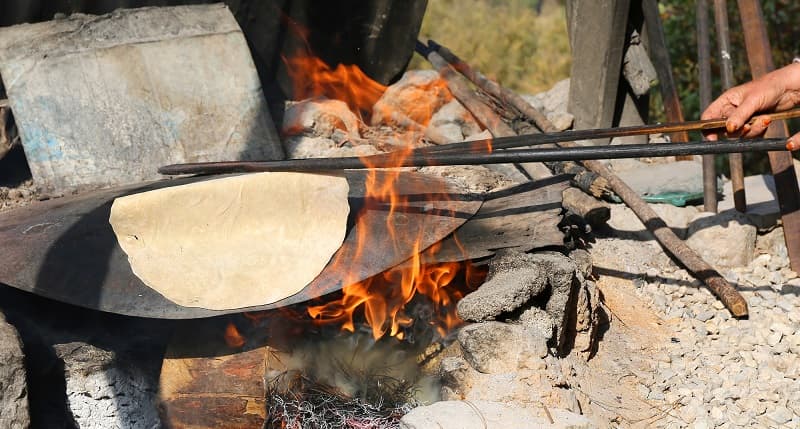
5 Chapati or Roti
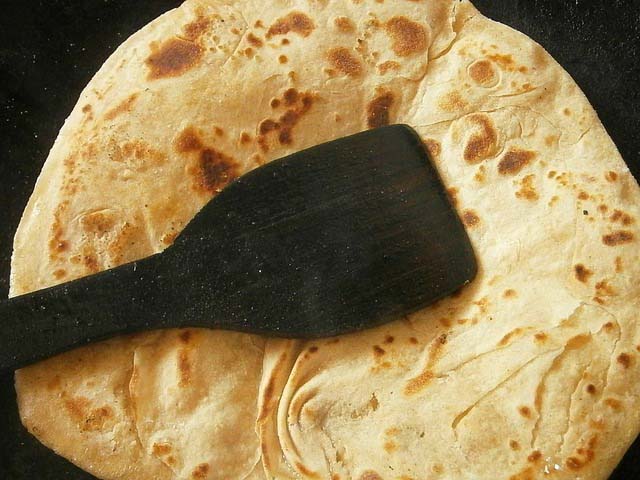
Chapati and roti aren’t quite the same thing but they’re similar enough to be grouped together.
While the roti can be made using almost any type of flour, chapati always uses atta flour, so in a survival situation, you’re more likely to make roti, even if you planned on creating chapati.
Ingredients:
- 1 cup all-purpose flour
- 1 tablespoon full cream milk powder
- Pinch of salt
- Oil for brushing
Instructions:
- Mix the flour, milk powder, and salt
- Add ⅓ to ½ cup of water – enough to create a smooth dough
- Knead until the dough has a satiny texture
- Divide the dough into 8 equal portions
- Roll out each portion to create a thin, flat disc
- Add a little oil to your frying pan or skillet and cook on the coals of your campfire, flipping the dough frequently, so it browns equally on both sides
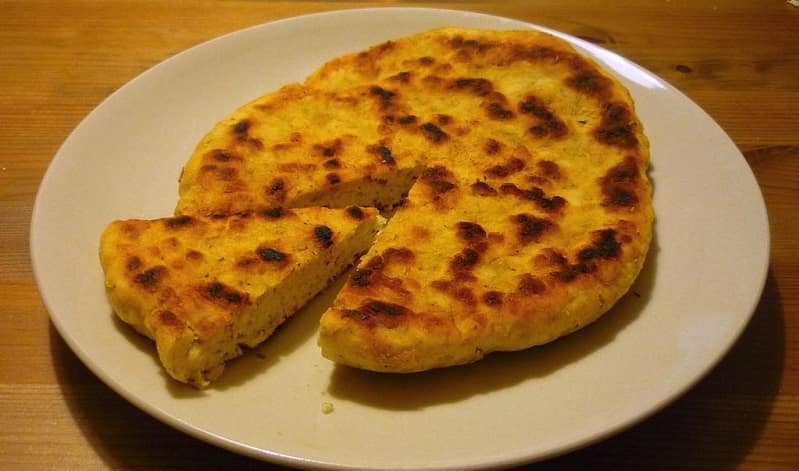
6 Pot Bread

Pot bread is a traditional South African dish, also known as Potbrood or Umbhako.
Traditionally cooked in a Dutch oven, pot bread can also be made using the inside of a carved-out termite mound or, if there aren’t any of those handy, in a cast-iron pot or camp Dutch oven.
Ingredients:
- 2 cups white flour
- 1 cup whole-wheat flour
- ½ cup corn kernels
- 1 large egg
- 2 tsp instant yeast
- 1 ½ tablespoons brown sugar
- 2 tsp vegetable oil
- ½ -3/4 cup warm water
- ½ tsp salt
Instructions:
- Combine the two flours, salt, sugar, and yeast in one bowl
- In a separate bowl, combine the oil, eggs, and warm water
- Gradually add the wet ingredients to the flour mixture, stirring constantly
- Fold in the corn kernels
- Transfer the dough into your well-oiled cast-iron pot
- Place in a warm place and allow to rise for about 45 minutes, by which time the dough should fill the pot
- Place the pot in the fire, packing warm coals around it and placing some on the lid
- Bake for approximately one hour.
7 Tortilla
Another type of flatbread, tortillas are similar to chapatis and roti but made using a slightly different process.
As roti are only kneaded to 40% gluten development, they’re more likely to break when used as a wrap whereas tortillas are more flexible, having been kneaded until 90% gluten development is achieved.
Ingredients:
- 4 cups flour
- 1 ½ teaspoon salt
- 2 teaspoons baking powder
- ½ cup vegetable oil
- 1 ¼ cup luke-warm water
Instructions:
- Combine the dry ingredients
- Add the water gradually until you have a smooth dough
- Knead the dough for approximately 6 minutes and then cut into 16 balls
- Roll each ball into a flat disk, toss into a hot frying pan and cook as you would a roti or chapati
8 Damper
Also known as bush bread, a damper is an Australian soda bread that was traditionally made from crushed nuts, roots, and seeds and cooked in the ashes of a campfire.
The basic recipe calls for just three ingredients – flour, salt, and water – and can be cooked in a camp oven or foil parcel.
Ingredients:
- 250g self-raising flour
- 25g butter
- 175g milk
- 1 tsp salt
Instructions:
- Mix the flour and salt together
- Rub the butter into the flour mixture with your fingers until it resembles fine breadcrumbs
- Add milk until you have a smooth, non-sticky dough
- Turn out onto a floured board and knead until you’ve shaped it into a rough loaf
- Pop the dough into your camp oven or wrap in foil
- Place the foil parcel or oven in the coals, packing warm coals around it and on top
- Bake for approximately 30 minutes
- A good damper should make a hollow sound when tapped
9 Danish Bonfire Bread
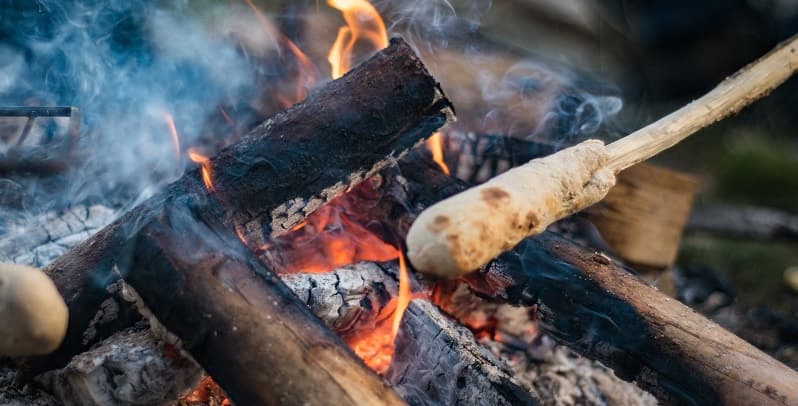
This traditional bread, also known as Snobrød, requires minimal equipment and just five ingredients. Once the dough’s complete, simply wrap a strip of dough around a stick and bake it over the coals while enjoying the warmth of the fire.
Ingredients:
- 2 cups plain flour
- 2 teaspoons baking powder
- ¾ cup of luke-warm water
- ¼ cup of oil
- ½ teaspoon of salt
Instructions:
- Mix the dry ingredients
- Make a well in the middle and gradually add the water and oil
- Mix well, and then knead the dough for a few minutes until smooth
- Allow the dough to rest for a few minutes and then divide into 15 equally sized balls
- Roll out each ball until you have 15 sausage-shaped sections
- Flatten each section slightly before winding around a stick, being sure to allow for some overlapping
- Hold the stick over the fire, turning periodically, until golden brown
10 Frybread

In the US, frybread is also known as a Navajo Taco and was first created in 1864 to sustain the Navajo during their 300-mile journey to Bosque Redondo.
Frybread also occurs in South African culinary history in the form of a vetkoek or “fat cake,”
Ingredients:
- 3 cups vegetable oil or shortening (enough for 1-inch depth, for frying)
- 1 cup all-purpose flour, plus more for dusting
- 1 ½ teaspoons baking powder
- ¼ teaspoon salt
- ½ cup milk
Instructions:
- Combine the dry ingredients in a bowl, mixing well to blend
- Add the milk gradually until the dough holds together
- Turn the dough out onto a floured surface and knead a few times until you have a smooth dough
- Divide the dough into four equal parts
- Roll out each section to create a circle of dough approximately ¼ to ½ an inch thick
- Heat one inch of oil in a hot skillet, using the handle of a wooden spoon to test the temperature.
- Once the oil bubbles consistently around the spoon handle, it’s hot enough to start cooking
- Carefully add one or two pieces of dough to the hot oil
- Cook for one to two minutes on each side
- When ready, the fry bread should be golden brown and slightly puffed up
Just one word of warning – fry bread is delicious! So delicious, one is never enough, but two could see you consuming a large number of calories with few nutritional benefits.
11 Irish Soda Bread
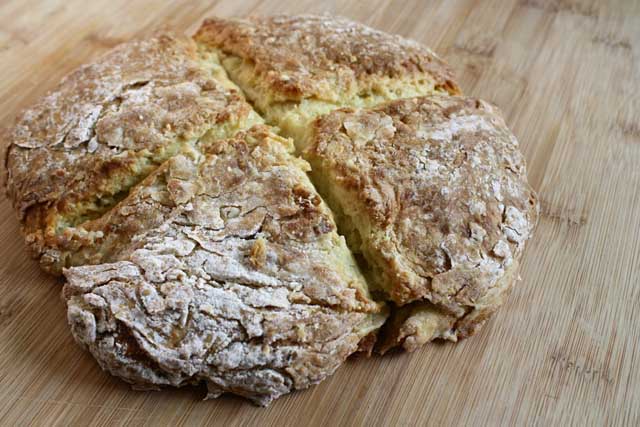
Although known as Irish soda bread, this simple form of sustenance originated in America where pearl ash was used as a substitute for yeast.
Irish soda bread became popular in the 1830s when a financial crisis and lack of ingredients made the simple bread recipe a necessity.
Ingredients:
- 400g plain four
- 250-330ml buttermilk
- 1 tsp bicarbonate of soda
- 1 tsp salt
Instructions:
- Combine the dry ingredients
- Add a little buttermilk at a time, using a fork to combine the mixture
- Once all the flour is combined turn the dough out onto a floured surface
- Shape the dough into a rough ball, then squash it flat
- Cut the dough into quarters
- Heat a little oil in a frying pan or skillet
- Cook each side for around 5 minutes, until golden brown
- Once the top and bottom are cooked, stand the quarters up on their ends and continue cooking until the whole exterior is toasted and the center is soft and spongey.
12 Steam Bread
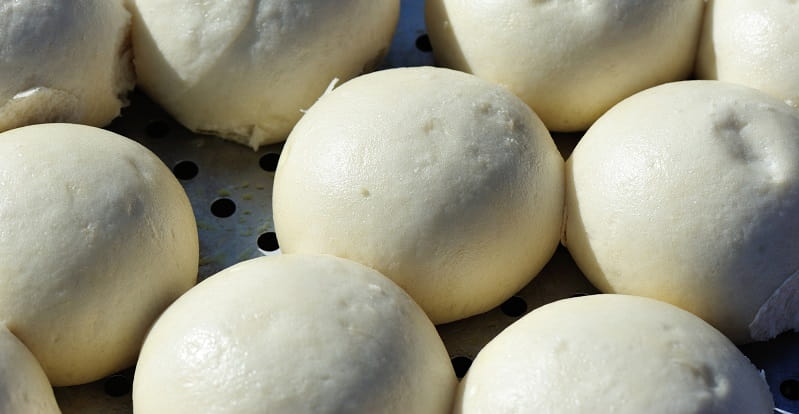
There are all sorts of different types and varieties of steam bread, from the traditional Zulu steam bread, known as Ujeqe, to the Chinese Mantou or steamed buns.
Almost all types of steamed bread use the same basic ingredients to create an elastic dough:
Ingredients:
- 4 cups cake flour
- Oil to grease the bowl
- 1 sachet instant yeast
- 1 teaspoon salt
- 500 ml luke-warm water
- Oil to grease the bowl
Instructions:
- Mix the dry ingredients before adding the warm water a little at a time
- Once all the components are combined, knead until you have a springy, pliable dough
- Cover with a clean cloth and leave in a warm place to rise
- After around 30 minutes, the dough should have doubled in size
- Knead the dough for a further minute
- Rub a stainless steel pot with oil before adding your dough
- Pour boiling water into a second pot
- Place the dish containing the dough into the water to steam for approximately 30 minutes.
13 Ezekiel Bread
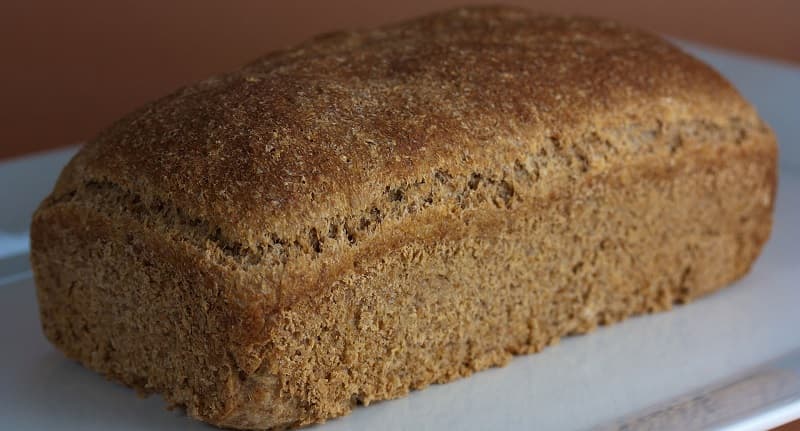
This recipe is based on the bread Ezekiel is instructed to live on during the symbolic siege of Jerusalem (Ezekiel 4).
Far from being designed as the artisan loaf, it’s perceived as today, Ezekiel bread “speaks of scarcity and the need to gather up whatever scraps can be found in order to survive.”
Ingredients:
- 8 cups wheat flour
- 4 cups barley flour
- 2 cups lentils, cooked and mashed
- ½ cup millet flour
- ¼ cup flaxseed flour
- 1 ½ cups water
- 1 tablespoon sale
- 6 tablespoons oil
- 1 tablespoon yeast dissolved in ½ cup warm water
- 1 tablespoon honey
Directions:
- Dissolve the yeast in the warm water and honey and let sit for 10 minutes
- Mix the wheat, barley, millet, and flax flour
- Blend lentils, oil, and a small amount of water (as best you can when camping) and place into a large mixing bowl with the remaining water
- Stir in two cups of mixed flour
- Add yeast mixture
- Stir in remaining salt and flour.
- Place on a floured surface and knead until smooth
- Put in an oiled bowl
- Let rise until double in bulk
- Knead again and cut dough and shape into 4 loaves
- Place one loaf at a time in a cast-iron pot
- Let rise again until doubled in size
- Bake on hot coals for around an hour.
This recipe is more complex than many of our other breads, but I thought it worth including as it’s a surprisingly good source of energy.
Thank you to the culinary wizard, Dede Kohne for this recipe.
Substituting Ingredients And Adding Flavor To Survival Bread
At its most basic, survival bread is a combination of flour and water. A little plant know-how, however, could transform it into a mouth-watering culinary delight.
If you know how to identify wild onion and garlic, for instance, you could use a few leaves to add flavor to your survival bread.
The addition of violet flowers will boost the nutritional value of your loaf as they’re high in both vitamin A and C while blueberries or blackberries can transform a basic loaf into a sweet vitamin-boosting treat.
Even if you forgot to pack the flour, you can still make survival bread using wild plant substitutes. The seeds of the amaranth, or pigweed, can be ground up to create a type of gluten-free grain that’s packed with fiber, micronutrients, and protein.
Cattails or bulrushes have long been used as a substitute for wheat, and both the rhizomes and the fluff from the male flowers can be used to either bulk up or replace the flour component in your survival bread recipe.
You can similarly make your own yeast using flour and water or even try some of these no yeast breads.
Conclusion
Survival bread is easy to make and can be cooked in a pot, a skillet, wrapped in foil, or baked on a stick. Not every recipe or loaf is as nutritionally beneficial as the next, but whatever you bake will at least add a little variety to your diet of cheap MRE’s.
Including some sprouted grains or lentils can boost your bread’s nutritional value further, providing you with a source of fiber, protein, and the essential vitamins B and C, which could prove vital in a long-term survival situation
It may not be possible to live on bread alone but, if the end of the world leaves you with few other options, a good survival bread recipe could keep you going for up to six months.
NJR ZA, CC BY-SA 3.0, via Wikimedia Commons
Finbar.concaig, CC BY-SA 4.0, via Wikimedia Commons
Don Graham, CC BY-SA 2.0, via Wikimedia Commons
Veganbaking.net from USA, CC BY-SA 2.0, via Wikimedia Commons

.jpg)
.jpg)
The roosterkoek recipe ingredients list beaten eggs and oil, but they aren’t anywhere in the directions of the recipe. Am I missing something?
Thanks for catching that. The instructions have been updated!
Would love to get your DIY food preservation book, but I’m afraid it will load on my phone and not my tablet. Your info is super.
Hi Nancy – all the books are in PDF format so will work on any device with a PDF reader.
Any plant suggestions from a desert environment? Unfortunately, most of the plants generally mentioned don’t appear naturally in our high desert.
That said, love your articles!
I haven’t found a recipe, but it may be possible to substitute yucca (not yuca, also called cassava) root for potato in a potato bread recipe. In Southern Utah, the starchiest wild indigenous foods I’m aware of are yucca roots, acorns and cattail roots. Acorns can be made into a flour, and pine nuts can be added if you can find them. Sego lillies cover much of the western states and are edible, but they don’t require being cooked or baked into bread. Maybe some of these are options in your local desert.
You should maybe check into any local survival tours. Sometimes indigenous communities offer tours and they can provide a lot fo good information. I travel a lot and learned some cool things about desert survival from Bedouins in Palestine and Egypt. (I am still very far from being any “expert” in desert survival though!)
You didn’t mention “beer bread…..” Easy to make, very tasty! 4 cups of flour, all-purpose works great, mix in beer to get the dough to a moist consistency, not runny, but firm. Place in a warm place and let the yeast in the beer cause the dough to rise, place in bread pans and bake!
I haven’t had much luck with beer bread. Beer definitely makes it taste good but it doesn’t have as much leavening effect as wild yeasts left to ferment. Beer does work well enough though for flat bread or bread prepared on the grill (which is delicious, btw).
How much water did you use in the steam bread?
Sorry about that – have updated the recipe.
500ml is about 2 cups.