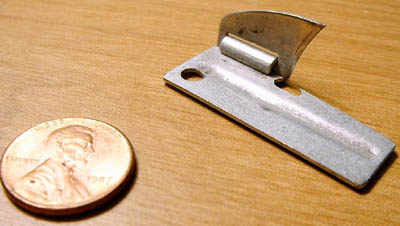
So, how do you open a can if you don’t have a can opener? There are a 7 methods you can use.
Method 1: Cut Lid Off with Knife
This is the easiest method of opening a can without a can opener. Obviously, you’ve got to be careful that you don’t hurt yourself with the knife. You’ll also end up with a very sharp, jagged edge around the can where you can slice yourself.
- Pierce the can with the tip of a sharp, pointy knife: You’ll want to use something as a “hammer.” A metal cup or wooden mallet work well. Position the knife upright and then hammer the butt end of the knife gently until the tip pieces through the can.
- Grip the knife firmly: Choose a position on the blade or handle (depending on the type of knife) so you have good leverage.
- Rock the knife back and forth: This will slice the lid of the can as you move the blade around the lid.
Tips:
- Don’t use your favorite knife: When hammering the knife tip into the can, you might bend or break the tip of your knife. Because of this, I would never use one of my favorite survival knives to open a can.
- You don’t have to cut the entire lid off: Once you get halfway through, you can use your knife to lift up the lid. It will still be attached, but the can should be open enough to get to the contents.
Method 2: Heel of a Kitchen Knife
If you don’t have a pointy knife, it will be hard to use the method above. However, you can use the heel of a kitchen knife (the part of the blade closest to the handle).
Instead of rocking the knife, you’ll be making a series of small cuts to the lid. This method can be a bit tricky to do (despite how easy it looks in the video). However, you are less likely to cut yourself. It’s also good for people without a lot of arm strength because you can use the knife as a lever.
Method 3: Rub Can On Rock or Concrete
Today’s cans have a seal around the lid. If you rub away this seal, you’ll be able to easily pry or pop off the lid of the can.
Instructions:
- Find an abrasive surface: A flat-but-rough stone works well. Concrete works great.
- Turn the can so the lid is facing downwards.
- Rub the can on the abrasive surface. You’ll need to use a bit of pressure on the can.
- Check for leakage. When a bit of liquid starts to come out, it means the seal has been broken.
- Remove lid. You can do this by squeezing the sides of the can until the lid pops off. Or you can pry off the lid with a knife, screwdriver, or similar tool.
Tips:
- Even though you can pop off the lid, it’s still better to pry it off. A butter knife (as shown in the video) works great.
- Check the lid periodically as you rub. You don’t want to rub for too long and have the lid fall off, spilling your food everywhere.
Method 4: Spoon
This method of opening a can without a can opener surprisingly does work. However, it does require a lot of hand strength and determination.
The reason for choosing a spoon is because of the curved shape. This allows you to rock the spoon back and forth on the lid, indenting the lid until it breaks. I’m sure another tool would work too, but a spoon is easier than things like screwdrivers.
Instructions:
- Grip the spoon firmly: You want your hand to be near the spoon part, low on the handle.
- Hold the spoon upright against the inner lip of the can.
- Rock the spoon back and forth. It should start indenting the can. You’ll need to apply a lot of pressure.
- Keep rocking until the spoon pierces the lid.
- Move the spoon and repeat. It will be easier once you’ve broken the seal.
- Peel back the lid: When you’ve broken through about half of the lid, you can use the spoon to pry back the lid and get at the contents.
Method 5: Manual Can Opener
This is technically a can opener. However, since most (young) people don’t know how to use one, I thought it was important to include instructions for it. Plus, you probably do have one of these manual can openers in your home somewhere or on your multi-tool.
The video shows opening a can with the Level Gear Toolcard Pro – a little metal card that fits in your wallet. You can buy it on Amazon here.
Also, read this post on how to build an EDC wallet for survival.
Method 6: Church Key (Puncture Can Opener)
Again, this is technically a can opener. You probably have one on your bottle opener sitting in a drawer somewhere. Usually church keys are used for puncturing cans of condensed milk (or other liquids) to make a spout. However, by making a series of punctures, one next to the other, you can open an entire can.

Method 7: Tin Snips
Assuming that you have tin snips handy, you’ll be able to open a can easily. Just use the tin snips to cut the lip off the lid of the can. This will break the seal and allow you to lift the lid right off.
To see it in action got to 3m 39s on this video.
There’s a Reason Can Openers Exist!
While these methods of opening a can without a can opener do work, they are time-consuming and annoying.
Plus, they’ll make a really jagged, dangerous edge on your can. That means you won’t be able to safely use it for things like making a mini survival stove.
So, if you are stockpiling canned food for emergency preparedness, make sure you stockpile a can opener too! Obviously, you need a manual can opener and not an electric one in case of power outages.
You can get a manual can opener on Amazon here.
There are also these cool multi-tools, many of which have can openers. You might also like the keychain-sized P38 can opener which is issued by the military to soldiers.

With these travel-sized options, there is really no reason you should ever find yourself without a can opener!


