A bivy sack is a simple, lightweight shelter. It’s a minimalist alternative to a tent that will keep you warm and dry and stop the mosquitos from devouring you at night.
Shelter is your top survival priority, so if you’re not particularly interested in learning how to build a survival shelter, a bivy sack provides a simple and relatively inexpensive alternative.
They are also lightweight and compact, making them ideal emergency shelters.
Types of Bivy Sack
There are three main types of bivy sacks. We summarize them below but read this article if you want a more in-depth guide to the best bivy sacks.
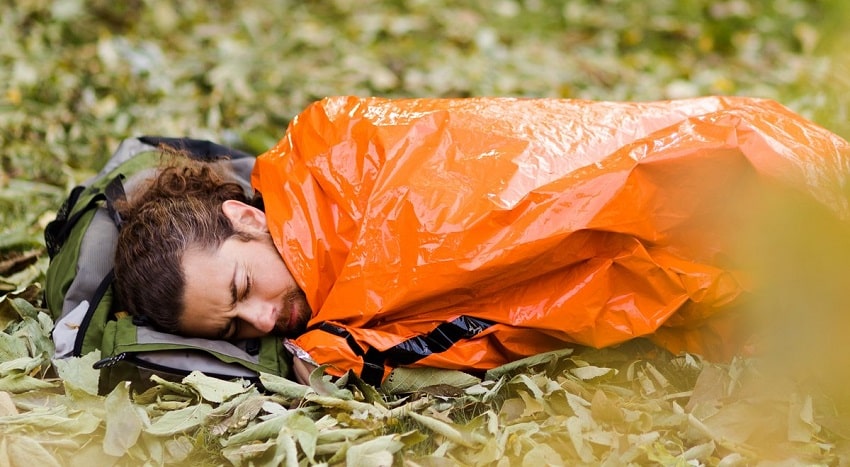
Traditional
The simplest of which is the traditional bivy sack. This type of bivy sack acts as a raincoat for you and your sleeping bag.
 Go Time Gear Life Emergency Bivy Sack
Weighing just 4.1oz and yet big enough for a 7-foot man, this bivy sack keeps you warm by reflecting your body heat back at you. It’s also windproof, waterproof, and tear-resistant.
Face-Lifter

The face-lifter bivy sack is similar but includes a hoop at the top that lifts the fabric away from your face. Both of these are waterproof and windproof. The third type is less versatile but will keep pesky insects at bay.
Regardless of the model you choose, setting up your bivy sack is a simple process, as is using it correctly.
Bug Bivy
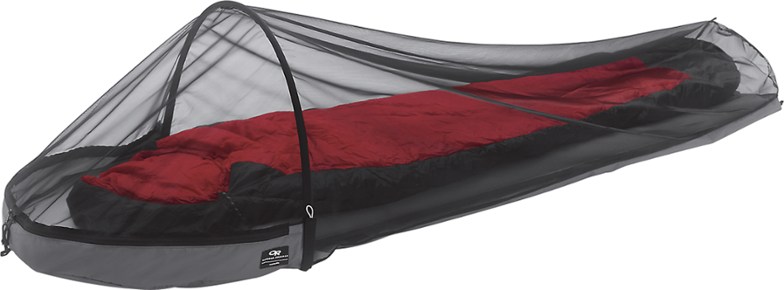
The third type is a bug bivy which won’t protect you from the elements but will keep insects and mosquitos at bay.
Getting Started With A Traditional Bivy Sack
As with an emergency tent, setting up a bivy sack is all about location. You want as flat a surface as possible and one free of stones and other sharp objects that could pierce the fabric of your bivy sack and cause you considerable discomfort.
A frameless bivy sack is the most lightweight shelter you can find, weighing as little as 7 oz. It’s also compact enough to slip into your bug-out bag.
Frameless Bivvy Setup Instructions
- To set up a frameless bivy sack, remove it from its carry bag.
- Lay it on the ground, ensuring the opening is on top.
- Some bivy sacks have straps to hold a sleeping mat in place while you toss and turn. If that’s the case, slip your sleeping mat into your bivy, and secure it with the straps provided.
- Slide your sleeping bag inside, ensuring the top and bottom align with the top and bottom of the sack.
- Wriggle into your sleeping bag and pull the hood of the bivvy sack over your head.
- Zip up the bivvy sack, leaving a small gap for ventilation.
This type of bivy sack is versatile enough to be used as a survival poncho or tarp and a survival shelter. For the average person, it’s also large enough that you can sit up in it while preparing food.
On the downside, getting enough ventilation is tricky when the cover of the bivy sack is resting on your face. In damp weather conditions, this can cause condensation to accumulate inside, making you and whatever you’re sleeping in uncomfortably clammy. Read more about this in our guide to mylar space blankets.
Setting Up A Face-Lifter Bivy Sack
A face-lifter sack has either one or two poles that lift the fabric of the bivy sack away from your face. While this makes the bivy sack more cumbersome to carry, it provides a more comfortable and drier night’s sleep.
- To set up a face-lifter bivy sack, remove it from its carry bag and unroll it in your selected location.
- Put the pole or poles together. If your bivy sack uses two poles, fix the longest one in place first.
- Slide the appropriate pole into the sleeve at the front of the sack.
- Secure the pole in place using the fasteners provided.
- If your bivy sack has a second pole, this will connect the two ends of the long pole. Slide it into the sleeves provided and secure it in position.
- Depending on the design of your bivy sack, you may need to peg the hood of the bivy sack into position.
- Once you’ve completed the setup, add whatever bedding you’ve brought along, be it a sleeping mat, sleeping bag, or, if you’re going for the ultimate survival luxury, an ultralight camping pillow.
Check out this tutorial for more details on setting up a face-lifter.
How To Use A Bivy Sack
While setting up a bivy sack is simple enough, sleeping in one can be more challenging. To ensure a good night’s rest, look at these handy tips for sleeping in a bivy sack.
Rocking and Rolling In A Bivy Sack
If your bivy sack lacks any straps to secure your sleeping mat, it will tend to roll around as you move in your sleep. Try to lift and turn your torso and legs separately to prevent too much movement. It’s not easy to remember to do this if you’re fast asleep, but if you practice it while nodding off, you should wake up roughly at the same place you went to sleep.
What To Do With Your Gear
There’s not a lot of room in a bivy sack, and you probably don’t want to cuddle up with your bug-out bag, especially not if it’s wet and muddy.
Use a dry bag or pack liner to protect your gear without dragging it into your bivy sack, and stow whatever odds and ends you need, like a torch or cellphone, in a smaller stuff sack so that it’s close at hand.
Conclusion
A bivy sack is a lightweight and compact alternative to a traditional tent. Simple to set up and easy to use, when used together with an emergency sleeping bag, a bivy sack provides a simple survival shelter that will keep you warm, dry, and free from itching insect bites.
