A tippy tap is a handwashing station design that has been around since the 80s. It’s great for long-term camping, off grid living, or SHTF situations where you don’t have running water but still need to wash your hands.
Compared to other DIY hand washing stations, the tippy tap design is popular because it is low cost, easy to make yourself out of common materials, and sanitary since it has hands-free operation.
There are a lot of ways to make a tippy tap. I’ll go over a simple way here and the pros/cons of this design and other handwashing station options.
Supplies Needed
- Contain for holding water. Ideally, it should have a molded handle. You can use recycled laundry detergent containers if you don’t have a water jug. Tippy taps can even be made from gourds, so any container will work.
- Nail. Or another sharp, pointy object, such as a screwdriver or knife.
- Sticks for stand. You’ll need two forked sticks and a stick to set between them.
- String. It needs to be approximately 3 feet long or as tall as your stand.
- Pedal. This can be a stick or a board with a hole drilled into one end.
Instructions
1. Heat a nail.
Use a lighter or a candle to do this.
2. Poke two holes in your water container.
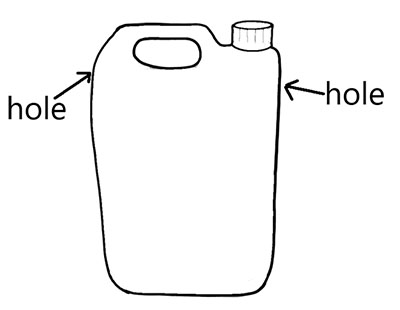
Using the hot nail, poke two holes in the container. One hole is for the water spout. The other hole acts as a vent (to prevent that glug-glugging that happens when you pour water out of a container).
Where to poke the spout hole?
Right Underneath the Lid
Most tippy tap designs have you poke the hole near the top of the water container underneath the lid. When the container is full, the water will easily come out. But, as the container empties of water, you’ll have to tip it very far to make it flow. This position generally works best with smaller containers or with large containers that get refilled often.
Lower Underneath the Lid
If you put the hole a bit lower down, you won’t have to tip the container as much, so it’s easier to control the water flow – but you also won’t be able to fill the container completely, so it will empty faster. This position generally works best for larger containers.
In the Lid
You probably don’t want to put the hole in the container’s lid. This will require you to tip the container all the way down for water flow. The container can sometimes get stuck in this position, it’s hard to control the flow, and you use more water.
3. Tie the rope to the container.
Usually, you can just tie the rope around the container’s lid. If you have an unusual container shape, you may need to get creative with where you attach the rope.
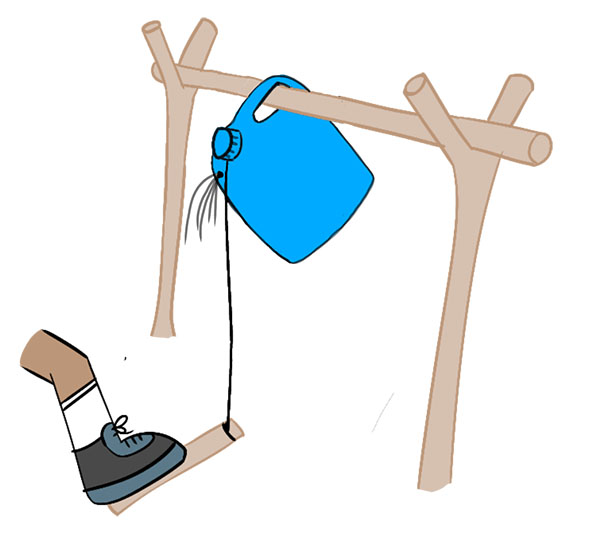
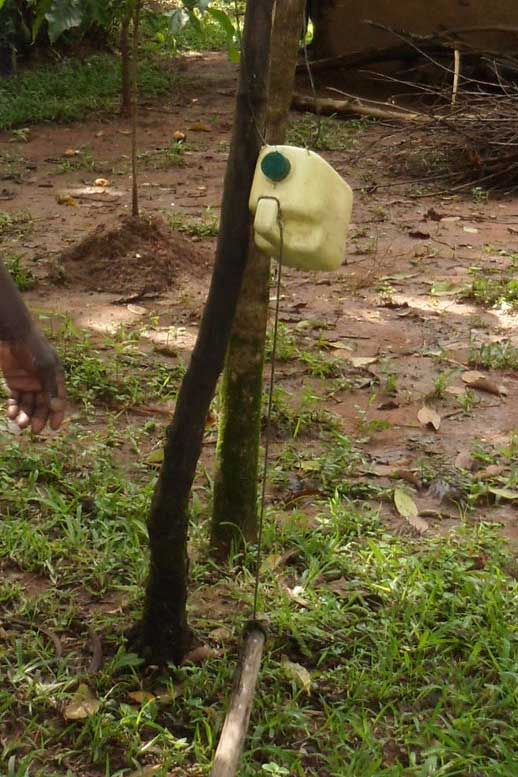
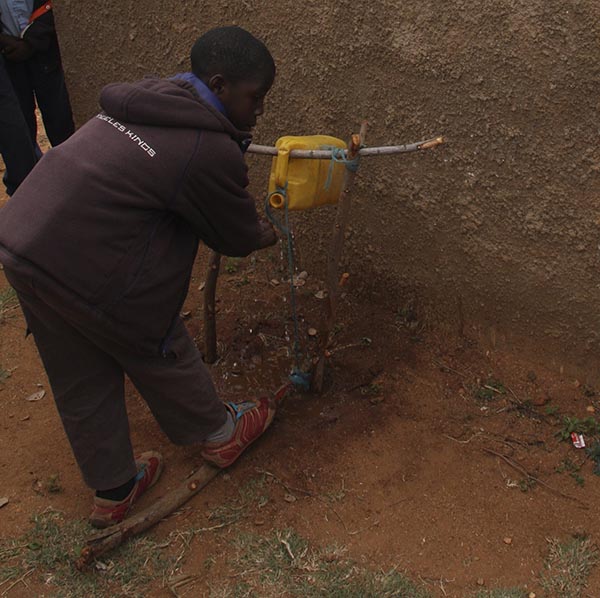
4. Make a stand for the tippy tap.
There are a few ways to make a stand for a tippy tap. The method that generally works best is to use two forked sticks and a crossbar stick.
You will need to:
- Dig two holes in the ground.
- Put the forked sticks into the holes with the fork upwards.
- Fill the holes with dirt or rocks to stabilize them.
- Put your long stick through the water container’s handle.
- Set the long stick across the forked sticks.
5. Attach pedal.
Tie the other end of the rope to your pedal. The tied end of the pedal needs to be off the ground. The pedal should cause the container to tip forward when you step on it. Adjust the length of the rope to get the tip right.
Choosing the best pedal
A flat board usually works best because it’s easy to step on. Drill a hole near one end and tie the string through this hole.
If you don’t have a board, I’ve found that longer, heavier sticks work best for the pedal because they have enough weight to stay on the ground. It’s also easier to control how hard to press on the large stick to control the water flow.
6. Attach soap.
Finally, attach soap to the tippy tap setup. The easiest option is to poke a hole through a bar of soap and tie it to the stand with rope.
Problems with Tippy Tap Design
While the tippy tap is good for many off-grid situations, the design has three major flaws.
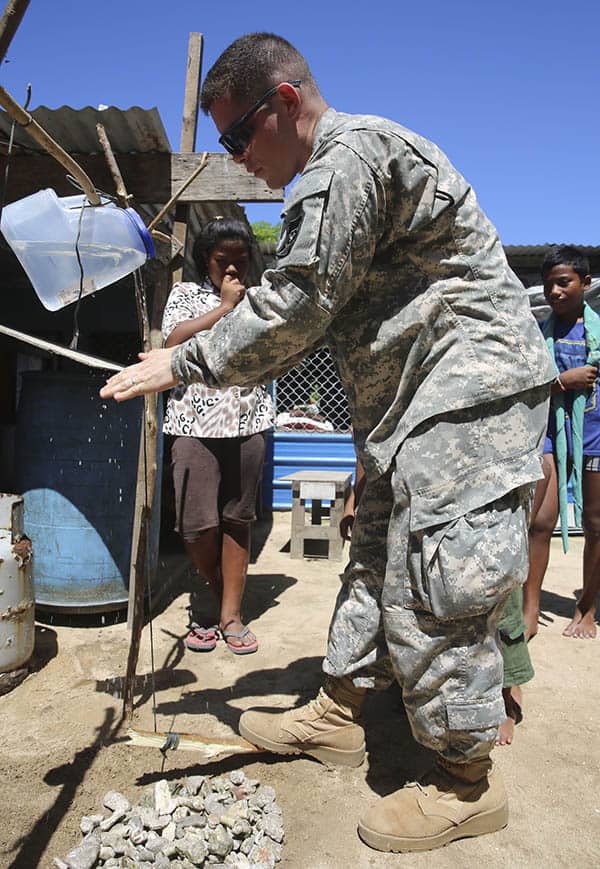
1. Muddy Ground
Tippy taps cause water to spill onto the ground below them. If there isn’t good drainage in the ground, you can end up with a muddy mess.
To prevent this, dig a pit under the tippy tap stand and fill it with gravel or sand.
2. Wastes Water
The tippy tap design doesn’t include a way to collect the water. It just ends up spilled on the ground. You can put a collection vessel beneath the tippy tap to collect this water, but it results a lot of splashing.
It would take some serious design modifications to collect this water. For example, you might need to put a pipe underneath the drainage area to divert the water towards a garden.
3. Not Suitable for Indoors
You could set up a tippy tap in a shower. However, it results in a lot of splashing. For indoors, you are better off using another handwashing station, such as a gravity sink.
Also read: How to wash hands without running water
