Ready to build a better mousetrap?
I’ve got you covered.
The bucket mousetrap is a simple yet effective way to catch multiple mice at the same time. It’s easy to build, cheap to make, and completely customizable to fit your preferences. You can assemble this trap in just half an hour, then set and leave it for several days while you wait.
The best part is you probably already have all the components you need right at home!
Read on to learn how to make a bucket mousetrap, so you can reclaim your property from rodents and resume your rightful position as ruler of the homestead.
What You Need to Make Your Trap
Head to the shed for tools and materials. If you don’t have everything you need, you can pick it up at the local hardware store or improvise with other household items.
- Bucket: The bucket is for holding your mice. A standard five-gallon bucket works well. If you have a rat problem, use a larger container.
- Rod: The rod will attach across the bucket and hold the bait can. You can use an old coat hanger, copper wire, or some scrap metal. Whatever you use, it should be straight and lightweight.
- Can: The can will be smeared with bait to attract the mice. You can use an old beer can, a food can, or even a smaller paint can if it doesn’t weigh too much. I’ve also seen people using plastic bottles.
- Drill: You’ll use a drill to make holes in the bucket and the can to attach the rod. If you don’t have one, you could use a hammer and nails or even a knife to make holes.
- Plank: The plank will lead mice from the ground to the lip of your bucket. It should be two to three feet long and a few inches wide. You can use any scrap wood. Depending on how you set it up and how heavy your wood is, you may need another plank to support it.
- Nails: These are for assembling and attaching your plank and support plank, should you need it.
- Hammer: You’ll need a hammer to drive in the nails.
- Bait: Your bait needs to be spreadable and light. Many people have success with peanut butter, a rare delicacy for mice. You could also use jam, marshmallow fluff, or wet pet food. Any sweet and sticky substance should do the trick.
- Liquid: Many people put water or antifreeze in the bucket to drown the mice and preserve their bodies. However, killing the mice is optional. To make a more humane live trap, just omit the liquid.

How to Assemble Your Trap
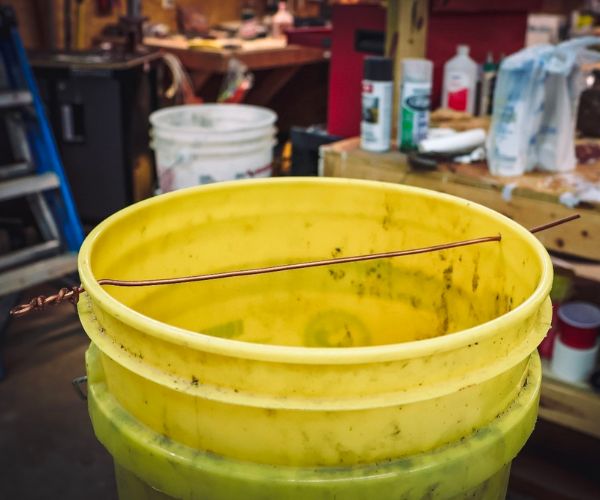
1. Drill the Bucket
Drill two holes on each side of the bucket lip. Use a drill bit larger than your rod, but keep the holes as small as possible. I used a drill press, but you can use any standard drill you have. It’s essential to make sure your holes align directly opposite one another.
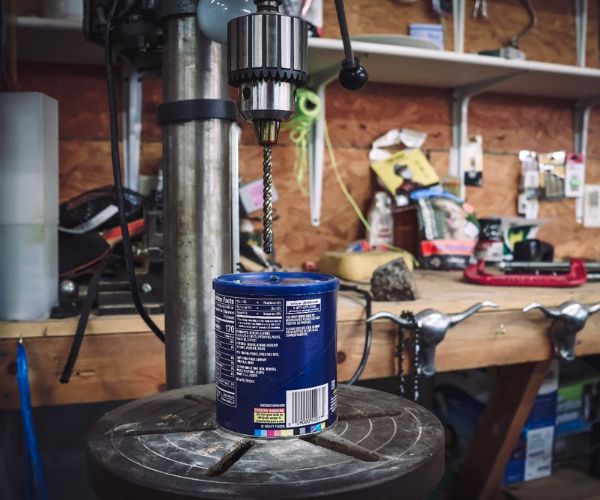
2. Drill the Can
Drill two holes through the can lengthwise from top to bottom. Like the holes in your bucket, the holes in the can should be directly opposite from one another.
If they are aligned correctly, the rod can go straight through. If your rod can’t go in straight through the can and bucket, it won’t rotate. If it doesn’t turn, your mice won’t fall into the bucket, and your trap won’t work.
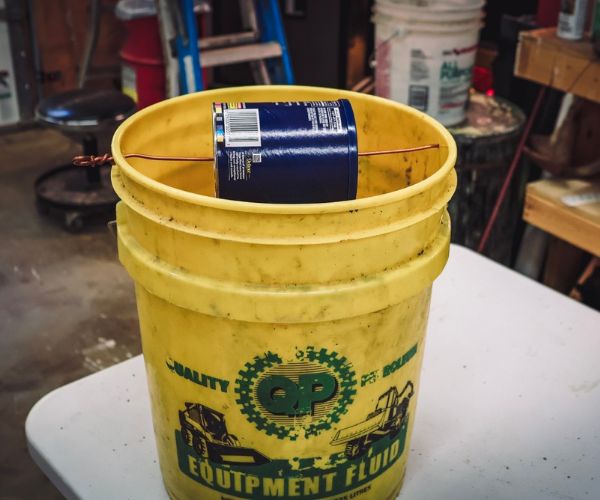
3. Insert the Rod
Thread the rod through one side of the bucket, then through the entire can. Finally, push it out through the hole on the other side of the bucket.
You won’t have that much wiggle room to work with, and it can be a tight squeeze. But if your holes are aligned correctly, the rod will fit. Once the rod is in, twist the ends of it to prevent it from sliding out.
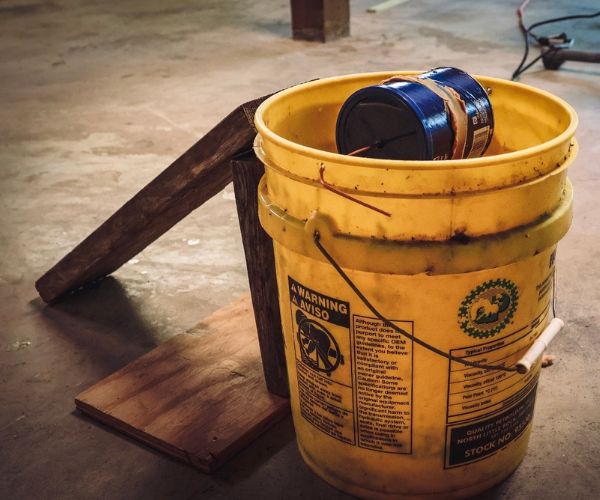
4. Set the Ramp
Lean the ramp up against the bucket and nail it to the lip. Make sure you have enough of an angle so mice can climb it. They should be able to sink their claws into the wood easily.
Alternatively, you can build a support beam beneath it like I had to—my wood was too heavy and ungainly to attach to the bucket itself.
5. Bait the Can
Smear your bait in a thin, even strip around the can. Remember, the bucket mousetrap works by weight and gravity. If you throw the weight off by adding thick globs of bait, the can won’t rotate when the mouse comes to get the bait.
6. Add Lethality
The bucket mousetrap is a humane way to catch mice, but you can easily turn it into a kill trap.
Many people add water to the bottom of the bucket to drown the mice. Some even put antifreeze in the bucket, which helps preserve the bodies and prevents them from stinking up the joint.
Alternatively, you can buy or make homemade mouse poison to add to your bucket.
7. Set the Trap
Place the bucket mousetrap in your infested area. This trap is suitable to use in an enclosed space, but keeping it in an open-door shed or barn may cause problems. The bait will also attract raccoons, squirrels, and larger pest animals that could steal the bait or knock the trap over. So, keep the door closed.
8. Emptying the Trap
Congratulations! You’ve got a bucketful of mice. If you added a lethal dose of liquid to your trap, you now have corpses to contend with. Always follow the safety guidelines for disposing of dead mice. You can double-bag them and throw them away or bury them on your property.
Make sure to wear gloves while touching any part of the trap and especially when touching the mice. When everything is done, wash your hands and bleach the trap.
If you choose to catch the mice alive and want to release them, just drive a few miles down the road and set them free. Of course, they could make their way back to your house. What can you do instead of releasing them?
Mice are an excellent source of protein. Instead of wasting it, consider cooking the mice and making dog or cat food with them. If you’re feeling adventurous, why not eat them yourself? You can cook and eat mice in various ways. You might even start craving these critters!
Now that you know how to make a bucket mousetrap, you’re going to conquer these pests once and for all. If you’re ready to catch some mice, why not get started on this DIY bucket trap today?
Also read:

I brought a few mice I caught into my Dr.s appointment, they were sealed in zip lock bags. I asked him if it was ok to to eat them and he said he would take them home and eat them so I let him keep them
I’m giving this a try
I was with you until you said I could eat the mice. I’ll take a huge pass on that. I’ll just take the mice with me on vacation so they can’t come back to my house. 😉
For the no liquid method, I’m thinking I will spray olive oil up the sides and bottom of the bucket to hopefully keep them from being able to jump out
Please don’t use any toxic liquid or poison. Any animal can dig up the dead mice and injest the poison. Use water to drown the mice, then any wildlife, cats, dogs who happen to come across the dead mice are not in danger of being poisoned.
They can’t jump out when there is liquid in the bottom of the bucket – nothing to push against.
Did he say you can cook and eat the mice?
These work great but the mice near me always seem to jump back out. I have tried taller than 5 gallon buckets but they can still jump out. Any thoughts?
Put a couple inches or so of water in the bottom of the bucket.