Are mice and rats driving you crazy?
Poison bait stations are a great way to control the population, but pre-built units tend to be flimsy and expensive. If you want a sturdy bait station that you can reuse repeatedly, your best bet is to make it yourself.
Fortunately, this isn’t a very difficult project. All you need are some basic supplies, a few tools, and a desire to reclaim your territory from the rodent scourge. Read on to learn how to build a homemade bait box so you can get rid of vermin without breaking the bank.
Please note: Severe rodent infestations can be a serious health hazard. Call a professional if you suspect you cannot control the issue.
Materials to Make a DIY Rodent Bait Station
A bait station is basically a protected feeding area with poisoned food inside. Unlike a bucket trap, a bait station can’t kill pests immediately. Rodents come to eat, go about their business, and eventually die from the poison.
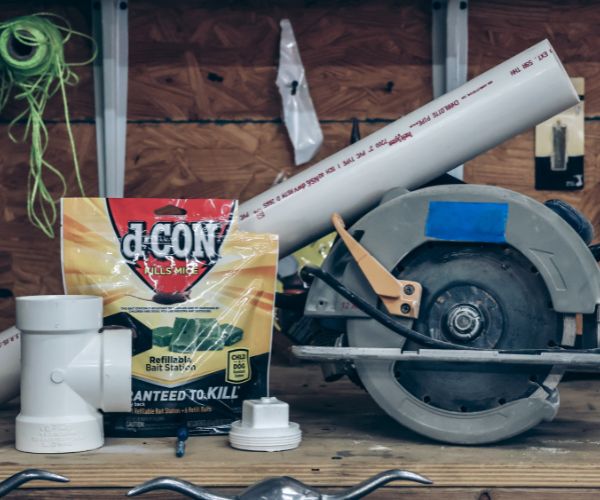
Simple bait stations are easy to make, and you can usually find all the materials at your local hardware store for less than $15. Here’s what you’ll need to get started:
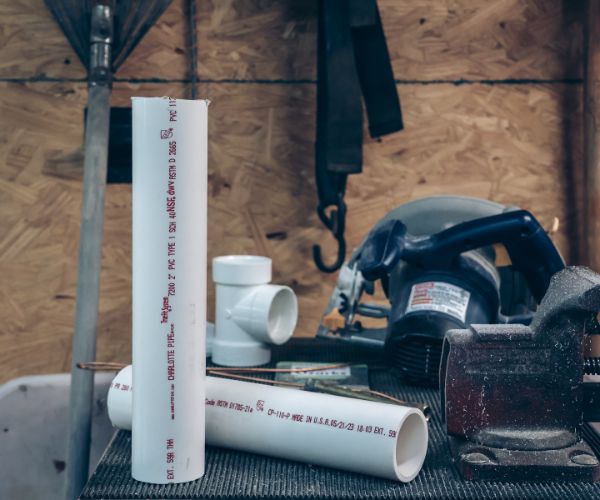
- PVC piping: Many experts claim that rodents are more likely to enter a feeding area if they see a visible escape route, so piping is perfect for a bait station. You’ll need about two feet of PVC to make the body of your bait box. Use two-inch piping for mice and four-inch piping for rats.
- Saw: You’ll use the saw to cut your piping in half. You can use a handsaw, a jigsaw, or any other cutting tool you feel comfortable with.
- PVC cleanout tee: You’ll use a cleanout tee to create an access point inside the pipe. Make sure to buy a regular cleanout tee with attached couplings the same size as your PVC piping.
- PVC cleanout plug: You’ll need a cleanout plug to close the access point you make with the tee. Make sure you buy one that’s the same size as your cleanout tee and has threading, so you can twist it in comfortably.
- Four-inch screw: You’ll insert a screw through the top of the cleanout plug to hang the bait. Four inches should do the job, but check the length of the screw against the height of your cleanout tee and plug to ensure it will extend into the body of your piping.
- Bait blocks: Poisoned bait will draw rodents to the station and encourage them to eat. Only premade blocks will work for this application. Don’t substitute pellets, powders, or DIY mouse poison concoctions. These aren’t solid enough to keep in place with a screw and could endanger pets and children.
- Wood base: The wood base is optional but useful. It stabilizes the station, preventing animals from disturbing and rolling it around. You can screw almost any small piece of scrap wood onto the bottom of the station to create the base. Just ensure it isn’t so thick that it prevents rodents from climbing inside the PVC.
- Half-inch screw: If you choose to use a wood base, you’ll use a short screw to attach it to the bait station. Any half or one-inch screw you have lying around should be sufficient.
- Drill: You’ll need a drill to drill a pilot hole and drive the screws. If you don’t have an electric drill or impact driver, you can probably get away with using a manual screwdriver, but it may take a bit more effort.
How to Make a DIY Rodent Bait Station
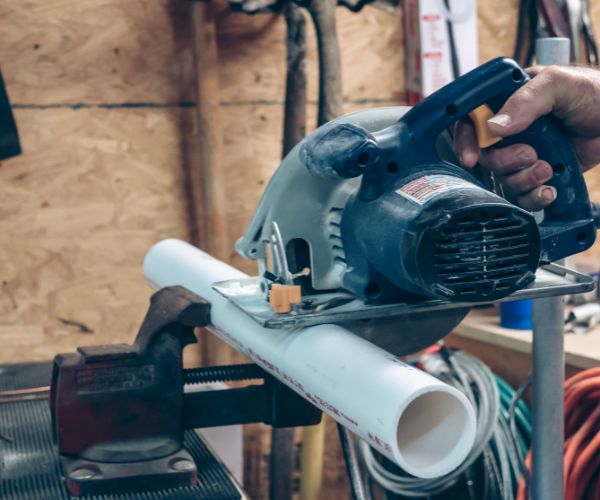
1. Saw PVC in Half
Use your saw to cut the PVC in the middle. There’s no need to measure precisely, though the sections should be roughly equal. If you want, you can use sandpaper to sand down the rougher edges where you sawed. This might make it easier to attach the cleanout tee, but it isn’t strictly necessary.
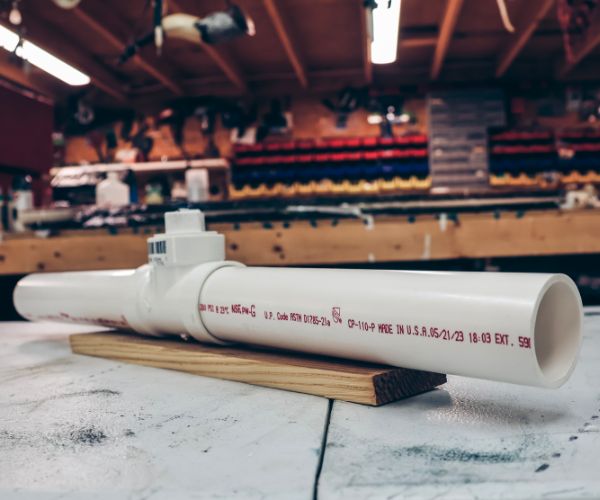
2. Insert Cleanout Tee
Insert the cleanout tee between the two sections of PVC. Your cleanout should have built-in couplings, making it easy to slide everything into place.
Don’t use pipe cement or any adhesive to attach the pieces. You want to be able to take the bait box apart later in case you need to clean it or perform maintenance, and glue will make that impossible.
3. Screw Tee to Wood Base
Take your short screw and screw it through the bottom of the cleanout tee and into the wooden base. You have easy access to the bottom of the cleanout tee through the hole in its top, so this is really the only place to screw the bait station and the base together.
You’ll need a long driver to reach the bottom of the cleanout, and using a magnetic bit will make your life much easier.
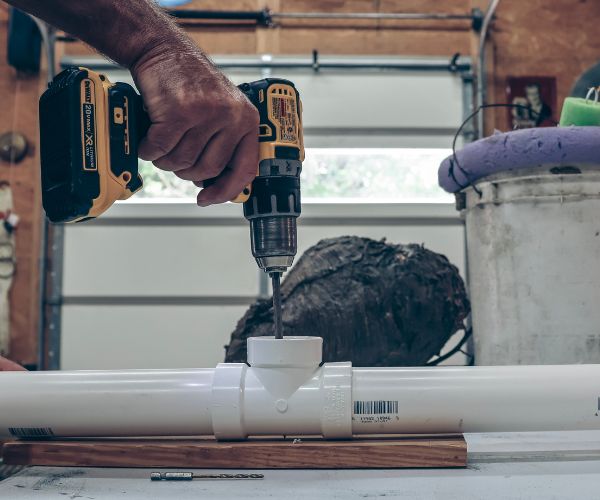
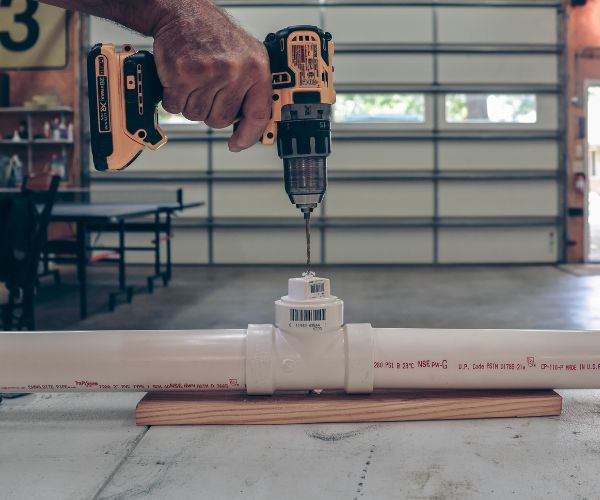
4. Drill Pilot Hole Through Plug
It’s wise to drill a pilot hole through the cleanout plug at this stage. You’ll eventually put your bait screw through the cleanout plug, but it can be fragile. Drilling a smaller hole first will prevent the plug from cracking and breaking as you put the screw in.
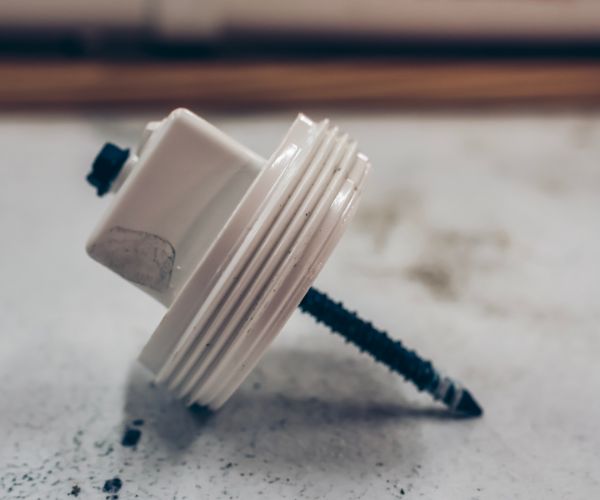
5. Insert Bait Screw Through Plug
Take your cleanout plug and drive the four-inch screw through its center, where you drilled the pilot hole. Drive the screw all the way to its cap, leaving the bottom threaded area exposed below.
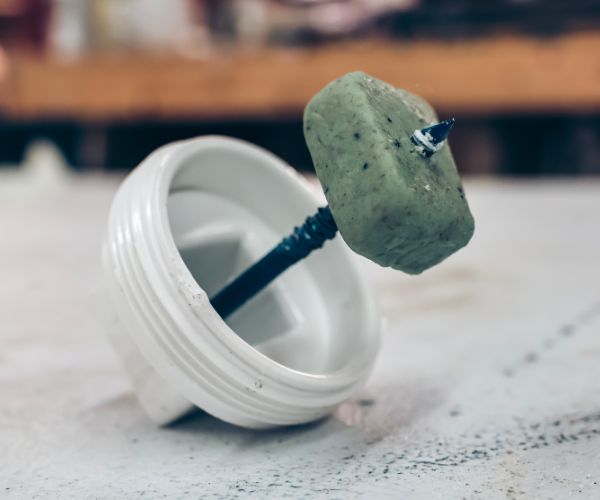
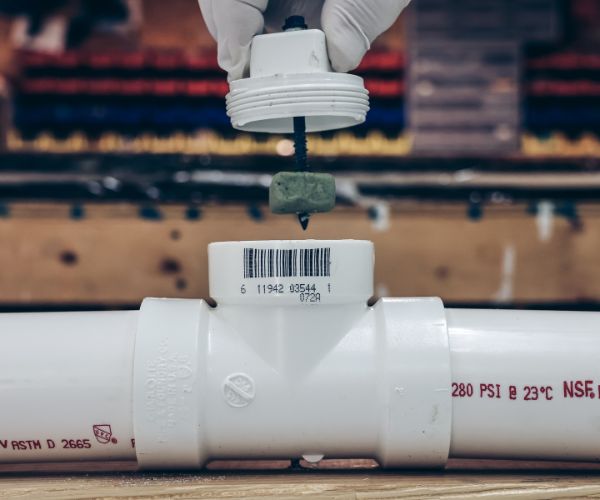
6. Attach Bait to Bait Screw
Put on a pair of gloves and screw your bait block onto the screw in the cleanout plug. Most bait blocks are soft enough to screw on without special tools; you can usually just twist them with your hands. However, some are harder. If you can’t screw it on with your hands, you can drill a small hole through the bait block.
The thread on the screw will keep your bait block in place so it won’t fall or get dragged out of the bait station by hungry rodents. If you want extra insurance, you can slip a rubber band or washer on the screw’s tip, but this is optional.
7. Insert Plug in Cleanout Tee
Insert the baited cleanout plug into the cleanout tee. Since the plug is threaded, you can twist it down easily. Note that some cleanout plugs are built differently and might vary in height. Look inside the pipe to check if you can see the bait block. If you can’t see it, the mice can’t either, and you may need a longer screw.
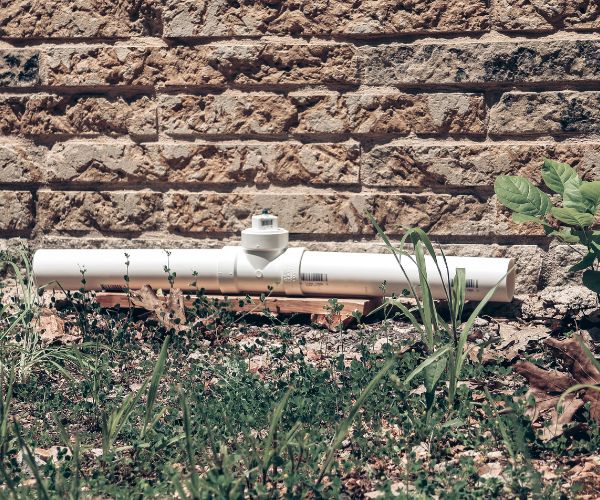
8. Set Bait Box
You’re ready to set the bait station! This robust structure is rugged enough to leave outside a shed, but the pet-safe design means you can also take it inside the house. Note that while you can use PVC outdoors safely, you should take steps to protect it from extreme weather.
Whether you’re using it inside or outside, it’s essential to place it in an area where rodents are active. If they’re stealing your food or grain supply, try to put the bait between their nest and the food source. It may take several days before they trust the bait, but rodents will eventually eat whatever is easiest for them to get.
Additionally, it’s wiser to leave the box around the edge of a structure rather than in an open room or yard. Rodents may avoid open areas because it’s easier for predators to attack there.
They are cautious and travel the same route daily, often leaving droppings, scuff marks, and other signs of their presence. Pay attention and learn their paths so you can leave bait stations there.
Check the station regularly to see if rodents have taken the bait. If it remains untouched, you need to move the station.
9. Replace Bait as Needed
It is crucial to replace bait often so it remains fresh and attractive to rodents, but the shelf life varies between brands. Read the manufacturer’s instructions on your specific blocks to see how long they’ll stay fresh and replace them accordingly.
Of course, your bait might get eaten before it goes stale. When you first put out the station, check it daily and put a new bait block in if it runs down. After a few weeks, many rodents will hopefully be dead. At this stage, you should only need to replace the bait every month or so.
When replacing your bait, unscrew the cleanout plug first. If the old bait is still there, dispose of it as prescribed by the manufacturer. Once the screw is empty, screw on another bait block and replace the cleanout plug. Remember, these blocks are toxic, so always wear gloves while handling them.
Ready to rectify your rodent problem? Now that you know how to make a DIY bait box, you can handle the issue without overspending on costly premade bait stations or extermination services.
