There are many ways to make rocket stoves, but the brick rocket stove is the easiest. This design uses 17 bricks. You don’t need any mortar or special tools to make it.
1. Choose Where to Put Your Rocket Stove
Rocket stoves can’t be used indoors because of carbon monoxide poisoning risk. You’ll want an outdoor space with a sturdy, flame-proof base. Ideally, position the rocket stove so the opening faces the wind for better airflow.
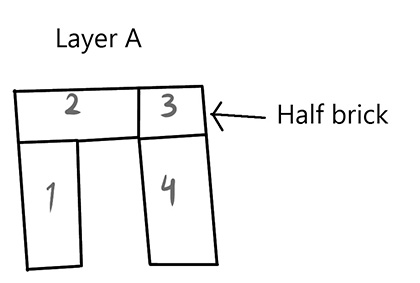
2. Layer A
You’ll need to cut a brick in half for this layer. This is pretty easy to do with a chisel and hammer. If you can’t break the brick in half, you can have it sticking out of the stove – but then you’ll need an additional brick.
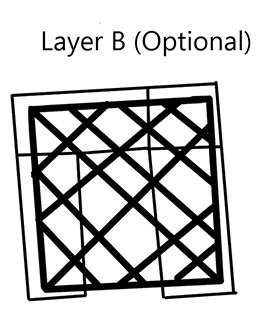
3. Layer B (Optional)
If you have a metal screen, put it on top of layer A.
If you don’t have a screen, you will use your 17th brick to prop up the wood.
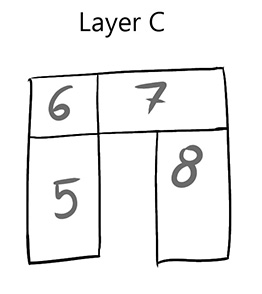
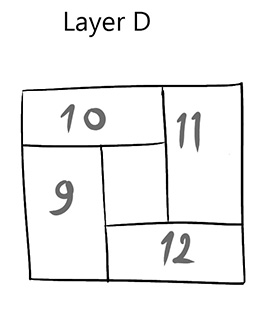
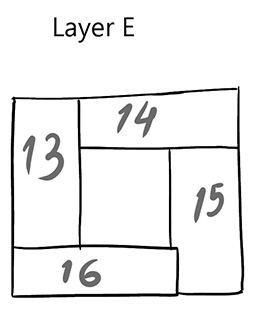
4. Add Layers C, D, and E
See the images below. Note that this is the minimum number of layers you should use. If you want to make a larger fire in your brick rocket stove, add more layers to make it taller.
5. Make Your Fire
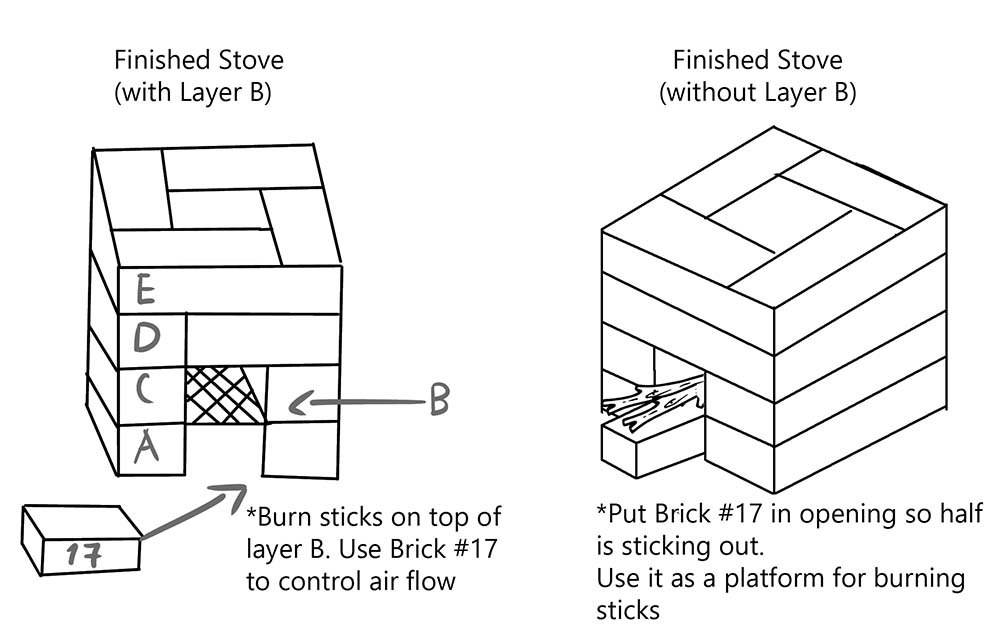
- If you have a screen (layer B): Put the wood for your fire on top of the screen. The screen allows the wood to get airflow from below and also for ash to fall through. Use brick #17 to control the airflow in front of the rocket stove entrance.
- If you don’t have a screen: Put brick #17 so it is halfway sticking out of the entrance. Use it as a platform for burning your sticks. As the ends of the sticks burn, you will push them further into the stove.
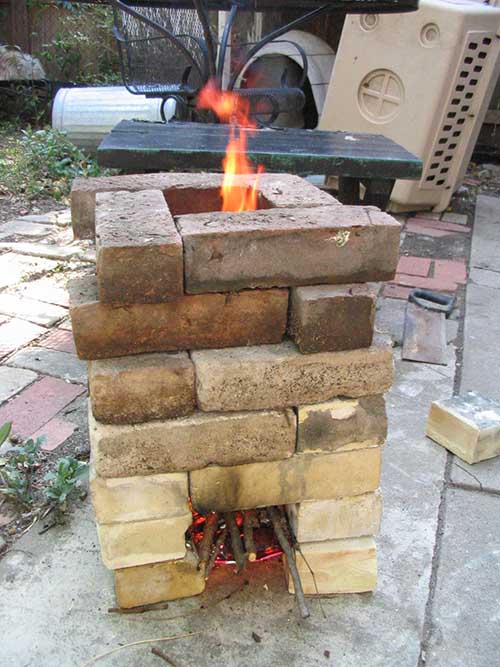

I made one and it sits just outside my back door for when I need it. Has a potted plant on top of it until then.