When it comes to ease and portability, container gardening is about as good as it gets.
I rent a home that has a modest-sized backyard. Unfortunately it’s also an area under some heavy shade during the growing season.
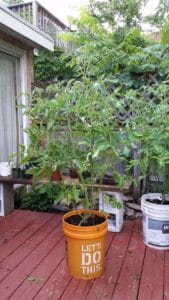
There’s one small pocket on the deck that receives ample sunlight, so I’ve had to make do with the little space I have to grow my vegetables in containers
That can be tricky business; some plants need as little as six inches of soil to grow, but others need as much as two-feet. And because they’re in containers they need to be regularly watered.
But, hey, that’s alright, because the other option is no vegetables, and that’s no option at all.
Why Use Containers?
That’s a good question. If you’ve got a sunny plot of land, why not throw plants right into the ground?
Because that land could be heavily polluted with something vile. Could be something that prevents the plants from growing or kills them outright, or even worse it could be something that you consume and slowly accumulates in your system.
That could be a death sentence by itself. Other times growing directly in the soil isn’t possible because of other environmental concerns.
Could be your only option is a wet, soggy piece of ground. Or maybe you just don’t have the space. That’s where container gardening in 5-gallon buckets comes in handy.
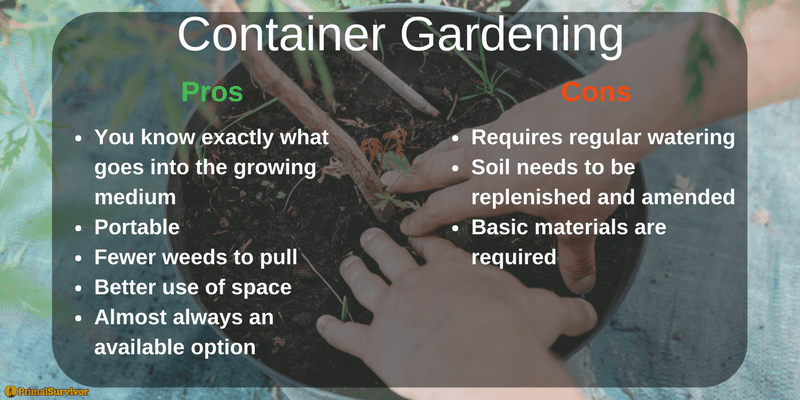
Pros
 You know exactly what goes into the growing medium
- Portable
- Fewer weeds to pull
- Better use of space
- Almost always an available option
Cons
 Requires regular watering
- Soil needs to be replenished and amended
- Basic materials are required
Sometimes this is the only option you’ll have. People who live in apartments and areas with limited space are ideal candidates for container gardening.
Practicing it now means you’ll be more adept at using the skills and implementing the knowledge if you ever truly need to. And besides, you get fresh produce from right outside your window.
A 5-gallon bucket is cheap, readily available, and perfect for growing a variety of vegetables
Starting Supplies
At the basest level, you really only need a 5-gallon bucket, some growing medium/soil, and the plants or seeds themselves.
Not bad, right?
We’ll take a look at the easy option and the more in-depth, hands-on one.
All container gardening projects need a few staples
- A few 5-gallon buckets: I always recommend using a new 5-gallon bucket, (Amazon Link) or at least one you know the history of. People store some awful things in those buckets, and you wouldn’t want it leaching into your food, would you?
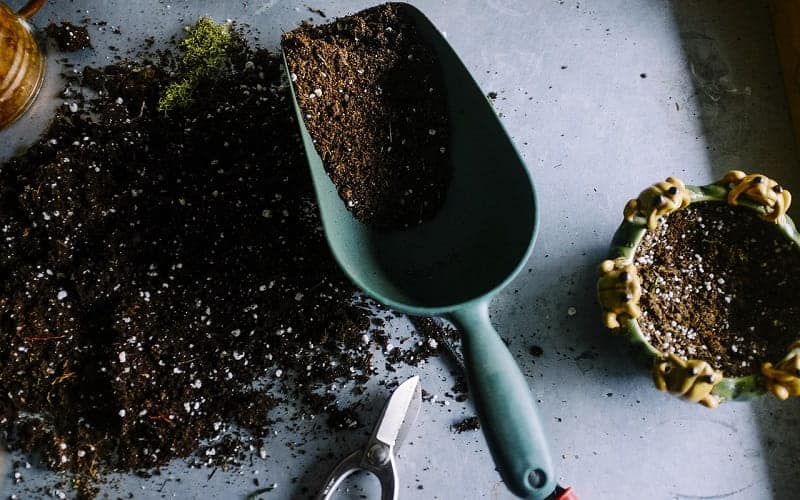
- A growing medium (potting mix or potting soil): Don’t buy garden soil for your containers! Potting mixes (suggestions are below!) are designed to allow for drainage, an absolute necessity in container growing. Garden soils will be heavy, hold onto water for far too long, and become way more trouble than it’s worth.
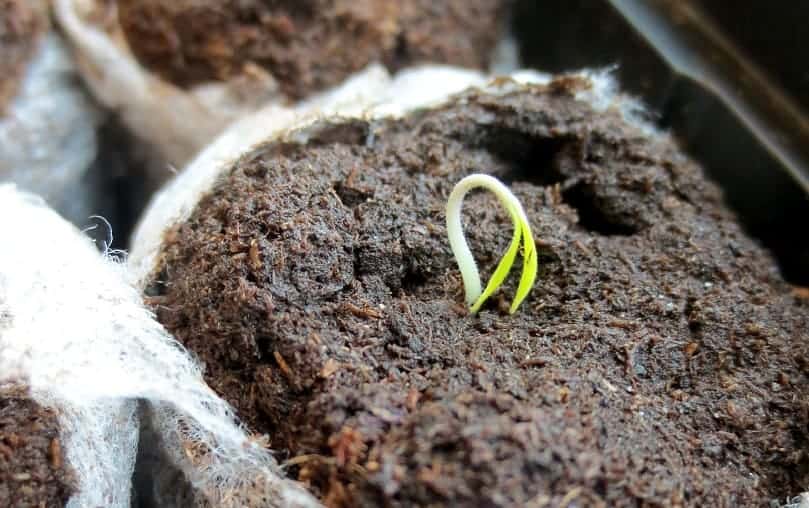
- Plants or seeds: Live plants are usually better to start in containers than seed.
- Plant stakes/cages: Not everything needs stakes or cages, but some plants (tomatoes, cucumbers) will suffer without.
Gimme the Easy Option
Grab a few 5-gallon buckets, and then a bag of potting mix.
Drill some holes into the bottom of the buckets; watch the video below for a good demonstration on how to add, and how many to add.
In general you want more than less. If you have a tomato cage, it’s easier to put this in first before adding the potting mix.
Add some water to the potting mix before putting in the container.
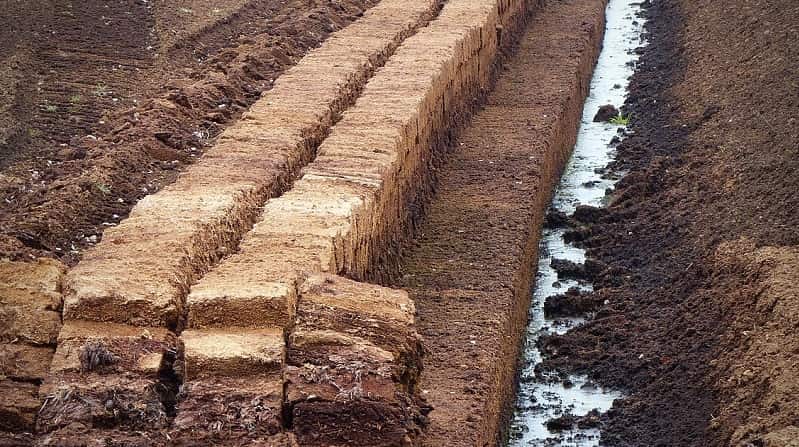
Peat moss is a main ingredient in many mixes, and when it is dry it becomes hydrophobic (it expels water rather than absorbing it).
That makes the first watering a pain in the butt; mix the soil with some water until it’s damp and moist. Fill up the bucket with your potting mix.
You want a bag of potting mix with some sort of slow-release fertilizer blended in. When using a pre-mixed variety I’ve had good results with Espoma’s potting mix. (Amazon Link) I’ve used it frequently when I’m in a pinch and can’t mix my own.
Though I’ve never used a FoxFarm potting soil (Amazon Link) it’s a good option, according to some trusted sources.
For a brand you’ll find almost anywhere, Miracle Gro (Amazon Link) makes a nice potting mix that’s about as nice as soil can get.
Leave about an inch or two of room between the top of the soil layer and the lip of the bucket.
Plop in those plants so the soil level of the bucket matches the soil level of the transplanted plant. Throw those puppies in a place where they get a solid eight-hours of sun.
Using mulch on these containers can help to limit weeds and conserve water. Place a thin layer, about an inch or two high, along the top of the potting medium.
Avoid bunching the mulch up against the stem of the plant.
I Want Something More Hands-On
Most of the steps you’ve carried through in the easy method carry over to this one: buy a bucket and add drainage holes, fill with cage and soil, plant vegetable and water.
The key difference is the growing medium you use. For this method, we’re making our own.
If you choose the store-bought methods below, you can stockpile the perlite and peat moss ahead of time; compost becomes a little more tricky and needs to be more freshly rotated.
Crafting your own blend is beneficial in almost every way, except that you need to mix it yourself.
You can mix this combination in each individual container, or use a tarp or wheelbarrow to blend a larger batch.
You also will add your own fertilizer to the blend, allowing you to have a more accurate guideline and estimation of what you’re reapplication schedule will look like.
We have a few recipes for you to use. Each recipe will reference “one part”. That is equal to whatever sized scoop you’re using to add each ingredient to the mix.
I tend to use an old six-inch plant pot when mixing, but anything will do; even handfuls.
The Soil-less Ratio
Use this method if you want a lighter potting medium. It tends to require more water as a flip-side to the benefit of a lighter weight. It also assumes you have access to store-bought materials.
- One part peat moss (for water retention)
- One part perlite/vermiculite/sand (for drainage)
- One part compost (for organic material)
Mix these together until it achieves a well-mixed consistency.
Add a fertilizer like Espoma Garden Tone (follow the directions on the bag for the size of your container) during planting for a nice boost to your plants growth.
The Top Soil Ratio
This combination is my preferred one. By adding some clean top soil to the mix you promote some growth of microorganisms that aid in plant development and soil health.
It also tends to last a little longer than other combinations, in my experience, and produces better-producing plants. It tends to weigh a bit more.
- One-half part clean top soil (to add “body”)
- One part perlite/vermiculite/sand
- One part compost
- One-half part peat moss
As above, mix these to a good consistency. Add the fertilizer as detailed in previous recipe.
The No-Store-Bought-Material Ratio
Let’s say you’re in a situation and can’t run to the store to buy bags of ingredients. You aren’t completely at a loss, you just need to put some more effort into your potting ratio.
It isn’t ideal, but it gets the job done.
- One part sand OR one-half part very fine gravel
- One part clean top soil
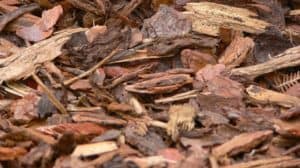
- One part pine bark (broken into smaller chunks about the size of your thumb)
- One part compost (can be found underneath scattered leaves, pretty much the top-most layer of decaying matter on the forest floor)
Mix to a good consistency, more vigorously than the previous combinations. Layer a half-inch of gravel on the bottom of the container for this composition.
You’ll need to continue adding water, but the chunks of pine bark can add some vital nutrients to the mix as it decomposes and can hold onto moisture.
I’ve used this combination once before and grew some tomatoes and peppers in it successfully.
Folks in the know will argue that adding mulch like this prevents roots from absorbing necessary nitrogen, but it seems to be a negligible amount.
Besides, this has worked well for me in the past.
The key elements to remember for a potting mix are that it needs:
- Drainage and porous material: Sand, vermiculite, tiny gravel or stone dust, etc.
- Something to hold onto and retain moisture: Compost, peat moss, etc.
- Organic material to feed the roots: Compost, small chunks of bark, fertilizer, etc.
Exact ingredients can be improvised as long as these basic requirements are met.
Plant Support
Store-bought tomato cages work, but I’m a fan of the old stick-and-string method.
Simply drive a stake into the container and use any sort of string, rope, or cordage to support plants against it and encourage them to grow upright.
Use string to hold up branches that would grow heavy and snap from the weight of fruit.
If possible, place your container on top of flat stones or bricks to allow water to drip right out of the drainage holes.
Watering
The main downfall of growing food in 5-gallon buckets is the increased demand for watering.
While plants in the ground can grow deep and eek out some moisture during all but the worst droughts, container-grown plants are contained in an entirely isolated environment.
Ordinarily I recommend the “weight test” when watering containerized plants; you pick it up, and if the growing medium/container feels light you water it.
That takes some trial and error to get used to, and not every container is easily liftable.
Top Tip
Simply press your finger into the soil to a depth of the second knuckle. If that’s moist, the plant is alright, but if it’s dry it’s watering time.
Most of the time I water my plants in two passes.
For the first pass I water and watch the bottom of the bucket.
I’ll wait until the water runs out of the bottom of the container before stopping; that’s a good indicator they’ve had enough to drink for now. Then I’ll move on to the next plant.
After I’ve watered everything, I go back around and give them one more quick drink each.
The soil is in a prime state to deeply absorb the water on this second go-around. Think of the first round of watering as the primer coat of the paint, and the second round as the second coat.
Watering containerized plants can be a big expenditure of water, so make sure you’ve got enough to get the job done.
Consider collecting the water that drains through the soil and container as well and using it again for these containers.
Best Vegetables for Container Growing
Not everything can grow happily inside of a 5-gallon bucket.
Some plants can be doubled up inside of a container, while most can grow herbs happily alongside each other.
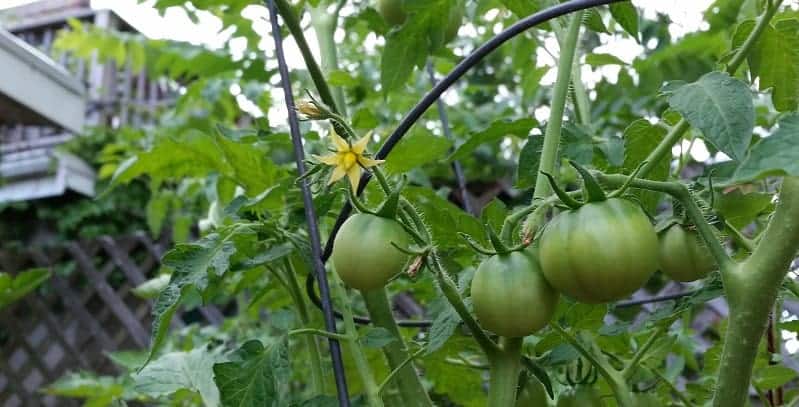
Tomatoes
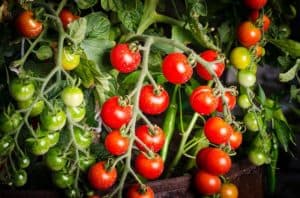 Grow one plant per bucket, and use a stake or cage to support the plant.
These guys can really grow wild, if you let them. Maintain regular moisture levels in the soil throughout the season to prevent diseases that destroy fruit. Basil grows well at the base of a tomato plant.
Peppers
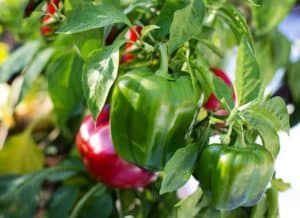 You can fit two peppers into each 5-gallon bucket. In my experiences peppers want to be supported by a stake.
Peppers are great for water conservation; many types want to dry out between waterings, which means you expend less resources growing them.
Cucumber
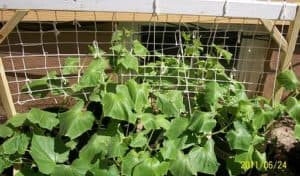 One plant per bucket. Cucumbers will grow and creep and do well with some sort of support.
The plants will grow over the container and spread around, so keep an eye on the fruit and ensure it isn’t being devoured by pests.
Onions
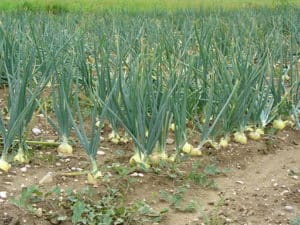 You can fit about four onions inside of a container. Onions are easy to grow but can be anxiety-inducing because you can’t see what’s going on beneath the soil.
Keep your eye on the green leaves climbing skyward to assess the condition of the plant, and don’t keep the soil too wet.
Lettuce
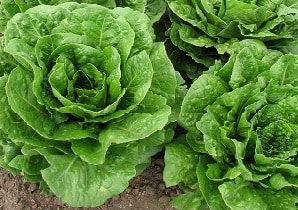 Ideal for growing in a container.
You can fit up to four plants per container, but be prepared to water regularly.
Consider other leafy-green options like sorrel to add a lemony tang to your greens.
Herbs
 You can fit a half-dozen herbs inside of a single 5-gallon bucket, or more. Thyme, rosemary, basil, cilantro, and chives grow well with each other.
Frequently harvesting leaves and stems keeps plants in check and ensures that they don’t overgrow one another. The flavor they add to your diet is worth it after a few weeks of bland, tasteless food.
Carrots
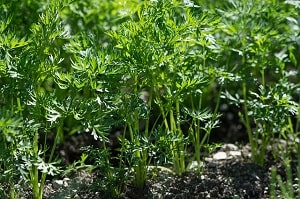 You could fit up to ten carrots in a single bucket.
If growing carrots ensure the soil is loose and sandy for proper root development; they don’t like when their growing medium is compact and rocky.
Tips and Tricks
- Utilize rain barrels at home and in the field for a low or no-cost supply of water for your vegetables
- Companion plants may seem superfluous but are beneficial and have “built-in” pest deterrents: adding marigolds to your containers can keep nasty bugs away while inviting beneficial ones such as ladybugs and praying mantis, for example
- Give your containers a quarter-twist every week to ensure they aren’t growing too lopsided
- Simple insecticidal soaps can be made by combining four-five tablespoons of concentrated dish soap to one-gallon of water. Mix and apply with a spray bottle to deter insects from your containerized plants
- You can re-use your potting mix indefinitely, as long as it’s amended and replaced with fresh ingredients once a year: remove dead plants and shake loose the soil from their roots. Fill it right back into the container and get it back to growing.
Food for Thought
Vegetables grown in a 5-gallon container can be useful to everybody reading this right now who is limited on space and growing options in their home. It’s inexpensive and provides fresh produce for the picking.
In a situation where you have no other option but to grow your own food, containers offer a safe and reliable source of food production.
It takes up little space and they are even portable. The resources used to provide a growing media for each container can be recycled year to year, providing a long-lasting source of growing media.
Get some practice and grow some tomatoes on your patio or deck this year, or experiment with your own potting mix recipes.
Let us know what you run with!
By Tomwsulcer (Own work) [CC BY-SA 3.0], via Wikimedia CommonsBy Rainer Haessner (Self-photographed) [GFDL or CC-BY-SA-3.0], via Wikimedia Commons

You can get 10 or so green onions in a single pail. They do well outside or under grow lights during the winter. They do require somewhat frequent watering and feeding at least 1x a month with miracle grow.
I start mine from onions purchased at the grocery store. I cut them off about 1/2 to 3/4 in from the roots (HINT: look for onions with the longest roots to begin with) wrap them up in paper towels, and keep them damp for about a week, then transplant them.
Harvest when they are about 1/2 to 3/4 inch in diameter at the root. Just slice them off with a sharp knife, again leaving 1/2 to 3/4 in above the soil. I have gotten between 5 and 8 (possibly more) onions from each set over two or more years time.
Thank you for this article. I will start my garden using the bucket method. I have zero confidence in my abilities & do not want to commit to changing the yard to accommodate a garden until I’ve had some success. Love the comments & will start looking for food grade buckets.
So how do you keep the buckets from tipping over when you have 4’ plus tall tomato plants?
Try using a round cage instead of poles for supporting the tomatoes. If that doesn’t work, then you need to add support for the tomatoes OUTSIDE of the bucket, such as a tripod that sits outside of the bucket or putting the buckets next to a fence and tying the tomatoes to the fence.
On how much water in your planter !!! I was given as a gift a”Moisture Hunter” instead of a rod to stick in -it has a censer plate on the back= just slide it up and down the bucket side to get the level of moisture and from 100% to dry it shows you the per cent of water at that level ! Don”t know what they cost but it sure is nice and precise ! Run it around the sides and you know if it needs watering more on that side or less all in a second !
Mine is called “Mannix” MMD7NP = Moisture hunter !
Good tip! It can be really difficult to regulate moisture in buckets so those rods seem like they’d be a big help.
Hello. I have been researching container gardening for 2 yrs now. I have all of my plants on a deck because I rent my home. I have sweet potatoes in fabric bags and 5 gallon buckets. Im so excited to see if there is anything in the containers. If I stick my hand in there will it disturb the root system? How long do you think it will take. Some were planted at the end of March and some in May. I love using the buckets
Thank you
Yes, that could potentially mess up the root system. Check out this cool system for checking on your bucket crops -https://www.pinterest.nz/pin/447404544223258232/
I am a first time grower in buckets. My question…..is it advisable to put a layer of rocks in the bottom of the buckets before putting the soil in?
Yes, that helps with drainage. You’ll want about 2-3 inches of smallish rocks to put at the bottom.
I’ve been watching a ton of YouTube vids & reading a lot but only found myself more confused and frustrated, until now. In No one broke it down like you. Thanks for all this info. I finally feel ready to begin.
Glad you found it helpful 🙂 Just get started (even if you are still confused about some things). The best way to learn is simply by doing.
This is a great article with a lot of good information. I’m fairly new to bucket gardening and find myself always scouting for good info.
One recommendation is to make your buckets into self watering buckets. This is my first year and they are absolutely amazing with one less to think about onna daily basis.
Thanks for the comment. Now I’m thinking we should do a post on self-watering systems at some point. There are so many ways to do it and they definitely make your life easier. A few friends of mine travel very often and their self-watering systems are what allow them to leave for weeks at a time and still come home to a thriving garden.
“we should do a post on self-watering systems at some point.”
Have you, if have already. where can I/we find it.
I am really easy to forget to go water.
Hi, I went all out with growing in 5 gallon buckets. I have 5 bkts of potatoes, 3 of carrots as well zucchini, onions and spinach. My question is how long do I water the potatoes? The leaves are at least 3 ft tall and have been in for just over 2 months ( started early May). Feel as if I keep watering, they will just keep growing. I know that at some stage the plant will “wilt” but when? thanks for your help. Quincy Massachusetts.
This was very informational as I am new to this. A great way for the family to do something that provides for us all. reading all the comments as well helps. I believe this is well put out for beginners, but I am going to try the fabric pots instead of the plastic, as I feel it will help with the moisture better. the only thing is, would the fabric pot holders become moldy instead of the plastic pots.
Hi, I’ve been growing tomatoes in 5-gallon buckets for several years now. I have found the best buckets at Walmart in the paint section. I only get the white ones because they are the only ones that have “food grade” on the labels. I won’t use the ones that aren’t “food grade”. They are about $3 each.
Thank you so much for this information. This will be the first year for me to do a bucket garden. I have grown Sweet potatoes in a bucket before and have been very successful. Due to health reasons I cannot plant a normal garden so this is an awesome way to still get fresh vegies.
Great to hear Linda, let us know how the sweet potatoes turn out.
Hey there Jeff, good question. In the long term picture I imagine that plastic containers leaking into the soil could become an issue, but I don’t know the answer to that for sure. However I can suggest alternatives to plastic containers.
You can find fabric pots, usually made of burlap, at garden centers and online. They don’t have the lifespan of plastic pots, and they tend to dry out a bit faster, but they work. Also check out potato grow bags, usually made of some fabric or similar material and featuring a little “door” in the growing area that theoretically allows you to check the potatoes development as they grow.
Lastly I can suggest whiskey barrels. Besides the full size containers we’re familiar with, you can find smaller, wooden containers for growing plants. They’re usually sold as a decorative container, but can easily be used for vegetables. Just check whatever sealants or preservatives they used! A good cedar barrel is a solid choice.
Best of luck finding the right containers, feel free to reach out again for more clarification or further questions!
Are there no concerns for plastic containers leaching into the soil and the plants? Do you have any non-plastic container recommendations?
Simply use food safe buckets as pickle buckets from drive-in restaurants bakery s = as a rule they give them to you or will save them for you FREE !
clean them of course = which is soap and water then a shot of pure x – then rinse good ! For first timer,s = drill holes in bottom and a couple 2X4 under the bucket to allow air space or you will drown your roots = use weed cloth
in the bottom of bucket = keeps rocks in and other pest out ! Want you to have good results as there nothing like growing your own Veges ! Jim
Excellent beginners tips for small space gardening! Took away extra knowledge although I am a garden expert!