Making DIY emergency candles is a smart move for anyone who wants to be ready for unexpected power cuts or other emergencies.
This guide will walk you through the simple steps I used to create my candles and some of the problems I encountered along the way!
Choosing Candle Wax
Candles use wax as fuel. As the National Candle Association explains,
“When you light a candle, the heat of the flame melts the wax near the wick. This liquid wax is then drawn up the wick by capillary action. Vapor from the melted wax combines with oxygen, which ignites at the wick and forms a constant flame.”
For making candles, you have two choices for wax:
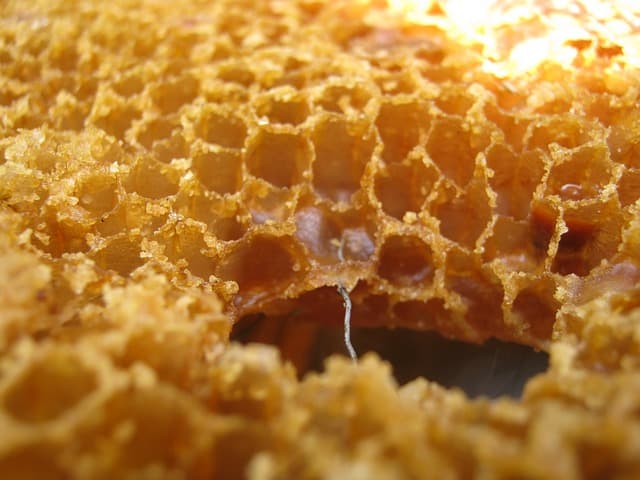
- Beeswax
- Paraffin
Beeswax vs. Paraffin for Candle Making
Almost all serious candle-makers will say that they like beeswax better than petroleum-based paraffin for their candles. However, don’t dismiss paraffin either.
In this DIY project, I tested both beeswax and paraffin (my bee-farmer friend gave me some wax and the paraffin I bought for cheap online). The paraffin ended up being easier to work with.
Beeswax Benefits:
- Longer burn time: A 3×6″ beeswax candle will burn for about 110 hours versus just 60 for paraffin.
- Higher melting point: This makes beeswax great for taper candles because it will drip slower.
- Better quality light: The light from beeswax flames is bright and has a nice yellow hue. By comparison, paraffin produces a dimmer, starker light.
- Scent: As beeswax melts, it releases its floral scent. Paraffin releases a chemical scent. Avoid scented paraffin at all costs! If you have to light lots of these at once, the chemical scent will give you a headache!
Paraffin Benefits:
- Cheap and readily available: Not everyone knows a bee farmer who will gift them wax. Paraffin is easily found in craft stores for cheap.
- More room for error: Paraffin has a low burning point, so it will burn even with a small, short wick. The same wick wouldn’t burn my beeswax candles – their wax kept putting them out.
- Consistent: Beeswax varies greatly in its hardness and burn time depending on its source. This can make it hard to size the wick. You don’t have this problem with paraffin.
Note about Soy Wax:
There is also soy-based wax available. It has many of the same characteristics as paraffin but burns cleaner and a bit longer.
The Wick
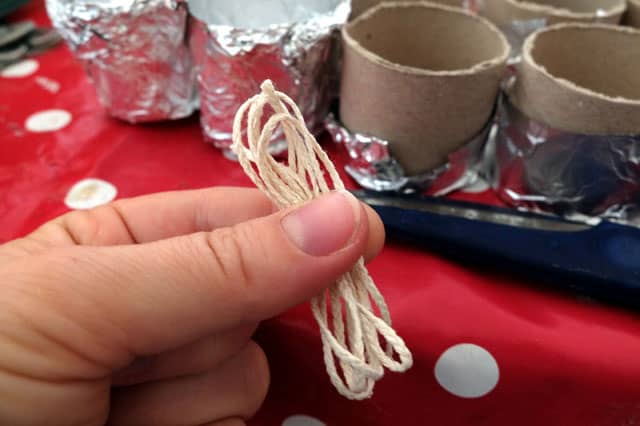
I didn’t realize how vital the wick was until my test candles wouldn’t burn. My wick material was good; it wasn’t large enough for my beeswax candles.
Candle Wick Materials:
I got some string (Amazon Link), especially for candle making. The best candle wicks will be braided into a round shape. The round braid helps the wick stand up straight and burn slower.
Unfortunately, the wick I got was a flat braid and, thus, not as thick. It burned very quickly, and I had problems with the beeswax candles not burning fast enough.
You could use various things as an improvised candle wick in an emergency.
Improvised Wick Ideas:
- 100% cotton string (synthetics and wool will melt)
- Shoestring
- String from a tampon (hey, we’re talking about emergencies here!)
- Balsa wood sticks
Wick Size:
This is VERY IMPORTANT. If you get a wick that is too small for your candle or wax type, it won’t be able to burn up the wax at the same rate it melts. The result? You’ll get a puddle of wax which drowns out the flame.
If the wick is too large, you’ll end up with a giant flame that produces a lot of soot. The wax will liquefy into a deep burn pool. With pillar candles this causes the walls to collapse on themselves.
Candle Wick Resources:
Choose Your Candle Type
There are numerous types of candles. They are each made slightly differently and have their pros/cons to consider.
Because this was for a wedding (with a lot of intoxicated people), I ruled out taper candles. They would be too easy to knock over and cause a fire. Likewise, I would never use taper candles during a natural disaster or if there are small children or pets who might knock them over.
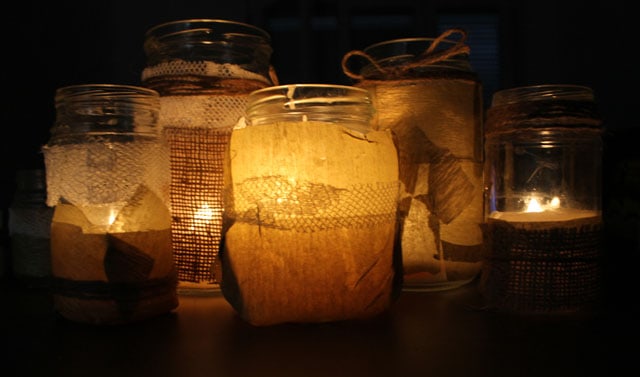
The safest choices were ones enclosed in glass jars. Our budget didn’t allow us to fill large mason jars with wax. So, I made DIY candle molds to make small pillar candles.
I Made:
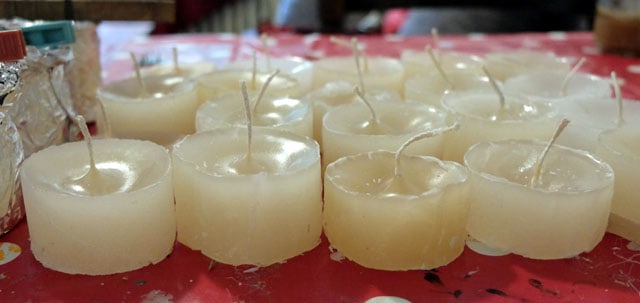
- Pillar Candles (Put Inside Large Mason Jars for Safety): These are solid, self-standing candles made by pouring wax into a mold. They typically use a lot of wax but burn brightly and for a long time. *My pillar candles were really small, so they more resembled tea lights.
- Votive Candles (Poured Into Old Baby Food Jars): Wax is poured into a small container. They are safe and easy to make, but lighting them can be awkward because of the container.
Making the Candles
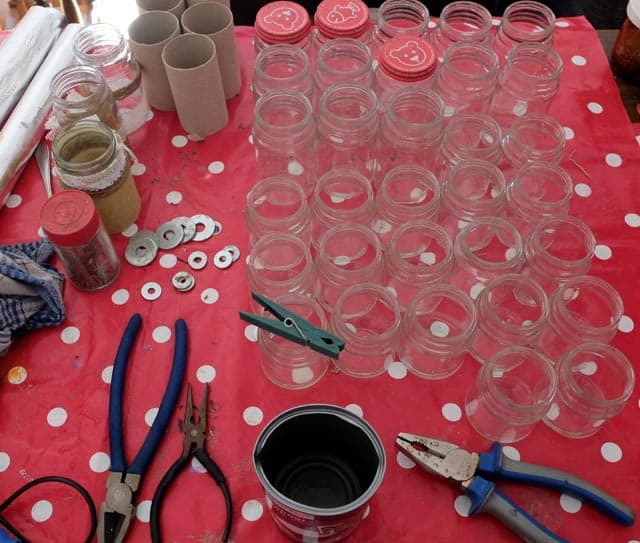
Supplies
- Molds or jars
- Wax
- Wick
- Wick holder (I used clothespins)
- An old pot for melting the wax in (metal can + tongs works too)
- A larger pot to serve as a double boiler
- Anchor to hold the wick down. Nuts, bolts, and screws work for this. I also tried glue-gunning some of the wicks down, but it was awkward in the jars.
- Tools: I used a few tools to make a spout on the tin can I used for melting the wax.
Step 1. Make Your Molds
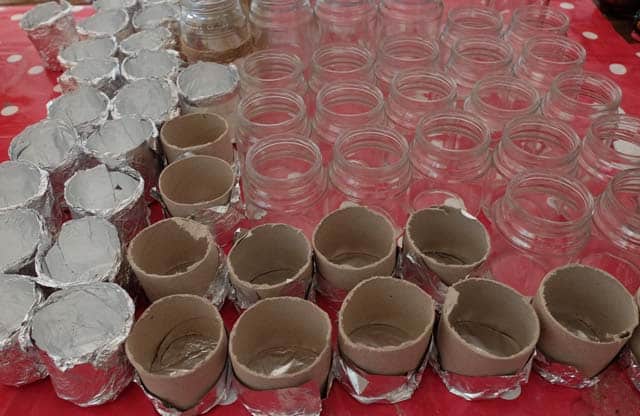
I wanted to test out a few DIY candle molds I’d seen online. So, I made my candle molds out of:
- Toilet paper rolls
- Tinfoil
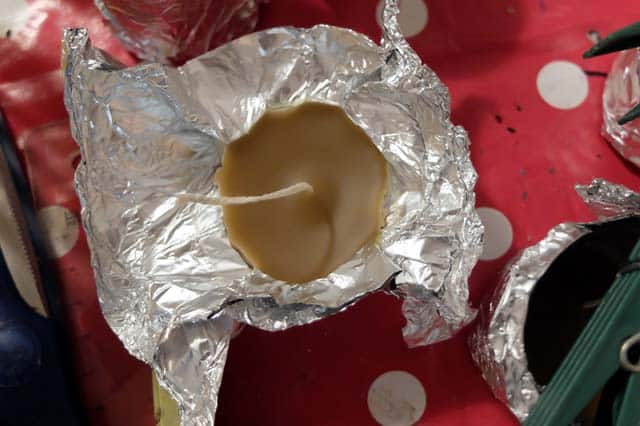
In one DIY tutorial, the girl closed the bottom of the TP roll with lots of tape. This seemed like a big waste to me, so I used a small piece of tinfoil to seal off the bottom of the roll.
The tinfoil molds were easily made by closing the foil over a small jar. The molds ended up quite lopsided. Luckily, these were for a “rustic” wedding, so perfection wasn’t a priority!
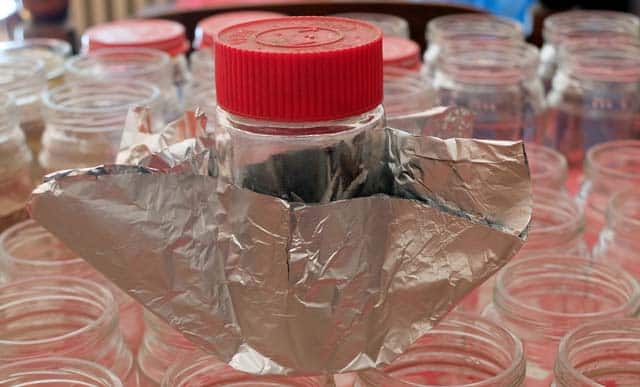
Making a candle mold by wrapping tinfoil over a jar
***If you make votive candles, you won’t need a mold. The jar serves as the mold.
Step 2. Prepare Your Wick Material
Ideally, you should prepare your wicks by:
- Soaking the wick in a mixture of Borax and salt
- Letting it dry
- Dipping the wick in wax
I skipped this step, and my paraffin candles turned out fine. However, my beeswax candles suffered problems.
If the wick isn’t prepared, it will burn a lot faster. Since beeswax has a higher melting temperature, the wick burned down before it could vaporize the wax, thus causing the wick to go out.
The lesson? Always prep the wick when using beeswax!
Step 3. Cut Your Wicks
With the first candles I made, I cut the wicks so they were just a bit longer than the mold. By the end, though, I was making the wicks a lot longer than the mold length.
The longer wick made it easier to clip in place for pouring. Wick string (Amazon Link) is cheap, so I didn’t mind wasting a bit to make this project easier.
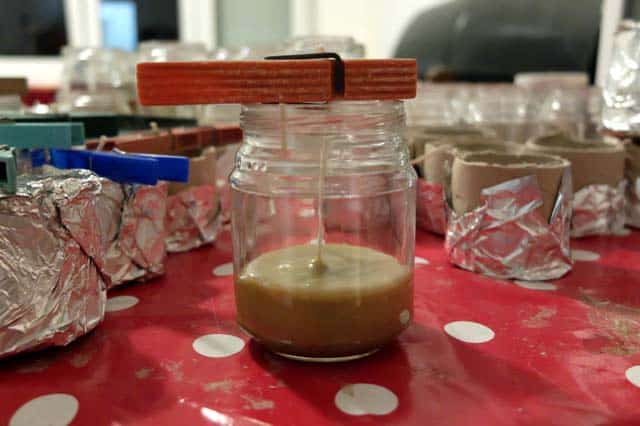
Step 4. Anchor Your Wicks
If you don’t anchor your wick to the bottom of the mold, the wick will start floating around in the wax as you pour.
Just tie the wick to something heavy and non-flammable. I raided my toolbox for items, such as bolts and screws, to use. There’s no reason to buy candle anchors like those below, but they are an option to save time.

Step 5. Clip Wick in Place
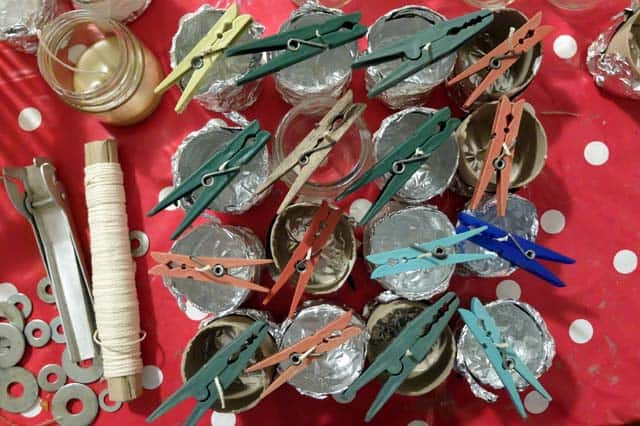
You can buy special candle wick holders (Amazon Link), but you can also get by with DIY items. I used clothespins to hold the candle wicks in place above the mold.
Other options include:
- Tie the wick to a pencil
- Hair clips
- Piece of cardboard with a hole punched in the middle
Note that whatever you use to clip the wick will be covered with wax. I’ve got a bunch of wax-coated clothespins to deal with now!
Step 6. Melt Your Wax
Paraffin wax has an ignition point starting at 390 degrees F. During a sculpture class in college, a pot of melted wax I was using caught on fire. The incident traumatized me, and I was extra cautious to ensure my wax wouldn’t catch fire!
Use a double boiler: The safest way to melt wax is with a double boiler. Boil some water in a pot larger than your wax pot. The wax pot goes on top of this. Steam from the boiled water melts the wax at a consistent temperature.
If your wax does catch fire, DO NOT PUT OUT WAX FIRES WITH WATER. The water will accelerate the fire and can cause an explosion. Instead:
- Put a lid on the container until the flames die down, or
- Use a fire extinguisher (which you have nearby, right?)
Step 7. Pouring the Wax
No brain surgery here. Just pour the wax. I prepared the space with plastic tablecloth material, so I wasn’t worried about any spilling.
Side note: You can buy tablecloth material by the yard in fabric stores. It is cheap and is great for projects like this!
Step 8. Removing Candles from the Mold
If you are making votive candles, then your work is done. If you made molds, you’ve got to remove the molds.
Contrary to what all those DIY candle mold tutorials showed, getting the mold off was NOT easy.
Bits of cardboard stuck to the wax. I was a bit lazy about cleaning it off the cardboard, and it caught on fire during my test. After that, I diligently used a knife to scrape off any remaining bits of cardboard. It took forever.
As for the tinfoil molds, those were even worse. Tiny pieces of foil got stuck in the candles. Next time, I’ll make the molds more carefully. The smoother the edges, the less foil got stuck.
There seemed to be a perfect window of time for removing the candles from the mold. If I let them sit until the wax completely cooled, the cardboard or foil was stuck. It was a lot easier when the candles were still slightly soft.
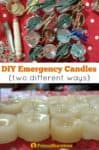
The Finished DIY Candles
There you have it – how to make emergency candles. Let me know if you have any tips about making your own candles!
Related: Shelf life of candles
For More DIY Projects: DIY Projects

With everything else that I’m constantly doing regarding prepping candlemaking doesn’t fit into my schedule. Ok, that sentence was my flimsy excuse. The truth is that I’m all thumbs. I can just see the mess I would make of candles. It would probably take hours if not days to clean up if the house was still standing. Fortunately I have about 20 different solar lights and a few that take batteries. I might buy a few just because they look pretty and smell good.
Excellent articles. I have the entire Foxfire series, but love reading anything on homesteading/DIY/survival techniques to expand my knowledge. Thank you.
Thanks Les – we have a whole category on DIY projects if you want to read more – https://www.primalsurvivor.net/diy-projects/
I’ve been making emergency candles by recycling old candles and putting the wax into used cans. My problem is that the wax has been caving in around the wick. It doesn’t always happen, so I don’t know why or how to avoid it. Any suggestions?
Hi Melissa,
The problem you are describing sounds like “sinkholes.” It occurs when the wax isn’t poured at the ideal temperature. Maybe get a thermometer for your wax? Sinkholes can also occur when you need to do a second pour for a candle. Here’s some good info on sinkholes: https://www.naturesgardencandles.com/blog/category/sink-holes-candles/
Or the problem might be “tunneling.” It happens when the wick is too small and the heat isn’t able to reach the sides of the wax. To prevent tunneling, it is also important that you get the “first burn” right. More on that here: https://www.scentsnob.com/2013/09/how-to-prevent-candle-tunneling.html
Hope this helps!”
+1 on Mildred’s comment to make these easier to print. Unfortunately all of the primalsurvivornet’s articles have a floating banner that blocks valuable information when trying to print, even to pdfs. Please fix.
Also appreciate the well-written insight into candle making – never knew wicks could be so temperamental. Personally I hate open flame candles and prefer to use floating wicks and a glassful of cooking oil — easy to store, safer to use, long wick life, and lots lots more light.
Excellent article, please put a print button to make it easier to print the article for reference. Thank you!
you can add print friendly to your browser (Chrome at least) and print from any site, but only the first photo came up so it depends how much you need to see vs read. HTH
PS: I still have ‘windows 7 so this may be different in other versions
PSS: ask around, people will give you baby food jars or spice jars, which will give you decent burn times. Just be sure to store fireplace matches or a BBQ lighter for reaching deep jars