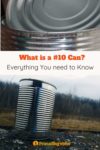
If you want to store emergency food long-term, you’ve probably heard #10 cans mentioned. These are some of the best ways to store food but also have some major drawbacks.
Here’s what you need to know about #10 cans:
- What is a #10 can
- How Big Is a #10 Can?
- How much food does a #10 hold
- What Are #10 Cans Made From?
- What can you store in #10 cans
- How to seal #10 cans
What Are #10 Cans?
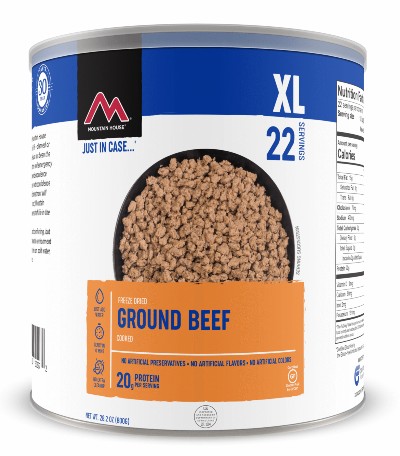
A #10 can (pronounced ten pound can) is a size of can used to store food. You can often find foods sold in #10 cans at warehouse supermarkets like Costco or Sam’s Club. Emergency foods, like those by Augason Farms or Mountain House, also commonly come in #10 cans.
How Big Is a #10 Can?
The name ten pound can does not refer to the weight of the can contents: the weight varies depending on what you store inside the can.
Rather, #10 refers to a standard size that measures approximately 6 3⁄16 x 7 inches and has a volume of 104-117 fluid ounces (approx. 3 to 3.5 liters). The can itself weighs approximately 9oz.
There are many other standard sizes for cans. For example, most commercial soup comes in #2 cans, which hold 16 fl. oz.
Common Can Sizes Compared
Note that can sizes are typically listed using liquids. The amount a can holds will vary depending on the food.
| Can Size | Ounces Held | Cups Held |
|---|---|---|
| #1 | 11 oz. | 1 1/3 cups |
| #1 Tall | 16 oz. | 2 cups |
| #2 | 20 oz. | 2 1/2 cups |
| #2.5 | 27 – 29 oz. | 3 1/2 cups |
| #3 | 51 oz. | 5 3/4 cups |
| #5 | 56 oz. | 7 cups |
| #10 | 109 – 117 oz. | 12-13 cups |
| #300 | 14 – 16 oz. | 1 ¼ – 1 3/4 cups |
| #303 | 16 – 17 oz. | 2 cups |
(Source: UNL Institute of Agriculture and Natural Resources)
How Much Food Fits in a #10 Can?
The amount of food that can fit in a #10 can vary depending on how dense the food is.
For example, a #10 can typically holds 12 cups (106oz) of cooked corn but only 9 cups (6oz) of freeze-dried strawberries. Fifty pounds of rice will typically fit in nine #10 cans.
The table below shows how much food fits into a #10 can by volume and weight.
| Food | By Amount | By Weight |
|---|---|---|
| Soup stock | 13 cups | 117 oz. |
| Cooked corn | 12 cups | 106 oz. |
| Whole peeled tomatoes | 12.5 cups | 105 oz. |
| Salt | 10 cups | 104 oz. |
| Rice | 12.5 cups | 90 oz. |
| Milk powder | 11.6 cups | 55 oz. |
| Soup powder | 10.5 cups | 50 oz. |
| Oats | 11 cups | 39 oz. |
| Egg powder | 11 cups | 33 oz. |
| Peanut butter powder | 8.4 cups | 32 oz. |
| Freeze-dried beef | 11 cups | 28 oz. |
| Freeze-dried strawberries | 9 cups | 6 oz. |
What Are #10 Cans Made From?
Most #10 cans are made from tinplate, which is steel coated in a thin layer of tin. Because tinplate is created using electrolytic deposition, it is sometimes called electrolytic tin-coated steel.
Tin-coated steel is very sturdy, non-toxic, and non-corrosive. The tinplate cans are sometimes lined with a material, such as acrylic or R enamel, to create a barrier between the food and the can. This helps prevent interaction with the metal, which might cause corrosion. Unlined cans should only be used with dry foods.
Sometimes, cans are made from other materials, such as aluminum or stainless steel. However, these are not common and not recommended for food storage.
What Can You Store in #10 Cans?
In theory, any food could be stored in a #10 can. Even non-food items like ammunition can be stored in #10 cans. However, #10 cans are generally only used for dry canning (storing non-perishable dry foods like beans and grains).
Can You Store Wet Foods in #10 Cans?
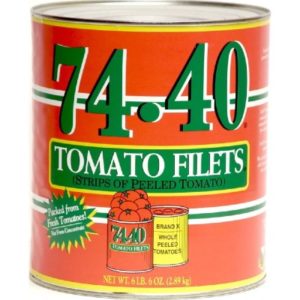
You can find plenty of wet foods sold in commercially-packed #10 cans. However, it is generally not possible to store wet foods or liquids in #10 cans yourself. This is because most #10 cans sold for DIY metal canning are not lined.
Because they aren’t lined (or are lined with a material that isn’t compatible with wet items), the #10 cans will corrode over time. Rust will get into your food, and eventually, holes will form, causing the contents to leak.
If you want to store liquids in metal cans at home, you’ll need to find cans that specifically say they are safe to use with liquids. I am not aware of any company that sells #10 cans safe for wet foods. Many smaller sizes of cans are safe for wet foods, though.
Pros and Cons of #10 Cans for Food Storage
Pro: Durable
Cans don’t let any light, air, or moisture pass through. So, if stored properly, food in #10 cans will last years or even decades without going bad. Cans are also very durable and can make it through natural disasters like hurricanes without getting damaged. In this sense, cans are the safest way to store your emergency food.
Con: Expensive Equipment
You will need a can sealer to store food in #10 cans. These are very expensive pieces of equipment. Even the manual ones will cost at least $500 to purchase. Motorized can sealers typically cost thousands of dollars.
Even if you are prepared to buy a can sealer (or maybe you can borrow or rent one from your local LDS cannery), the cans themselves are very expensive. If you buy online, expect to pay $2 to $3 per can. At this price, it’s often cheaper just to buy the pre-filled cans from emergency food companies. Sometimes, you can find #10 cans from local suppliers for cheaper if you pick them up yourself.
Con: Too Large
An issue with #10 cans for emergency food is that they hold a lot of food. This isn’t an issue with non-perishable dry foods like flour or beans. However, if you buy wet foods in #10 cans, you must refrigerate any uneaten food. This might not be possible in an emergency situation where the power is down.
Unless you have a large family and can eat the entire contents of a #10 can in one sitting, getting such large cans often doesn’t make sense. Smaller cans of food are more practical to use.
Con: Not Reusable
Once you open a #10 can, you cannot use it for food storage again. Apparently, Gering and Son used to sell a reflanging tool for #10 cans, so you could use them again. However, this tool costs over $1000, so breaking even would take a long time. It seems like they don’t sell the reflanging machine anymore anyway.
*If you know where to get a #10 can reflanging tool, let us know in the comments!
Con: Not for Wet or Liquid Foods
I don’t know of any company selling open-top #10 cans safe for wet foods. If I invest in a home can sealer, I’d want the flexibility of storing wet items, too (it’s more disaster-proof than canning in glass jars). In that sense, I’d rather buy a can sealer for smaller cans than a #10 can sealer.
#10 Cans vs. Mylar
Both #10 cans and Mylar bags are great for storing dry foods because they don’t let light, air, or moisture through. If you put an oxygen absorber into the can or Mylar bag before sealing, you’ve also created an oxygen-free environment. Some foods can last for decades when stored like this.
The only real benefit of using #10 cans over Mylar is that they are more durable. Roof beams could fall on a #10 can, and it would likely survive. By contrast, Mylar bags puncture fairly easily. To solve this problem, many preppers just put their Mylar bags in buckets. The buckets are nearly as durable as a can.
Ultimately, most people will choose the Mylar+bucket method for storing food long-term because it is so much cheaper. The bags cost less than 50 cents each (even cheaper if you buy in bulk). No special equipment is required; you can seal them with a home iron. You can even reuse Mylar bags after opening them.
Read about Mylar bags for long-term food storage
How to Seal #10 Cans At Home
Once you have the supplies, storing food in #10 cans is very easy. The basic instructions are:
- Fill the cans with food. Give the cans a little shake when they are halfway full so the contents settle and you can fit more food inside.
- Label the cans with the contents and date. A simple way to do this is to write on the cans with permanent marker and then cover it with clear plastic packing tape to protect it.
- Place the lids on the cans.
- Put the cans in the can sealer.
- Follow the can sealer instructions to seal the cans.
- Check the seal before storing.
These videos show you how the process is done.
If you are interested in canning meat in smaller cans (check that they are safe for liquid foods), I recommend watching this video from the Alaska Cooperative Extension. They do a good job of showing how to properly heat game meat in cans to prevent botulism poisoning.
Handling #10 Cans and Lids
Even though #10 cans are very durable once sealed, they are somewhat fragile beforehand. It’s easy to dent the cans or the lids, which could make it impossible to get a good seal. The edges of the cans and lids are also very sharp, so handle them carefully.
How Many Oxygen Absorbers to Use in a #10 Can
A #10 can contains approximately one gallon. You should use the same number of oxygen absorbers as you would with any other 1-gallon container, usually 400-600cc. The amount of oxygen absorbers needed varies depending on how much air is in and around the food being stored.
Read more about oxygen absorbers for long-term food storage
Manual vs. Motorized Can Sealer
Manual can sealers are more affordable than motorized sealers. However, the money saved usually isn’t worth it. The reason is that manual can sealers will take much longer to seal a single can. It varies depending on your proficiency, but expect it to take 20-30 seconds per can with a manual sealer. By contrast, electric can sealers can finish a can in seconds.
Oxygen absorbers should be used to store dry foods in #10 cans, and these start absorbing oxygen as soon as they are exposed to the air. When you finish sealing the first few cans with a manual sealer, the oxygen absorbers might have lost their effectiveness.
Further, manual can sealers will physically tire you out.
Storing #10 Cans
Here’s what you need to know about storing #10 cans so the cans and their contents stay good for years or decades.
Do #10 Cans Rust?
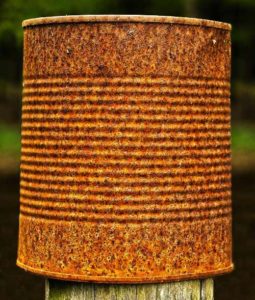
Tinplated 310 cans do a good job of resisting corrosion, but if kept somewhere wet or humid, they will eventually rust.
Always make sure to keep the cans dry. Never store them in the basement. You also want to keep the cans off concrete floors and away from walls; put them on pallets or shelves instead.
What if you have to store #10 cans in the basement or somewhere humid?
Ideally, you would not keep #10 cans in the basement; the risk of corrosion is too high. However, I have heard of many people protecting their #10 cans with paraffin. For example, a member of the Homesteading Today community did this while living on a boat.
To coat #10 cans in paraffin:
- Remove any paper labels from the cans. Write the contents with permanent marker.
- Dip the can in paraffin wax so it is completely coated.
- Alternatively, just cover the top and bottom seal area with paraffin, though this won’t provide the same level of protection.
- Store the coated #10 cans on wooden pallets.
- Do not store the cans in buckets, as this will trap humidity in with the can.
Refrigeration
There is no need to store canned foods in the refrigerator. The entire point of canning them is to keep them fresh. However, it is generally safe to put unopened cans in the fridge. The only potential issue is that your fridge might have high humidity, which could eventually lead to corrosion.
You generally shouldn’t put opened cans of food into the fridge though. Once open, the food can react with the opened metal rim of the can. Metal could then leach into the food. However, the risk of this happening is very low. It could take years for any significant leaching to occur. So, it’s not as bad a practice as some would have you think (Sources: Science Notes, Alsaksa USDA)
Freezing Temperatures and #10 Cans
When storing #10 cans of tomatoes, cooked vegetables, and other wet foods, it’s very important that you don’t let the cans freeze. Even though manufacturers leave some headspace, the expanding frozen food can cause the #10 can to burst open.
You also shouldn’t let dry foods in #10 cans freeze either. Dry foods do contain a bit of moisture but it is usually evenly distributed throughout the food. When frozen and then thawed though, the moisture can clump together (not being very scientific here), causing wet spots to form. These wet spots could allow pathogens like botulism to grow.
Reusing #10 Cans
Here are some ideas about what you can do with empty #10 cans:
- Growing containers for plants. Some plants even like rust.
- Mini trashcans
- Storing random small items around the house
- Scrap metal: Cup them open with tin snips and hammer them flat. They then can be used for things like an improvised roof.
- Rocket stove: See designs here
- Make a Hobo stove
- Make a solar heater: You can use them instead of soda cans
- “Poor man’s dry canning”: I got this idea from a Permies forum. Use a sideways can opener on some to create lids. Fill other cans with dry food items. Put the lids you made on top. Tape the lids in place with foil tape.

I need to purchase #10 cans, do you know where I can get them?
There are several online sellers, like House of Cans. They are pretty expensive and you need the sealer too. If you want cans with food in them already, then these companies are good: https://www.primalsurvivor.net/best-emergency-food-reviews/
Make a stove out of one in a pinch.
House of Cans or Legacy Food Storage both sell cans. They are over $6 a piece now in our inflating economy. We can stuff and since the local LDS cannery stopped selling cans, the shipping costs devour the benefits.
It’s a “Number 10 can”. If it meant pound, the “#” would come after the number. That’s the way that symbol has always worked.