
Without adequate shelter we won’t make it very far in a survival scenario. From camping-trips-gone-wrong to becoming separated from your group to a true SHTF scenario, a roof over your head can be what makes or breaks your encounter.
Having a bit of knowledge on how to build a lean to shelter can dramatically improve your experience, so let’s check out what we need to know about building some temporary housing.
Location, Location, Location
Arguably the most important aspect of building a shelter of any type is its location. You’ll want to consider a few key points:
 A safe environment free of danger from flooding, treefall, and other environmental hazards
- Consider the prevailing winds in the area and position your shelter facing away from the wind direction.
- A concealed and low-key spot
- Access to roads, travel, food, and water (for extended stays)
If you’re in a situation where you need to be concerned with being spotted by unfriendly folks, location selection should involve a degree of camouflage and separation from the beaten path.
Constructing your shelter with an irregular shape and applying some local materials to help it blend in are important choices.
A shelter constructed in different environments requires different considerations, but the focus of this article is on a wooded lean to shelter.
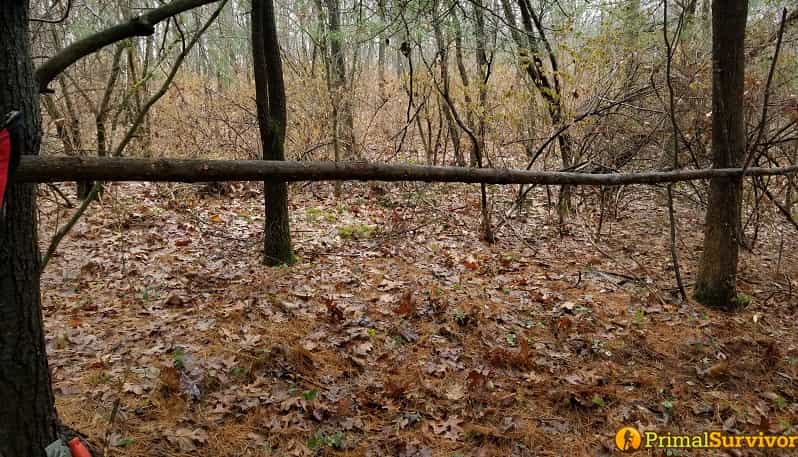
Choosing My Site

I admittedly cheated when selecting my location. It was on family land adjacent to an old campsite I know is dry, flat, and comfortable to sleep in.
It provides ready supply to essential needs like water and fuel for fires, is in a secluded and discreet location, and is an easy-to-access area from local roads.
We found the remnants of an old campfire which is a good indicator that the location is reasonable for staying in. Other evidence to keep an eye for is the presence of deer beds, indicating it’s a safe place for them to avoid detection and get some rest.
We used an e-tool to scrape away some of the leaves and detritus but quickly decided it was unnecessary.
Step 1: Firm Foundation
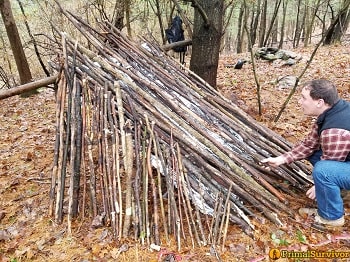
I elected to use a mid-sized fallen tree as the main support of my lean to shelter. I nestled it into the crotch of one standing tree and fashioned a Y-shaped support from another fallen branch to support the opposite end of the log.
A lean to shelter needs something to lean on, so a strong and reliable “center beam” is super important.
It isn’t crazy to consider digging a shallow trench to place the base of your “roof” to sit firmly in, but for this demonstration I decided not to.
Step 1.5: Consider What You Have On Hand
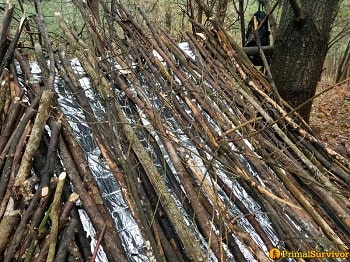
For this shelter construction I semi-cheated and brought two mylar blankets with me to act as a heat reflector. I used one of these as a base layer of the roof and the other for its intended purpose; a blanket.
A blanket to drink beer in!

In addition to the emergency blanket we also used some paracord,an axe, a knife, a survival shovel, and a six-pack of beer.
Almost anything you have on hand is potentially helpful to your scenario, so be creative and think outside of the box!
Step 2: Collect Supplies
This is a point that might raise a few eyebrows, but that’s alright. We’re going to jump into it anyway.
I am a firm believer in doing things one step at a time. This one-thing-at-a-time method isn’t a slow and arduous process, no!
Instead it’s a method that allows you to focus on one step of the journey at a time; in this case, we’re collecting as much material as we can to form the roof of our lean-to shelter in one go.
Between a friend and I we collected about 50% of the total material needed in our first shot. After this initial collection we were able to better gauge exactly how much material we would need and avoided wasting time and energy on what might be wasted supplies.
We used only dead wood for our shelter. On our journey hunting for supplies we passed many standing trees that would have been perfectly suitable for shelter construction… but the time spent cutting and obtaining this live wood is likely comparable to our time spent finding only dead wood.
It took us about an hour to find the supplies needed.
Step 3: Begin Construction
We attempted to duplicate the rushed feelings and urgency of a survival scenario when building our shelter, so we didn’t make this shelter pretty. Besides, my buddy’s wife and their newborn baby demanded his attention, so the sense of urgency wasn’t hard to fabricate.
We laid the collected wood and supplies on the ground and leaned them against our main support pole as tightly as they’d fit. Thinner branches were used to fill in the gaps between bigger ones and those with unforgiving bends and crooks.
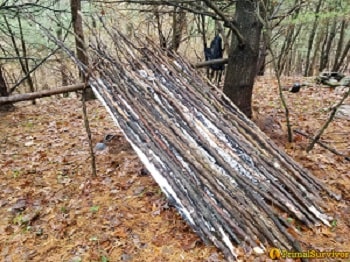
Lashing these sticks to the main beam could be useful if the structure is going to become a more permanent place to stay, but for a short duration simply leaning the branches is adequate.
We also could have cut the poles used here to be of uniform length, but that’s a project for an extended stay and not an emergency overnight shelter.
Step 4: The Walls!
We added some short walls to the sides of our structure for a few reasons:
- To increase the total protective coverage offered by the lean to shelter
- As an added level of security
- Short walls allow for better camouflage
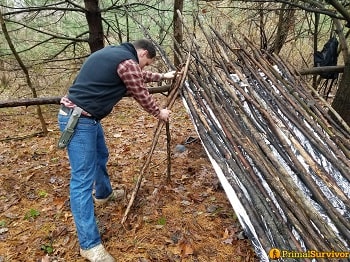
Construction here is the same as it was for the roof; simply repeat the process!
However, because these walls run on a different plane than the roof, the poles will lean against the ends of your roof structure. This can be a bit tricky to coordinate but it isn’t impossible or overly frustrating.
For this shelter we started at the tallest section of the wall and worked down to the ground, but either “direction” should work.
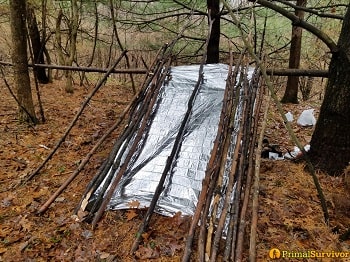
Step 5: Cover It Up!
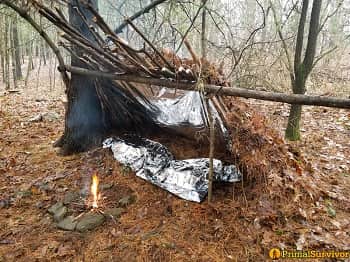
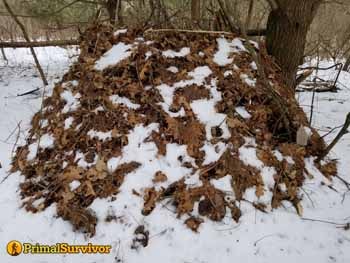
I situated this lean to shelter in an area with plenty of detritus around to function as camouflage and insulation. Simply grabbing handfuls of leaves and pine needles and piling it on the wooden structure is all you need to do.

I also added a larger pile at the bottom of the structure to serve as a base preventing leaves and material on top from cascading down. Pressing the leaves and needles into the slats of the lean-to helps to keep them in place.
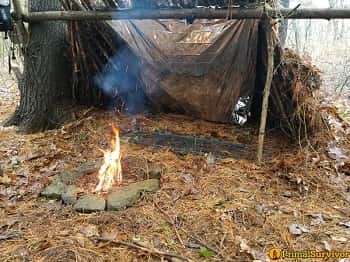
Step 5.5: A Firepit?
In general it’s wisest to keep your fire well away from where you’re sleeping.
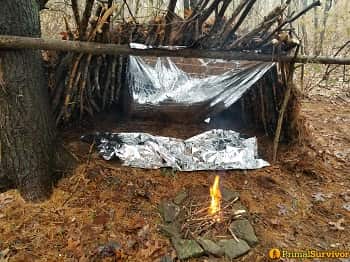
For this demonstration we made a very tiny fire pit to sit near the base of the shelter to provide a bit of warmth. The wet conditions we constructed in meant the leaves we covered the shelter with were wet and almost impossible to ignite.
The Completed Shelter
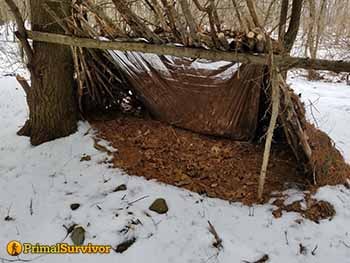
Two Month Update
I visited the lean to during a winter hike through the woods and was delighted to find the bedding area dry and warm.
This shelter hasn’t had any attention, care, or upkeep of any kind in over two months. The leaf matter we used to cover the roof of the shelter was largely intact minus a few gaps, easily repaired. Just repeat the process as outlined above.
Most important is how dry the ground beneath the shelter was. It’s not a fancy shelter, but it gets the job done!
Optional Improvements
We decided to keep this shelter basic with no frills. You’ll find plenty of incredible designs on the internet from master woodsmen producing expert-level shelters. But chances are you’re not a master woodsmen, so a quick lean to like this is a solid starting point.
If you’re anticipating a longer stay than a night or three, some improvements can be made to this shelter to make it safer and more comfortable.
- Grab more materials to make this an A-frame shelter with two walls and a single entrance.
- Add another layer of sticks and material to make your roof stronger, and fill-in this space with more leaf matter to make your structure better insulated.
- A raised sleeping platform is an incredibly comfortable addition to any shelter, and with a simple design like the one we have here this platform is easily added.
- For really long-term stays you can weave pine branches into the roof slats and dress with leaf matter.
Wise Use of Resources
For this instructional demonstration I worked with a friend and used construction supplies obtained solely from fallen trees, or deadwood ethically removed from standing trees. A true survival scenario would find me far less picky about what supplies I am utilizing.
I admit upfront that I am a total tree hugger, so bear with me when I offer this suggestion: if you’re only practicing your lean-to shelter building skills, use exclusively fallen and dead wood.
Avoid cutting down live material unless you’re familiar with their purpose in the environment. In a true survival scenario these rules can be broken, but if it’s just for practice try to practice some restraint.

Thanks for some great teaching and visualization, for emergency shelter. I’m a “newbee” trying to learn all I can, in an suburban environment. This info is great for an inexperienced person.