You want to stockpile water, food, and other disaster preparedness supplies, but you live in a tiny apartment and aren’t sure where you will put all that stuff?
I hear you. I currently live in a tiny apartment.
How small?
When I watch episodes of Tiny Homes, I say, “That’s actually pretty big.” My apartment (in which I live with my husband and two small children) is under 600 square feet.
Living in a tiny home creates a challenge for prepping, but it isn’t impossible.
Here are some of the tactics I’ve used to get prepared despite the limited space, including specific advice about stockpiling food and water.
Get Rid of Things!
In my experience, everyone has a lot of random stuff in their home that they don’t need. I know it is hard to get rid of things when you’ve got a voice in your head saying, “What if I need it someday…?” or “What if I lose weight and it fits me again?”
But trust me: You will feel better once you get all of those things out of your home! Not to mention all the space it will clear up for disaster prep supplies (and having those supplies will make you feel even better).
I do a twice-yearly “purge” where I go through my home and get rid of any items I don’t need. It always amazes me how much stuff I’m able to get rid of, even though there isn’t much space in the apartment to begin with.
Need some help with this? I suggest:
- Watching episodes of Marie Kondo (or get her book here. Marie’s techniques are practical, and the show will get you motivated to purge.
- Courtney Carver has a good guide about how to get rid of 100 things in 1 hour.
- Budget Dumpster has a ridiculously thorough guide to de-cluttering your home
Okay, now that you’ve made some additional space, here’s how to use it wisely!
Make a List of Prepping Priorities
I have a big issue with many prepper websites. They often use fear-mongering tactics to scare the hell out of you and then try to sell you a bunch of stuff. Yes, this stuff may be useful – but you probably don’t need an inflatable lifeboat before you’ve even gotten bottled water or a backup toilet.
So please resist the urge to buy a bunch of disaster prepping gear because someone told you it is a “must-have” item. It could take up vital space in your small apartment, which could be used for something more important.
Instead, make a list of things you need by priority. IMO, these should be your priorities (not necessarily in this order):
- Water – see our guide to the best water storage containers
- Food
- First-aid supplies
- Personal medications
- Bug out bag
- Lighting
- Emergency radio
- Toilet (see options here)
- Hygiene supplies
Depending on where you live and what disasters are likely to occur, these types of disaster supplies might also be priorities:
- Stove
- Heating
- Baby supplies (diapers, formula, pre-sterilized bottles, etc.)
- Board-up supplies (such as plywood and plastic sheeting)
Water Storage Solutions for Tiny Apartments
Water is a tricky issue. It’s crucial for survival but takes up a lot of space. FEMA recommends storing at least 1 gallon of water per person, per day stockpiled. Ideally, I think you should have at least 30 days’ worth of water, and you’ll probably need more than one gallon per day!
For my family of four, that comes out to a minimum of 120 gallons of water. It would take 16 cubic feet to store this much water. Since the water storage jugs take up space too, realistically, it will take even more space than that.
How do you stockpile water when space is limited? Here are some ideas:
Get a Very Good Water Purifier
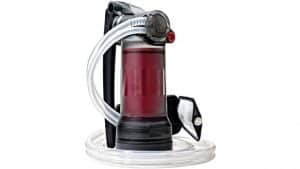
If a really bad disaster strikes and you run out of bottled water, then you’ll need a way to treat water. Most water filters only treat bacteria and parasites.
Some more recent water filters treat viruses too, though. When chemicals might be in the water (such as after flooding), you’ll need an activated carbon filter to remove them.
Please read our guide to the Best Water Filters for Emergency Preparedness. These water filters are pretty damn small, and some can treat hundreds of gallons of water. Just make sure to get enough backup filter cartridges!
Can You Put a Water Drum On Your Apartment’s Roof?
Many people are waking up to the need to prepare for disasters, so if you decide to call a building meeting about preparedness, it might be met with enthusiasm.
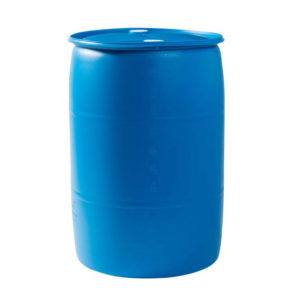
See if your building and neighbors will let you put a big water drum on your roof. These water drums come in various sizes and can even be used for collecting rainwater. The water will have to be treated before use, but this can usually be taken care of with a basic camping water filter. Read how to choose water barrels.
Your neighbors might even go in with you on the costs of the water drums. Wouldn’t it be cool to know that everyone in your building would have their water needs met if a disaster struck?
*I know this goes against the common prepping “advice” that you should hide your preps from your neighbors. But I disagree. We are all safer when everyone is prepared. So instead of hiding things from your neighbors, take steps to get them involved! More on that here.
Invest in Water Bricks
Storing water in milk jugs or old soda bottles is a cheap solution. However, there are some issues with using recycled bottles for water storage (the main one being that they leak).
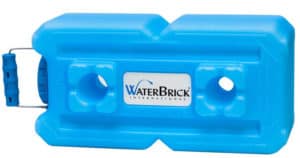
The shape of these jugs means you lose space. Instead, get some WaterBricks (read our review here). These containers can be stacked on top of each other. The rectangular shape means every bit of space is used effectively.
Emergency Food Storage
Stockpiling canned foods is one of the easiest and cheapest ways to get prepared for an emergency. However, canned foods contain a lot of water. That means you only get a limited amount of calories in the space the can takes up.
When space is at a premium, you’ve got to focus on calorie-dense foods.
Instead of stocking up on canned goods, consider freeze-dried food buckets. They aren’t as pricey as they seem (see cost breakdown here). Because there isn’t any water in them, the food buckets don’t take up much space.
Freeze-dried foods also don’t require much water to be prepared. All you have to do is add boiling water and let the food rehydrate for a few minutes.
You will need a small camping stove to do this, like the MSR Micro Rocket Stove. (Amazon link) You still have to be careful about carbon monoxide poisoning, but these small stoves are generally okay for short-term indoor use.


*Check out our picks for the Best Freeze-Dried Emergency Food.
Stock Up on Compact Emergency Gear
There is some emergency gear and supplies which don’t take up much space. They might not be at the top of your priorities list but get them anyway since they are easier to store in a small apartment or home.
These emergency items include:
- Survival water filter and cartridges
- Emergency radio
- Camping stove and gas canister
- Rechargeable headlamps
- Rechargeable batteries
- Solar power bank
- Hand-crank phone charger
- Menstrual cup – more on feminine hygiene.
- First aid kit
Creative Storage Solutions for Prepping Gear
With four of us living in such a small space, I’ve gotten good at finding creative storage solutions for all of our stuff. Below I’ll go over some solutions I’ve used.
*Before you use any of these solutions for disaster preparedness gear, please consider how you will access supplies during a disaster?
Supplies won’t do you any good if you can’t reach them! So keep the most essential supplies in your safe room or the space which is least likely to be destroyed in a disaster.
Put Bed On Risers
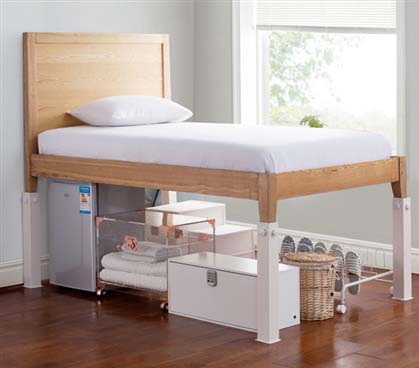
There are cool risers you can get for your bed’s legs. Yes, this does mean it can feel like you are climbing onto your bed each night – but it will get you a LOT more storage space.
Note that you don’t necessarily have to put your prepping supplies under the bed. But, if you put other things under the bed (like seasonal clothes), then you can free up space in closets for prepper supplies.
Inside Your Couch
We’ve got a couch in our living room that pulls out to expose storage space underneath. This is where I keep all of my camping and backpacking gear. A lot of this gear also doubles as emergency gear (such as survival sleeping bags).


The WAY Back of Cabinets
The back parts of cabinets (especially top cabinets) often don’t get used. You can store prepping supplies like water jugs or canned food here.
Think Vertical
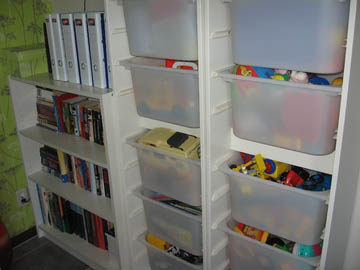
My apartment might only be 600 square feet, but it contains over 5,200 cubic feet of space. When you think vertically, it gives you a lot more space.
Invest in some good shelving units to make use of all this vertical space. Again, your prepping supplies don’t have to be on these shelves. I keep books, photo boxes, mementos, etc., on my shelves. This frees up closet space for disaster supplies.
Important Tips:
- Don’t put shelves over your couch or beds! If an earthquake hits, the shelves can fall onto your head and kill you.
- Remember to brace shelving units, especially if important gear is stored on them.
Use Vacuum Sealers for Toilet Paper
Toilet paper is one of the most annoying disaster prep items to stockpile because it takes up a lot of space. A simple solution is to vacuum seal the TP, so it takes up much less space. It will also help waterproof the TP too.
You can also use vacuum sealing for items like diapers and sanitary pads.
Another solution is toilet paper tablets, a relatively new product that is essentially compressed toilet paper that can be rehydrated.
*Read our posts about TP alternatives here and toilet paper tablets here.
Don’t Forget about an Emergency Toilet
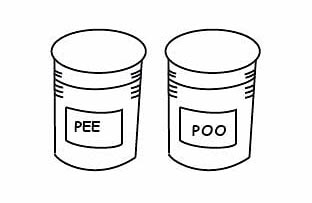
No one likes to think about how they’d go to the bathroom if the plumbing went down. Yet, it’s one of the most critical aspects of disaster prep. If you live in an apartment, it’s even more important because you can’t just go down to the garden to poo (not that pooing in your yard is a good idea…).
The simplest solution is to make a two-bucket toilet (read how); you could also consider a camping toilet for short-term use. It’s not glamorous, but it is a lot less messy and smelly than going to the bathroom in a single bucket.
Prepping Gear that Is Worth the Space
This goes back to what I said about prioritizing your prepping supplies. Some items might take up a lot of space but are worth having around. Here are just some of the larger items that you will want to have:
- Your Bug Out Bag: Building a bug out bag takes a lot of planning, but it is one of the most crucial items to have if you need to evacuate quickly. Put this at the top of your priorities list. Here’s a good BOB checklist.
- Hard copies of a few survival and first aid books: Remember that you won’t always be able to access digital copies of books during disasters. These books are good to have on hand as references.
- Fire extinguishers: Especially in apartments because of the additional fire risk that comes with using gas stoves.
- Toilet: As mentioned before, this is an item you do NOT want to be caught without!
- Extra blankets or sleeping bags: Since you probably won’t be able to use a generator or heater, make sure you’ve got blankets on hand for winter power outages. More on emergency blankets.
- Tools: Apartment dwellers often think they don’t need tools. However, if a disaster hits, you might need tools for tasks like boarding up a broken window.
Be Aware of Fire and Carbon Monoxide Risks
A lot of emergency preparedness gear – like generators, stoves, and portable heaters – aren’t safe to use in small spaces like apartments (there are some exceptions see this post on the best indoor generators).
Be sure to research the risks that come with these items, learn how to use them safely, and make sure you have CO detectors installed.
Go Over Your Emergency Plan
Finally, make sure you go over your emergency plan in detail. If your apartment isn’t going to be suitable for hunkering down through a disaster, you need to have a plan for:
- When will you leave?
- Where will you go?
- How will you get there?
- How will you get in touch with family members?
Do you live in a small apartment or home? How do you find space for prepping supplies? Let us know in the comments section below.
Also read about apartment homesteading.

Hi, I’m the Emergency Manager for a large utility in Portland, OR. I host a disaster preparedness speaker series and one of the sessions I’m planning is “Preparedness for Small Spaces.” Would you be available to talk more about this?
Jamaal F
I’m sending you an email 🙂
Don’t forget to prep for your pets too…. food, litter, water for them….
How do you store powdered milk or powdered baby formula for long term
See this post: https://www.primalsurvivor.net/how-to-store-dried-milk
We’re looking at stockpiling food here, and not only do we live in a 1-bedroom apartment, but it has no storage room and hard plaster walls or something (so it’s very difficult to mount shelves to the wall). But we realized that in our kitchen, there’s a really good amount of space above the cabinets – we barely even thought about it before (you just kind of mentally gloss over the space you can hardly see and rarely use) but we could easily store a month’s worth of food up there. So now we can breathe a bit easier!
I use mason jars behind books in my bookcases. Vitamins, over the counter meds, prescription meds, spare eyeglasses, pet supplies, paper products, small denomination bills, playing cards or other games would also come in handy.
Love this – smart storage idea and doesn’t draw attention to your stockpile.
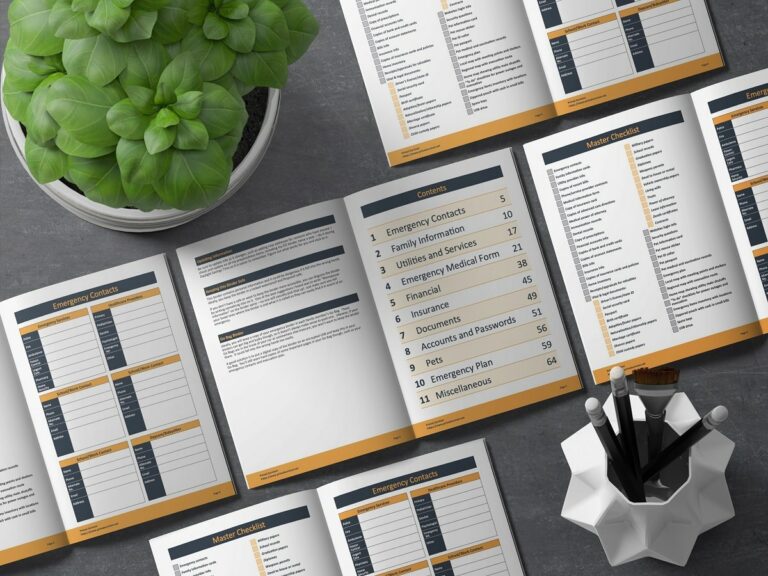
I wish you had a PDF for download of your articals so they could be downloaded. This one would be great for my son and daughter in law and my daughter.
Hi Jackie – we sell a selection of Ebooks here which are prefect for download and print.
• Cases of water bottles or totes containing supplies can be stacked, bungee-corded together for stability and a tablecloth tossed over the stack… voila, an end table or coffee table.
• Create concealed storage in any bookcase… cut balsa wood to the size of shelf opening, paint to match or contrast with bookcase, i.e. cream colored bookcase calls for cream colored paint or charcoal grey bookcase calls for egg yolk yellow paint. Empty shelf and place gear/etc on the back of the shelf. Slide balsa wood partition into shelf opening to conceal “way back” items. Replace the contents of the shelves in remaining space.
• Create storage in plain sight… use empty cereal boxes to hide MREs and other freeze-dried foods. Wrap #10 cans in wrapping paper (you might want to write in permanent marker on the bottom of the can what’s inside) and use them as small display units for candles, figurines, other gee-gaws.
• Instead of flimsy laundry baskets, use totes with lids, leaving the lids on the floor of your closet. When you feel a need to pack up and evacuate, dump the dirty clothes on the floor and pack the tote with whatever you need to take with you, assuming you’re evacuating by vehicle.
• Hang one or more strong hooks on the wall just inside each closet… on each hook hang someone’s BOB, a warm coat with gloves/mittens and some hand warmers in the pockets, and a scarf in the sleeves, and place a pair of good hiking boots on the floor under the hook. This “grab & go” setup will facilitate getting everyone OUT even if there are sleepy (or just slow!) children involved.
• Just as important as storing stuff well is knowing where the stuff is… maintain a Master List of where you’ve stashed stuff so you, your spouse, even older children can grab stuff and put it into a tote or a BOB.
TX Griff
Always great to hear your suggestions TX. Some ingenious ideas there.