Getting prepared doesn’t take as much effort as you’d think.
By taking small, logical steps, you can prepare for the most common disasters like power outages, blizzards, and even unemployment. From there, you can continue building your emergency supplies and learning new skills to prepare you for anything.
This prepping 101 guide to emergency preparedness outlines the steps you need to take to prepare.
It contains the core info and links to resources to learn more about each aspect of preparedness.
Step 1: Prepping Basics
It is easy to become overwhelmed and act out of fear when you start prepping. We urge you to start preparing in a planned, thought-out manner.
If you rush into prepping or act out of fear, you could spend a fortune on useless gear or simply lose steam.
Thus, before you start, we advise you to follow these steps.
1: Identify Threats
One of the main principles of disaster prepping is that anything can happen to anyone. Thus, we should prepare for worst-case scenarios.
However, preppers also acknowledge that they can’t prepare for everything. Nor is it practical to prepare for everything.
Instead, you should focus on the most likely disasters. This would undoubtedly include hurricanes for people on the East Coast of the USA. People in Japan would need to prepare for tsunamis. But, in the Midwest, you can safely forget about tsunami planning and focus on tornados instead.
Once you’ve identified threats, take some time to learn about what typically happens during these disasters. When you know what to expect, you can prepare better.
For more on this, read:
- Power outage
- Hurricanes
- Flooding
- Earthquakes
- Electromagnetic pulse (grid outage)
- War and nuclear disasters
Buy Ebook by Primal Survivor:
2: Mental Preparedness
Mental preparedness is one of the most overlooked parts of emergency preparedness. However, it is arguably the most important part of successful prepping.
Why? Because if you aren’t mentally prepared for a disaster, it won’t matter how much gear or supplies you’ve stockpiled. You will make bad decisions and put yourself and your family in danger.
A big part of mental preparedness is emergency conditioning. This involves imagining bad scenarios in detail. You essentially trick your brain into thinking you’ve gone through the experience. If it does happen, you will be more likely to respond correctly to the disaster.
For more on this, read:
3: Preparedness Assessment
Disaster prepping should always be done with a plan. Until you know how prepared you already are, you won’t be able to make a good plan.
For example, I’ve been camping and backpacking long before I ever got into prepping. So, when I started prepping, I already had a lot of gear (like water filters, sleeping bags, gas stoves, etc.) and essential survival knowledge. However, my tiny apartment lacked basic provisions like food and water.
A preparedness assessment involves going through the supplies in your home to see what you have. It also involves asking yourself questions like, “How would your family get in contact if a disaster struck while you weren’t home?”
Once you’ve done the preparedness assessment, you can focus on your weak areas. This allows you to budget your time and money most effectively.
4: Making a Prepping Budget
There’s no denying that disaster preparedness costs money. If you follow the standard advice on prepper websites (where they often preach fancy high-tech gear), then it costs a lot of money.
Even if you have a lot of money, you shouldn’t rush off and buy every cool piece of survival gear you see. Many of these items provide a false sense of security and don’t help you with core survival needs.
To ensure you spend your money wisely, you must prepare a budget. To do this, you will need to
- Do an assessment (see Step 3 above )
- Make a list of things you need to buy (which will be covered throughout this guide)
- Determine which items are most important (like water and food)
- Budget money towards each priority
- Decide how much money you want to invest each month toward prepping
For more on this, read:
5: Building Your Survival Community
Many popular prepping blogs preach the mantra, “Never talk about your preps.” The idea is that if your neighbors know about your prepping, they will come knocking on your door if SHTF.
At Primal Survivor, we don’t agree with this approach. Instead, we believe you should also get your neighbors involved in prepping. The more prepared people around you, the better off all of you will be.
It can be challenging to talk about disaster preparedness with friends and family. A lot of people still think of prepping as something that is “crazy” or “extreme.” However, prepping has gone more mainstream lately. As disasters become increasingly more common, people are waking up to the need to prepare.
Another thing that we disagree with is the “Lone Wolf” approach to prepping. Many survivalists talk about setting off into the wilderness alone at the first sign of disaster.
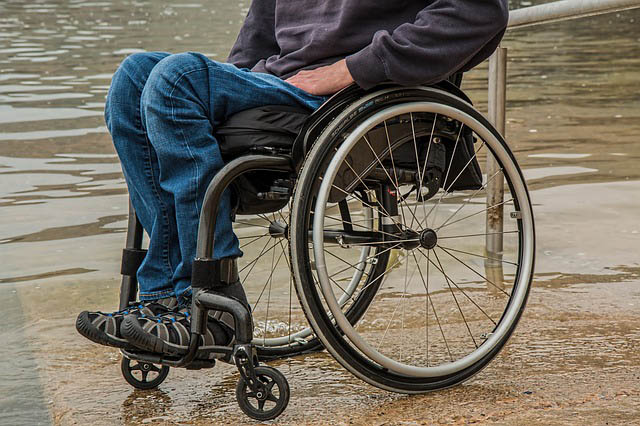
Realistically, though, your chances of survival are much better when you have a group of people to help. And I, for one, know that I’m not leaving my children or disabled husband behind just because they aren’t capable of “carrying their weight.”
Building a survival group isn’t something that happens overnight. It may even take months or years to find a group of people you can rely on in a disaster. However, this is something to start thinking about from the outset of prepping.
For more on this, read:
Step 2: Preparing Your Home
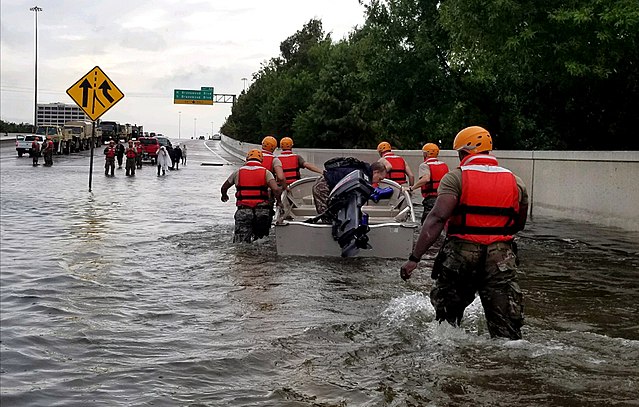
If a disaster strikes and you have a warning, you should evacuate as soon as possible. Preparing your home is NOT an alternative to evacuating. Thousands of people die.
However, there are plenty of situations where you cannot evacuate or it doesn’t make sense to do so. These situations include:
- Disasters that strike without warning
- You won’t be able to get out of the danger zone soon enough
- Short-term emergencies like power outages
- There are elderly, young, or disabled people in your home
Preppers refer to staying home during a disaster as “hunkering down.” You can read more about bugging out vs. hunkering down here.
For situations where you may need to hunker down, you must have a stockpile of emergency supplies, including food, water, and gear.
1: How Long to Prepare for?
FEMA, the Red Cross, and other disaster relief organizations used to recommend stockpiling 3 days’ worth of emergency supplies at home. They have since updated their recommendations to 14 days.
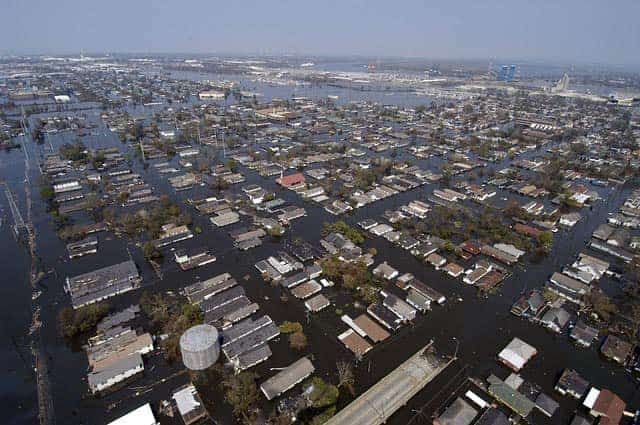
At Primal Survivor, we take the recommendation further. We believe you should have at least a 30-day stockpile of emergency supplies. Why? We only need to look at past disasters.
In Hurricane Katrina, for example, it took several days before aid reached victims. The hurricane landed on August 29th, but there were no large-scale deliveries of supplies until midday on September 2nd.
Hurricane Katrina was devastating – but it was NOT a wide-scale disaster. The rest of the USA was largely unaffected (not to mention the rest of the world). So, while it took a while for FEMA to get into gear, they were able to deliver emergency supplies to New Orleans. People from around the country and the world gathered aid supplies and sent them to the ravaged city via helicopter drops, convoys, etc.
If aid supplies take several days to reach victims in a localized disaster like Katrina, imagine what would happen during a national disaster.
In large-scale disasters affecting entire or multiple countries, basic supplies might not be available for weeks or months.
It took 3 weeks for aid to reach victims of the 2004 Indian Ocean earthquake and tsunami that hit 6 countries. Haiti still hasn’t completely recovered from the 2010 earthquake, which destroyed its infrastructure. People went months without receiving any aid.
2: Water Preparedness
You can only go 3 days without water. Long before those 3 days are up, you will already be dehydrated to the point of desperation and may have symptoms like hallucinations. For this reason, water should be at the top of your list for emergency preparedness.
We recommend stockpiling at least 1 gallon of water per person daily (aiming for 30 days). However, if you are not used to conserving water, you’ll probably need around 3 per person daily.
Ideally, the water is stored in jugs or barrels. It is also possible to keep water in plastic bottles, but you will have to rotate these as they eventually leak.
You will also need a method of purifying water, such as a filter or purification tablets. Bear in mind that not all purification methods will treat all threats. For example, boiling will kill bacteria and parasites but will not clean water of chemicals. See our links below to learn about how to make water safe.
For more on water preparedness, read:
- How to store water
- How much water to stockpile
- Emergency water purification methods
- Best water storage containers
Buy Ebook by Primal Survivor:
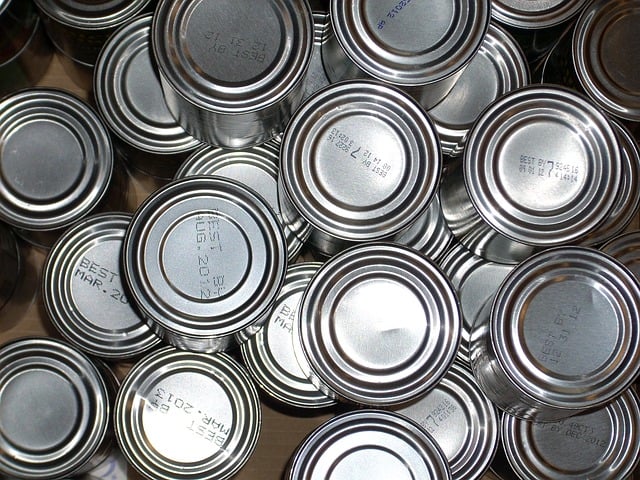
3: Food
Food isn’t necessarily one of the most critical emergency prep items (you can go 30 days without food). Things like having a heat source in winter and supplies for cleaning up rubble are of more importance.
However, food is one of the easiest things to prepare. Food is also great for boosting morale during a disaster. You’ll better handle a prolonged power outage or other emergency with tasty snacks and warm meals. Even the act of preparing food can be calming during a disaster.
Building up a comprehensive emergency food stockpile can be difficult. You’ll need to consider things like:
- How many calories per day you’ll need
- Nutritional requirements
- How you will cook/prepare those foods
- Shelf life of foods
- Which foods will be able to survive a disaster
- Where will you keep the foods
But (I repeat) getting your emergency food stockpile together doesn’t have to be complicated. It can be as simple as buying lots of canned goods and some non-perishables at the supermarket. Or, if you have a larger budget, you can purchase emergency food kits. There are even emergency kits for people with allergies or special diets.
A big mistake people make when prepping is not considering how they cook food. For example, many people will stockpile vast amounts of dry beans. It may seem that beans are a great survival food since they last for years. However, beans take a long time to cook. How will you do this without power? What will you use for fueling your stove?
As people get more into prepping, they often package their own emergency foods. This usually involves putting non-perishable foods into sealed Mylar bags with oxygen absorbers. While there is a bit of a learning curve, this method allows you to choose which foods you want to stockpile and gives you much more variety.
For more on emergency food, read:
- Survival foods list: What to stockpile for disaster preparedness
- Cost of 3 months of emergency food
- Best emergency food brands
- Emergency food stockpiling mistakes
- Ways to cook without electricity
Buy Ebook by Primal Survivor:
4: Hygiene
When we think of “hygiene,” it is usually regarding showering or washing hands. However, hygiene can be a huge challenge in the aftermath of a disaster. Suddenly, you may have to figure out where to go to the bathroom when the plumbing is down or how to wash your hands.
Because of these issues, there are severe disease outbreaks in the aftermath of virtually every major disaster. These outbreaks often kill more people than the actual disaster did. Just look at Haiti. People are still dying of cholera nearly a decade later.
Don’t think that these disease outbreaks are limited to third-world countries. It can happen in the United States and Western countries, too. Remember hurricanes, Katrina and Sandy? Hundreds were affected by diseases like typhoid and cholera. There were also rashes, respiratory infections, diarrhea, and more health effects.
Hygiene Problems You Might Encounter after a Disaster:
- Human waste disposal
- Sewage flooding through the streets
- Infectious disease outbreaks
- Trash buildup
- Toxic materials (such as asbestos from destroyed buildings or chemical spills)
- Feminine hygiene
Even though no one wants to think about hygiene issues, we urge you to prioritize hygiene preparedness. It doesn’t take much money or effort to make a 2-bucket toilet. Nor is it expensive to buy a menstrual cup or a stockpile of tampons.
In addition, you’ll need to get basic supplies like rubber boots (for wading through flooded streets), sturdy gloves, lots of trash bags, and hand sanitizer gel.
Please read the following articles on hygiene preparedness:
- Emergency toilet options
- How to wash your hands without running water
- Feminine hygiene during emergencies
- Toilet paper alternatives
Buy Ebook by Primal Survivor:
5: Heating and Lighting
Many people die during power outages every year because they do not have adequate heating. In some cases, people simply froze to death. This is particularly the case with the elderly and other vulnerable people.
However, many more deaths also occur because of unsafe heating methods. For example, many people die because they use BBQ grills or other portable heaters indoors. These use oxygen and create carbon monoxide, thus causing suffocation and “silent death.” Even generators can cause CO poisoning.
Lighting isn’t usually a dire concern during emergencies. However, you will need a flashlight for tasks such as unplugging appliances. I prefer headlamps because they can be used hands-free.
For more on emergency heating and lighting, read:
6. Other Supplies
One critical aspect of preparedness that often gets overlooked is how you deal with the destruction.
For example, if a hurricane hits, you will have broken glass all around you. If an earthquake hits (and breaks gas lines), you could be dealing with huge fires and their smoke.
You will need gear like fire extinguishers, wood for boarding up windows, and a face mask to deal with these challenges. You’ll also need basic tools, like a shut-off wrench for turning off gas mains and plumbing.
For more, please read:
Step 3: Getting Ready for Evacuation
Evacuation is not something that people want to think about. The idea of leaving your home — and all of your possessions — behind can be overwhelming. Yet, it is something that increasingly more people have to deal with.
One survey found that 22% of Americans have had to evacuate their homes due to a natural disaster. Many of these people had to evacuate multiple times. If you aren’t ready to go, you could find yourself unprepared in the worst of situations.
1. Your Evacuation Plan
It is crucial to have an evacuation bag packed and ready to go. In addition, you also need an evacuation plan. Without a plan, you could easily let your emotions get the better of you and make bad decisions – like not getting out in time.
Many preppers refer to evacuation as “bugging out.” This can seem extreme since most of us won’t be fleeing into the wilderness to survive on the supplies in the “bug out bag” and our wits alone. However, many evacuees do camp out for a few days until they can get to shelter. Thus, the concept of bugging out is integral to prepping.
For more, read:
- Bug out bag essentials checklist
- How to make an evacuation plan
- Bugging out vs. hunkering down: What makes sense for you?
- How to Make an Emergency Communication Plan (get in touch with your family after a disaster)
2. Where Will You Go? How Will You Get There?
A good evacuation plan includes exactly where to go and how you will get there. The plan must also include alternate locations, routes, and backup vehicles in case things don’t go according to plan – such as roads being closed.
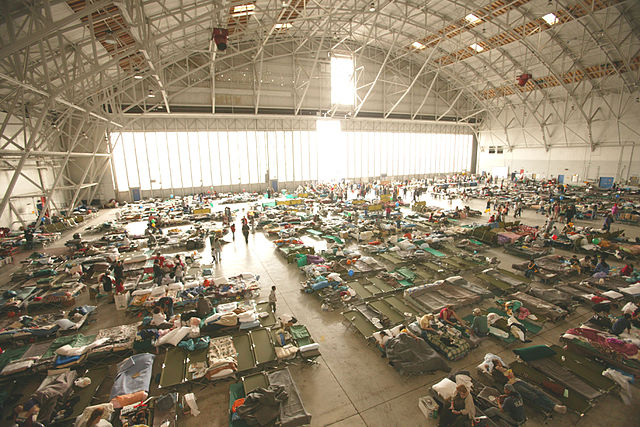
Disaster agencies will typically set up shelters for evacuees with nowhere to go. Even if you plan to go to one of these shelters, you must be prepared. Shelters are often understaffed and lack basic supplies like blankets and cots. The stores in your bug out bag can help fill this gap.
For more, read:
3. What to Pack in Your Bug Out Bag
Most people who evacuate due to natural disasters can go to hotels, family members’ homes, or other safe places. However, not everyone is so lucky.
In significant disasters (especially those affecting entire countries or regions), many people are forced to live in makeshift shelters or camp out for days or weeks. For example, families fleeing the Syrian War (which many don’t realize was a very prosperous country before SHTF) had to camp in the woods as they traveled from Syria to Europe.
Because I live in the Balkans, I saw many of these refugees. The ones with tents, good shoes, and rain gear fared much better than those who didn’t have time to pack before fleeing (you don’t have time to grab anything when a bomb hits your home).
The refugees without supplies were left to sleep uncovered outdoors, developed lung infections from waiting in the long lines at borders in cold, rainy weather, and their children didn’t even have the comfort of a favorite toy.
So, even though it may seem unlikely to be forced out of your home, you should be prepared. Pack an evacuation kit and take the task seriously.
For more on evacuation kits/bug out bags, read:
- 3-Day Bug Out Bag Packing List
- Bug Out Binder List (emergency documents)
- Binder template
- 50+ Bug Out Bag Food Ideas
- Bug Out Bag First Aid Kit List
- How to Build a Bug Out Bag for Your Family
- 4 Real-Life Examples of Bug Out Bags
- What is a survival cache?
Buy Ebook by Primal Survivor:
Step 4: First Aid and Medical Preparedness
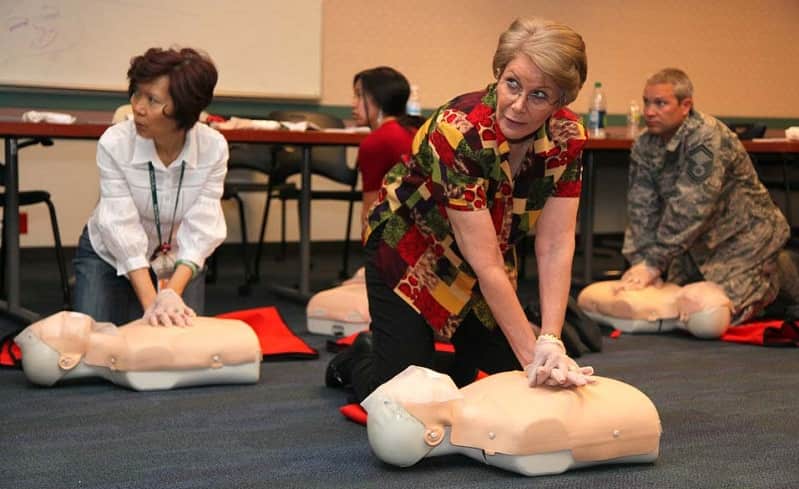
A complete first aid kit is something you should have for everyday preparedness, not just for large-scale emergencies. You never know when you’ll have an accident like a knife wound while making dinner or a serious slip-and-fall.
However, first aid and medical care after a disaster is an entirely different story.
The first issue is that the disasters themselves can cause injuries. Let’s say that your arm gets crushed by rubble during an earthquake. With roads down and inaccessible, ambulances might be unable to reach you. While you wait, you could bleed out and die.
Even if you can reach a hospital, the hospital will be overrun with injured or sick people looking for help.
Disasters also cause a “ripple effect” that goes beyond injuries. One study found that hospitalizations increased even after the first 72 hours after natural disasters (when injuries are most likely to occur).
Why? Because disasters exacerbate existing medical conditions.
For example, many people forget their medications in the rush to evacuate. Patients on dialysis or needing other care cannot get treatment when clinics close. Home medical devices fail and can’t be replaced. Infectious disease outbreaks may occur from tainted flood water…
A big part of disaster prepping should involve learning to care for your first aid and medical needs. This process is ongoing (you can’t learn first aid overnight). However, you’ll find that this knowledge helps you feel more secure in everyday life.
For more on this, read:
- Complete First Aid Kit Checklist
- OTC Medications to Stockpile
- Emergency Dental Kit Checklist
- How to Learn First Aid Skills
- 10 Essential First Aid Skills for Preppers
- How to Treat Burns
- How to Treat Bleeding When You Can’t Call 911
- Tourniquet Instructions
- Guide to Fish Antibiotics for Humans
Buy Ebook by Primal Survivor:
Step 5: Everyday Carry
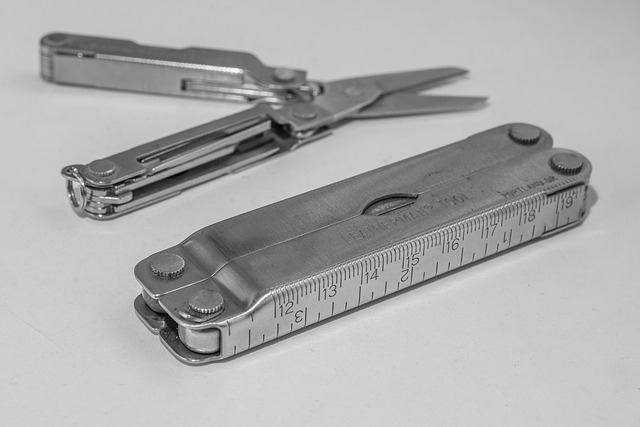
EDC, or everyday carry, isn’t just a bunch of stuff that you always have on you. Rather, EDC is a philosophy.
The idea of EDC is that you never know what problem you might encounter and must always be prepared. EDC gear and tools help you be prepared and more self-reliant.
Admittedly, my EDC items are often used for “disasters,” like fixing one of my daughter’s toys. She also uses my multi-tool scissors to make impromptu art projects from napkins or leaves.
I’ve never had to use any of the items for survival (except that one time I pepper-sprayed someone…). But, if a disaster were to strike, I would at least be better prepared than most people. The snips on my multi-tool could be used to create a hobo stove from a tin can. The paracord from my bracelet could be used to make a shelter. The duct tape could be used to make a splint…
In this section, we’ve also included Get Home Bags (GHB) and vehicle kits. While these aren’t the small, multi-functional pieces of gear that we usually associate with EDC, they are still part of the philosophy behind EDC.
Disaster could strike anytime, including when you aren’t at home. A GHB contains everything you need to make your way home after a disaster. It is different than a Bug Out Bag because it is only meant to help you get home, not survive through a disaster.
As for vehicle kits, most of us spend a considerable part of our lives in our vehicles. Further, it is pretty likely that an emergency will happen while in our cars (breakdowns, accidents…). So, it only makes sense that we should keep basic survival gear there.
For more, read:
- EDC gear list
- Real EDC kit examples
- Get home bag checklist
- 10 survival items to keep in your glove compartment
- Car emergency kit list
- Winter car emergency kit
Buy Ebook by Primal Survivor:
Step 6: Learning Wilderness Survival

In an actual SHTF situation, we might be forced to flee into the wilderness and survive off of our wits alone. But (let’s be honest!) this isn’t likely to occur in most disaster situations. Even in massive disasters, most victims end up in shelters and have access to some basic aid.
However, knowing wilderness survival skills is still a considerable asset even if you aren’t in the wilderness after a disaster. For example, let’s say you are in a crowded refugee camp. You’ll be happy to know how to hang a tarp so you can make a changing station to get some privacy.
Learning wilderness survival skills isn’t something you can do, check off a list, and then be done with. It is an ongoing process. Even once you learn basic wilderness survival skills, you will have to practice them regularly.
This isn’t as difficult as it sounds.
For example, I’ll go backpacking/wild camping with my children multiple times during the year. It is a great vacation, digital detox, and time to bond with my family, and we also practice survival skills like setting up a shelter, navigating, and foraging for wild edibles.
Articles to Get You Started:
- How to survive in the wilderness
- List of survival schools in USA
- Essential bushcraft survival skills
- How to navigate without a compass
- Most dangerous threats in the wild
Food and Water in the Wilderness:
- How to find water in the outdoors
- How to purify water without a filter
- Wilderness survival food
- How to tell if a wild plant is safe to eat
- Ways to make a survival fish trap
Fire for Survival:
Wilderness Survival Shelters:
- Survival shelter designs
- How to build a wilderness survival shelter with no supplies
- Guide to Mylar blankets
- How to make a lean-to shelter
Buy Ebook by Primal Survivor:
Step 7: Moving towards Self-Sufficiency
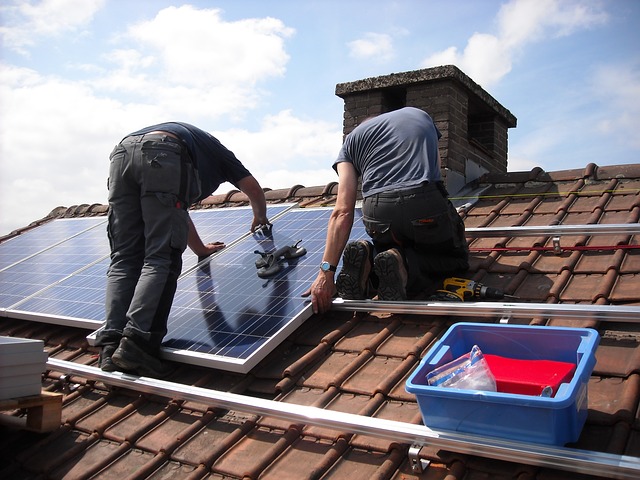
Self-sufficiency has become a buzzword recently. Not only are preppers advocating for self-sufficiency, but there are the homesteading, backyard chicken, rooftop gardening, and sustainability movements (to mention just a few).
The reason that these movements have become so popular undoubtedly has to do with the fact that most of us are not self-sufficient.
Our food comes from supermarkets. Our clothes are purchased in stores. Tools (assuming that we even use them) are made in factories. We are clueless about how much energy these things take to produce.
If even a minor disruption to the vast system that supplies these products and services occurred – such as from an EMP event — we’d be suddenly left completely on our own. There’d be no way to get more food, heat our homes, or provide for other basic needs.
Most disasters are only short-term. Within a few days or weeks, we can get all the services we rely upon back up. That’s where our emergency stockpiles of food, water, and supplies come in.
But what if a long-term disaster were to occur?
Self-sufficiency is about recognizing this vulnerability and taking steps to correct it.
Like learning survival skills, self-sufficiency isn’t something that can be done overnight. It is a continuous process of learning and adapting. However, you can take some simple steps to move closer to self-sufficiency.
For more, read:
- Checklist: How to get started with off-grid living
- How much land do you need to be self-sufficient?
- 5 ways to grow your own food
- Guide to preserving your own food
- How to live without running water
- How to harvest rainwater
- Off-grid sewage and waste disposal
Buy Ebook by Primal Survivor:
Step 8: Special Considerations
We want to emphasize here at Primal Survivor that disaster preparedness is not the same for everybody.
What makes sense for some will make absolutely no sense for others.
Each person and family has its own needs to consider. Some of these may include small children, medical requirements, or disabilities. We’ve tried to account for these situations in the following articles.
For more, read:
Closing Note
People want to know exactly what steps to take to prepare for an emergency. They want to know exactly what to pack and what steps to follow.
These “exact” steps give us a sense of calm and reassurance.
But the truth is that we don’t know what will happen during a disaster. We can only do our best to imagine different scenarios and prepare for them as best as we can.
Instead of being overwhelmed by the many things you should prepare for, take things in stride. Use the steps in this guide as a starting point. Make adjustments depending on your situation and needs. Continually build up your resources, skills, and knowledge.
That’s what disaster prepping is really about.

In the American Midwest tornadoes are much more prevalent from May thru September as a disaster. I moved to a small town and we almost immediately had one, then a few years later our metro suffered a major EF5.
Americans using stick built construction means the lowest rated tornado will still cause major damage to a home if it hit directly – only masonry will stand up to the 100 mph winds. And EF5 generates 300mph winds – solid concrete structures are about the only thing that will stand.
A safe room built to withstand high winds with the bug out equipment and prioritized gear etc stored in it have become common – many also store their firearms in it, too. One remarkable fact is that its not common for neighbors to be uncooperative in post strike activities – and the looters etc all drive in from out of town to work a upper scale neighborhood for easy pickings. They will scour the perimeters where more damage and less people are remaining, major chain stores, etc. A backpack is very much a clue, therefore the choice of one for us needs to be carefully considered. This situation is the one time I would prefer a bright color with the address labeled clearly on it. Looters won’t do that.
Lighting after sundown is a key issue and the use of solar LED yard lights is one answer – we actually did bring in some of those for room lights and returned them outdoors daily for recharging in full sun. We cooked on our propane camping grille and other camp equipment became useful – given a steady supply of canisters. A catalytic heater placed in the basement helped keep pipes warmer and I’ve even used a 10k BTU heater on a 20 pound grill tank in -10 weather last winter.
Clean up from a tornado gets involved, if you cut firewood for heat for the winter then some critical skills should be well learned, but its not a good time to start a new hobby. The larger proportion of injuries and even deaths in some cases occur during cleanup, not the event. Twisted trees loaded with kinetic energy suddenly released, exhausted people making bad judgments after days of strenuous work all lead to accidents. Do NOT get into “hero” mode and start scouring the neighborhood to quickly assist others who may well be content to leave something alone until later. Prioritizing small and dangerous activities when we just need to clear the streets first is how mistakes are made. There’s a least a chapters worth of information to discuss in this area yet the majority of folks never confront what can happen until its suddenly imposed on them. Then we all blunder thru the recovery and many of the things we do become lessons learned – but not in the best order. There is NO imperative on a lot of stuff needing to be done – a downed tree not in the way of traffic can just wait – and then be carefully considered how to approach it by those who have experience.
Vet your volunteers for their skill and levels of expertise – and there is always the issue of who are these people?
Basically, well rounded for an article of such broad coverage…. Does it cover everything? Of course NOT, but for the beginner or even experienced, a good checklist of items to consider / remember / utilize in identifying topics requiring further study.
One whoops! though… “carbon monoxide, thus causing suffocation and “silent death.” Even generators can cause CO2 poisoning”…
Carbon Monoxide’s empirical formula is CO… and is indeed toxic and I assume that the author meant to use CO instead of CO2 (which is Carbon Dioxide in the statement above)
Good catch! I’ll fix that now 🙂
New at this.
Great Information.
Thank you.